
Ben Gribbin
April 21, 2015
Share post:


-

12K Subscribers
Subscribe
Search
Popular Articles
8 Almost Useless Land Rover Mods
11th June 2014
Updated: What Makes a Defender Iconic?
29th November 2011

Land Rovers suffer greatly with rust & corrosion problems. Why?
- A lot of the underpinnings are made from steel, which contains a portion of Iron - Iron reacts with Water and Oxygen to form a hydrated oxide (typically Fe2O3) we know as rust
- Land Rovers are often used in high salt content, high moisture environments (fording, off-roading, launching boats e.t.c), bringing the chassis into contact with water that has an increased salt volume. Salt acts a catalyst for the rust formation process.
- Factory applied corrosion protection isn't always as comprehensive as it could be
- The ladder chassis design can hinder water dispersal and trap mud and moisture internally, if not regularly cleaned
Video: https://www.youtube.com/watch?v=dDl6CDjW0KI
Why Land Rovers Rust: https://www.youtube.com/watch?v=4OZkDzVpIvQ
What can an owner do to stop this happening?
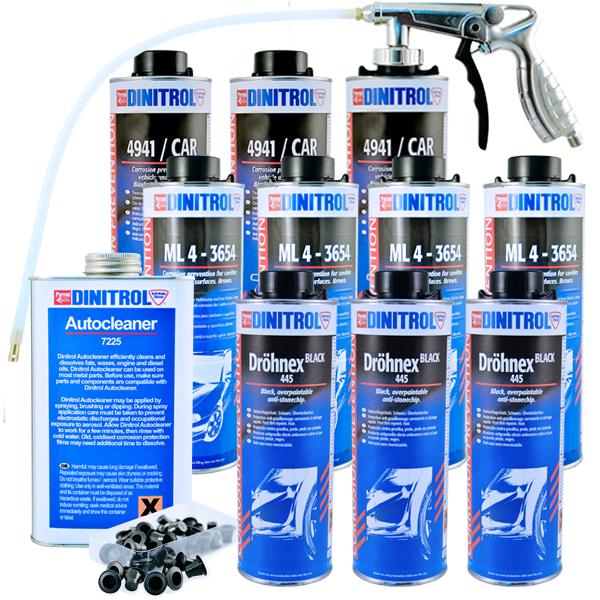
You need to make use of a rust treatment product. Our (and a good deal of professional rust proofers) product of choice is Dinitrol. Dinitrol cures to a pleasant, satin black finish, renewing the look of a vehicle. but also stoping rust from spreading and even forming in the first place. Other products dry to a tacky, waxy texture, causing a real mess when you’re carrying out mechanical jobs on your Landy. Dinitrol will cure to a slightly harder, more paint like finish. Handy Dinitrol DIY treatment kits are available from Rejel.
Rejel Dinitrol kits are fantastic! Service is second to none and shipping is very quick, we can't recommend Rejel enough.
There are 2 kit options, one for those using air compressors and those without - to suit all vehicles and budgets. You can carry this job out pretty much anywhere - and it’s well worth doing every few years to keep that chassis protected. There are Land Rover specialist companies out there who will apply under sealing for you, as it can be a tad messy - but at a cost of around £400-500. We can make sure the job is done to our satisfaction and save some money at the same time.

Top Tip
Even if you're vehicle is brand new, you should consider rust-proofing it - factory rust protection is not always the best. A Land Rover that has had rustproofing applied from new will remain in excellent condition for many more years than a comparable vehicle that received no rust treatment.

Tools Needed
- Foil
- Cling film
- Masking paper
- Masking tape
- Compressor connectors (or aerosol kit)
- Compresssor (or aerosol kit)
- Underbody 'Schultz' type gun, with lance (or aerosol kit)
- Rust proofing waxes #3125 (ML) and #4941
- Dinitrol RC800 and Rc900S
- Included plugs
- Gloves
- Mask
- Vaseline
- Overalls
- Old clothes
- Cloth
- Tools
Clean and Prepare
Step 1: Pressure Wash Chassis & Body
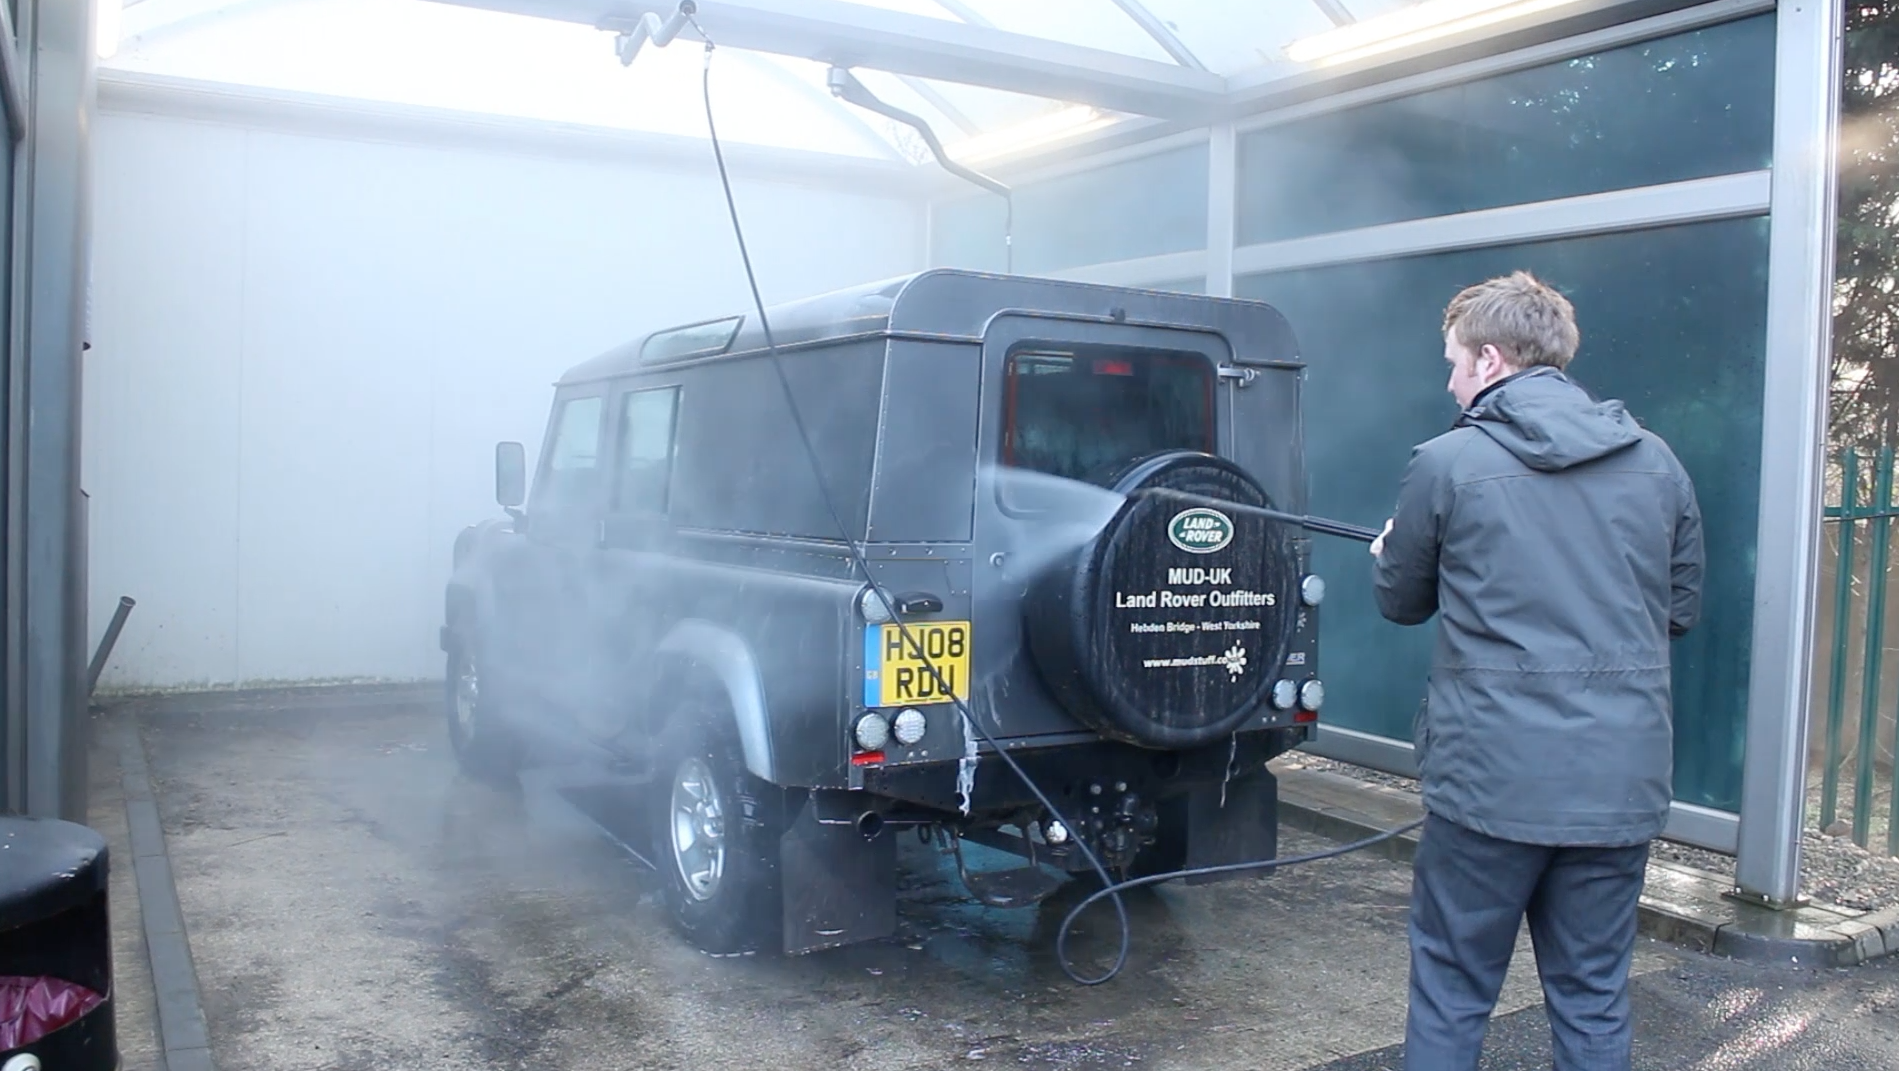
Dinitrol requires a good condition, clean chassis to start with. In our case, we spent 30 minutes pressure washing the chassis. We started on the bodywork, so that it is contaminant free and our masking tape will adhere to it later. Then, the chassis was blasted with a hot, high pressure lance - mixed with detergent. You need to get into all the nooks and crannies, work methodically to cover the whole chassis and pump the inner rails full of water, until the run off is clear and no longer muddy.
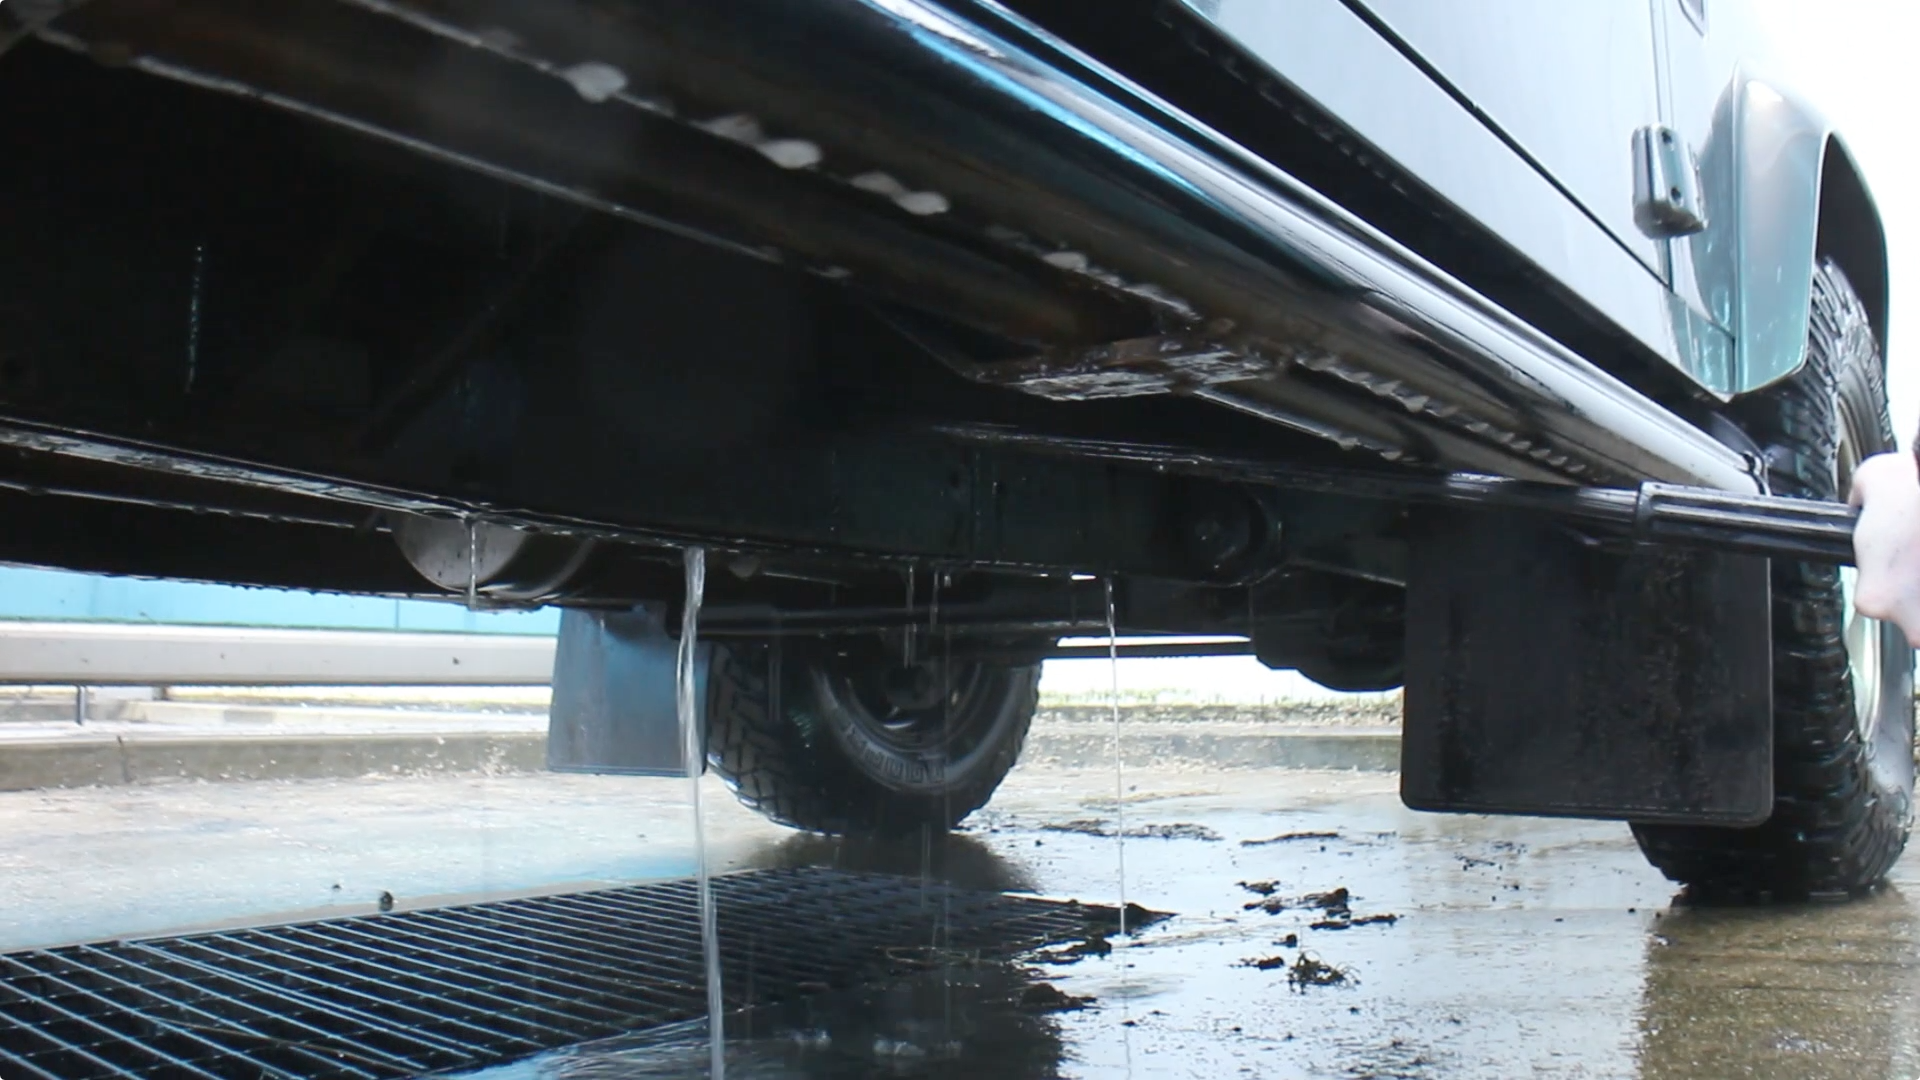
This flushes out areas of trapped dirt and dried mud - which can cause corrosion on the inside of the box sections. If you don’t have your own pressure washer, then a local garage will do just fine, as we’ve used here - or you can hire / borrow one. Once you’ve done a detergent clean, flush the cavities with a rinse setting until the chassis is as clean as you can get it.
Step 2: Steam Clean Chassis and Underpinnings
 We took the Defender to a local lorry yard who agreed to let us use their steam cleaner. This strips road grime, salt, silt and debris from the chassis and underbody - leaving it spotlessly clean. A quick Google search will no doubt find somewhere you can take your Landy to have it steam cleaned, or you can hire one by the day from a tool hire shop.

Leave to dry for a few days to give box sections time to air out, You can test the condition of the chassis with an air gun to confirm internal structures are dry and no pools of water are sitting on top of chassis rails or out of sight.
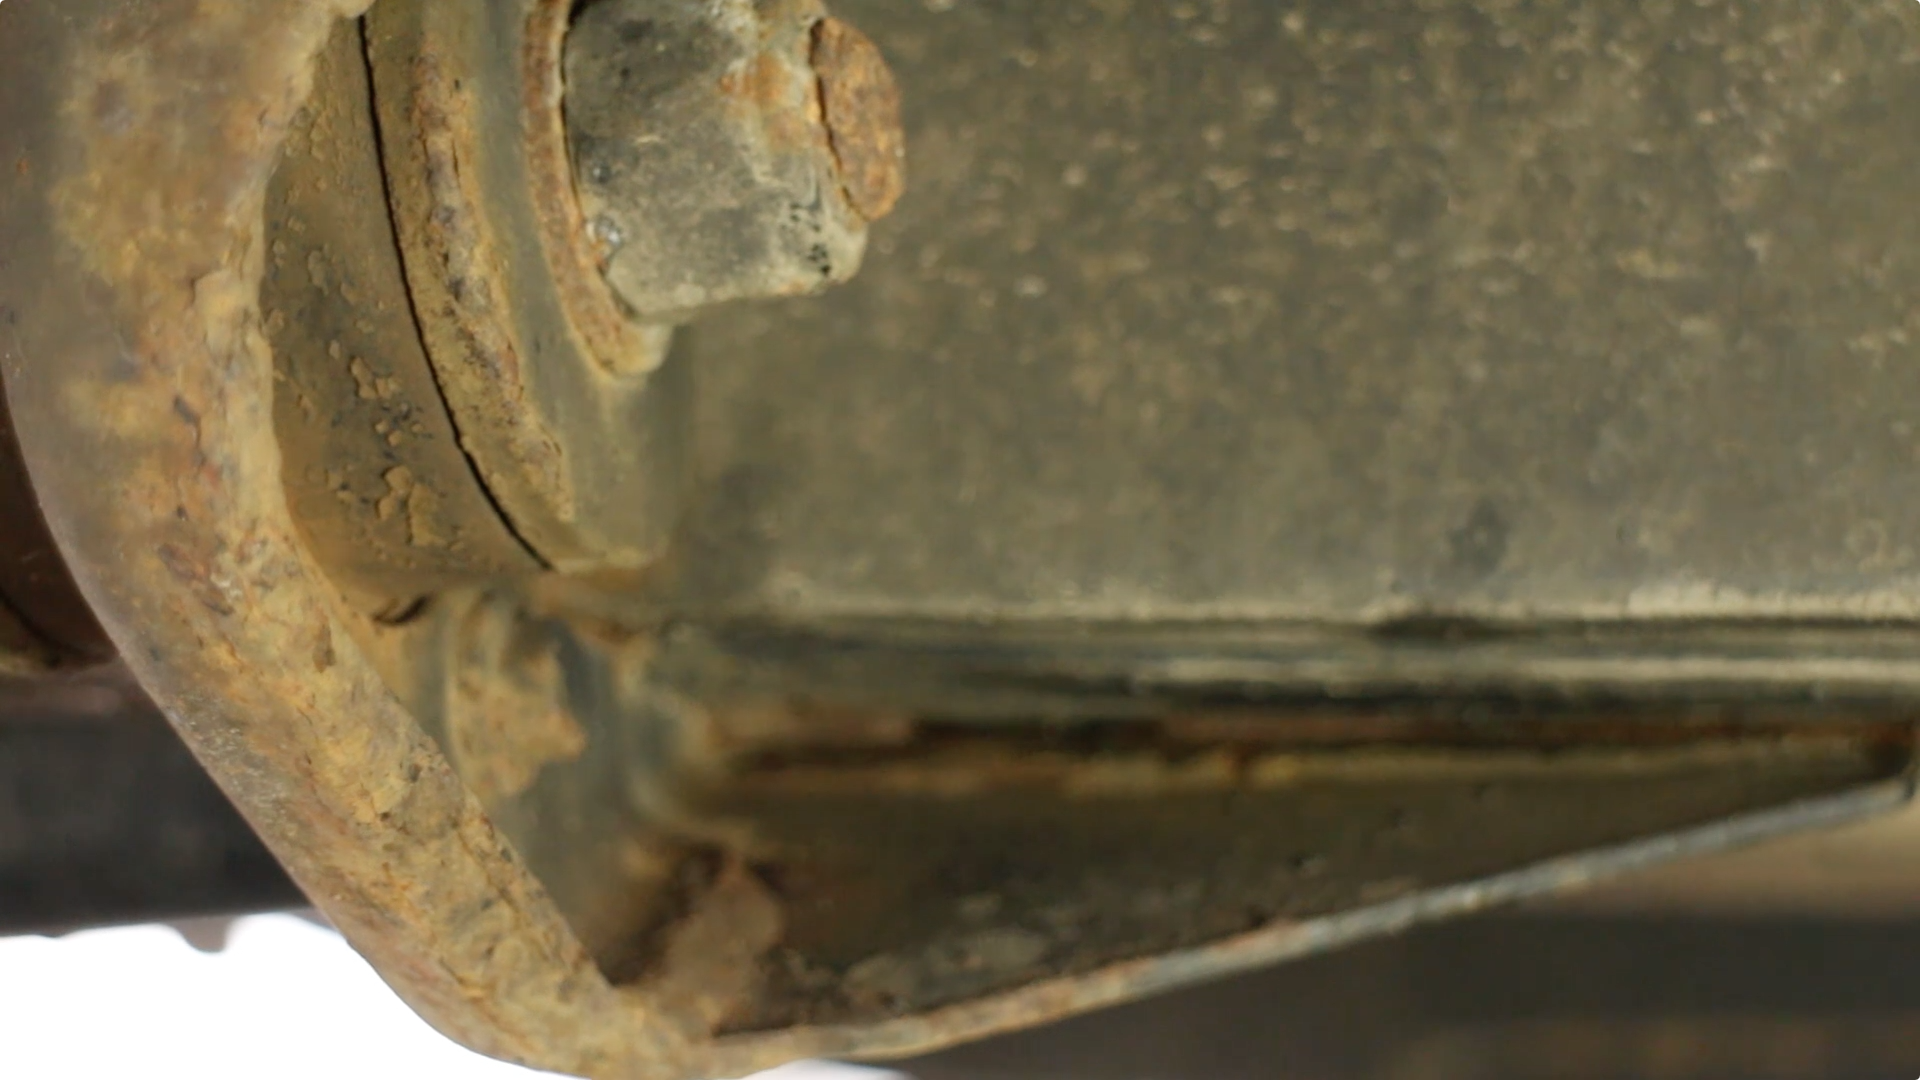
After steam cleaning, we can see we have a bit of surface rust, nothing too bad - our 110 had been rustproofed previously and so there are no areas of major concern.
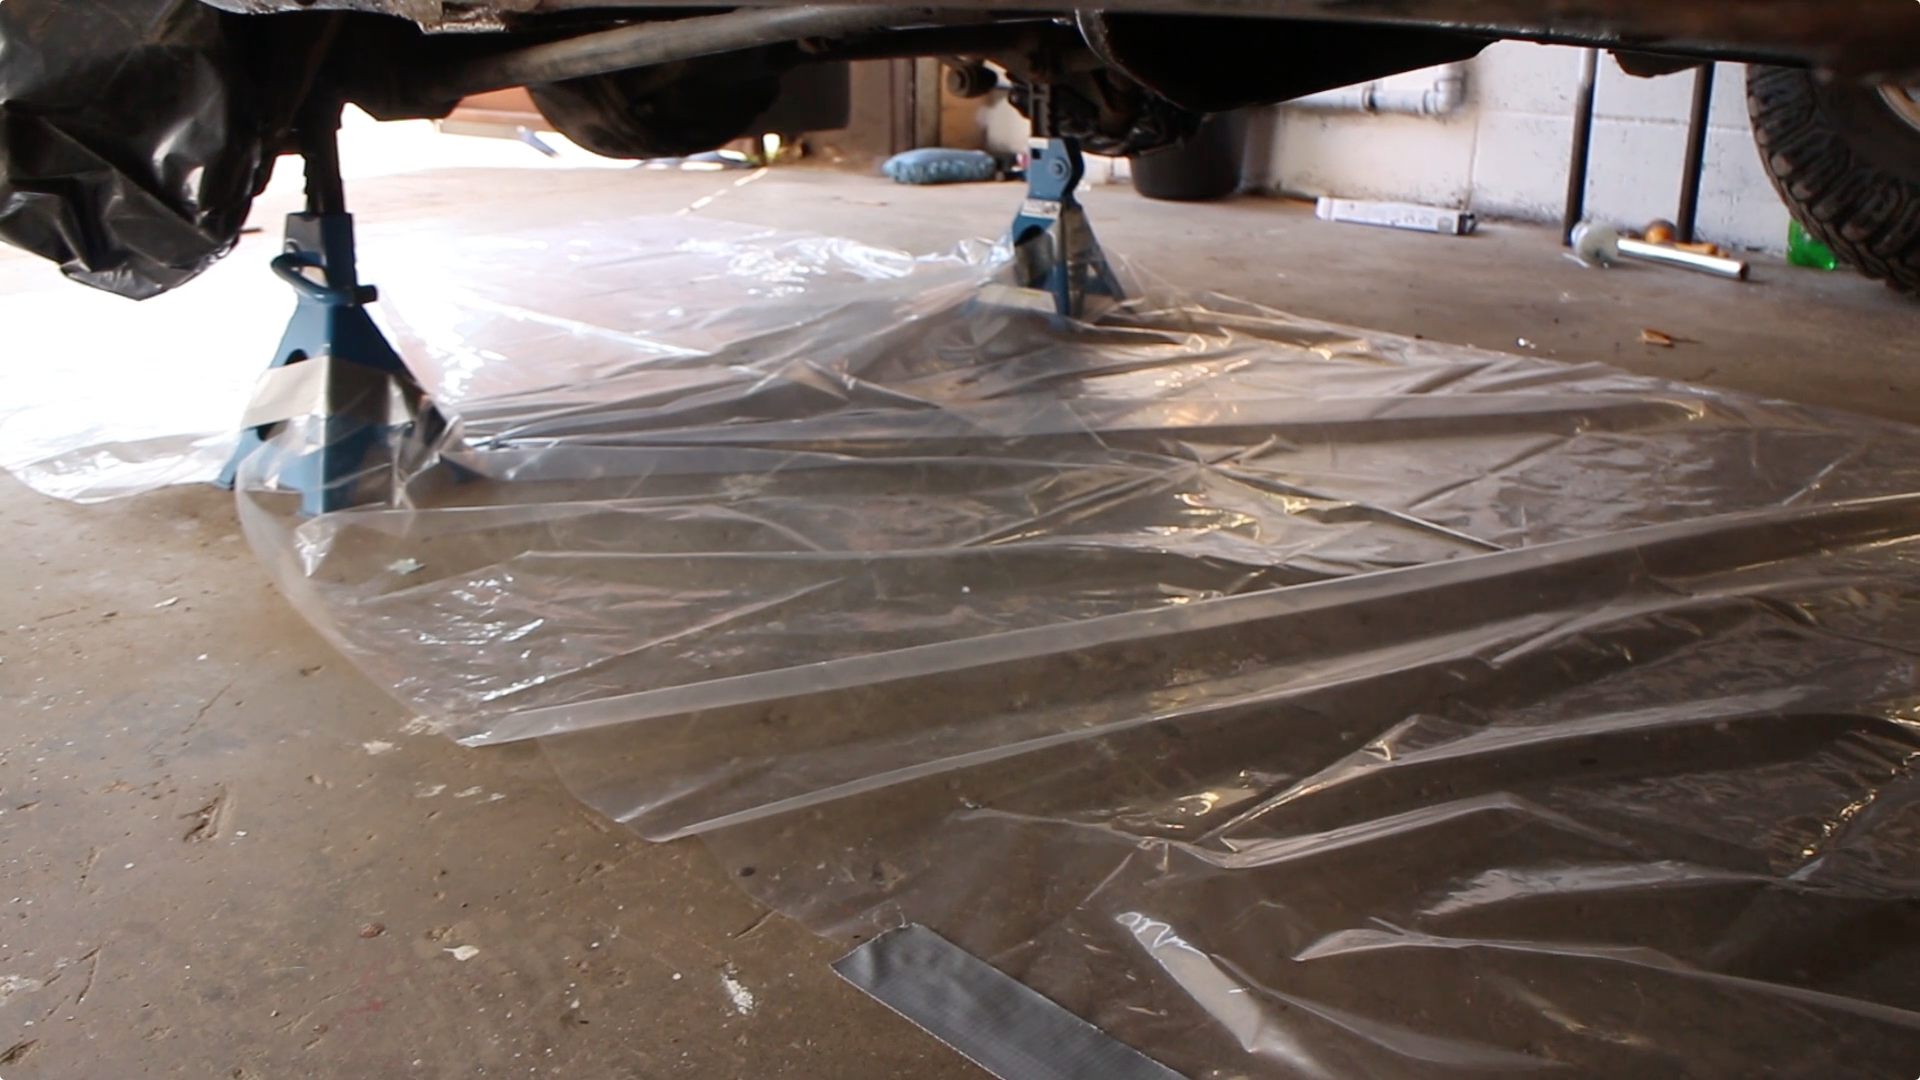
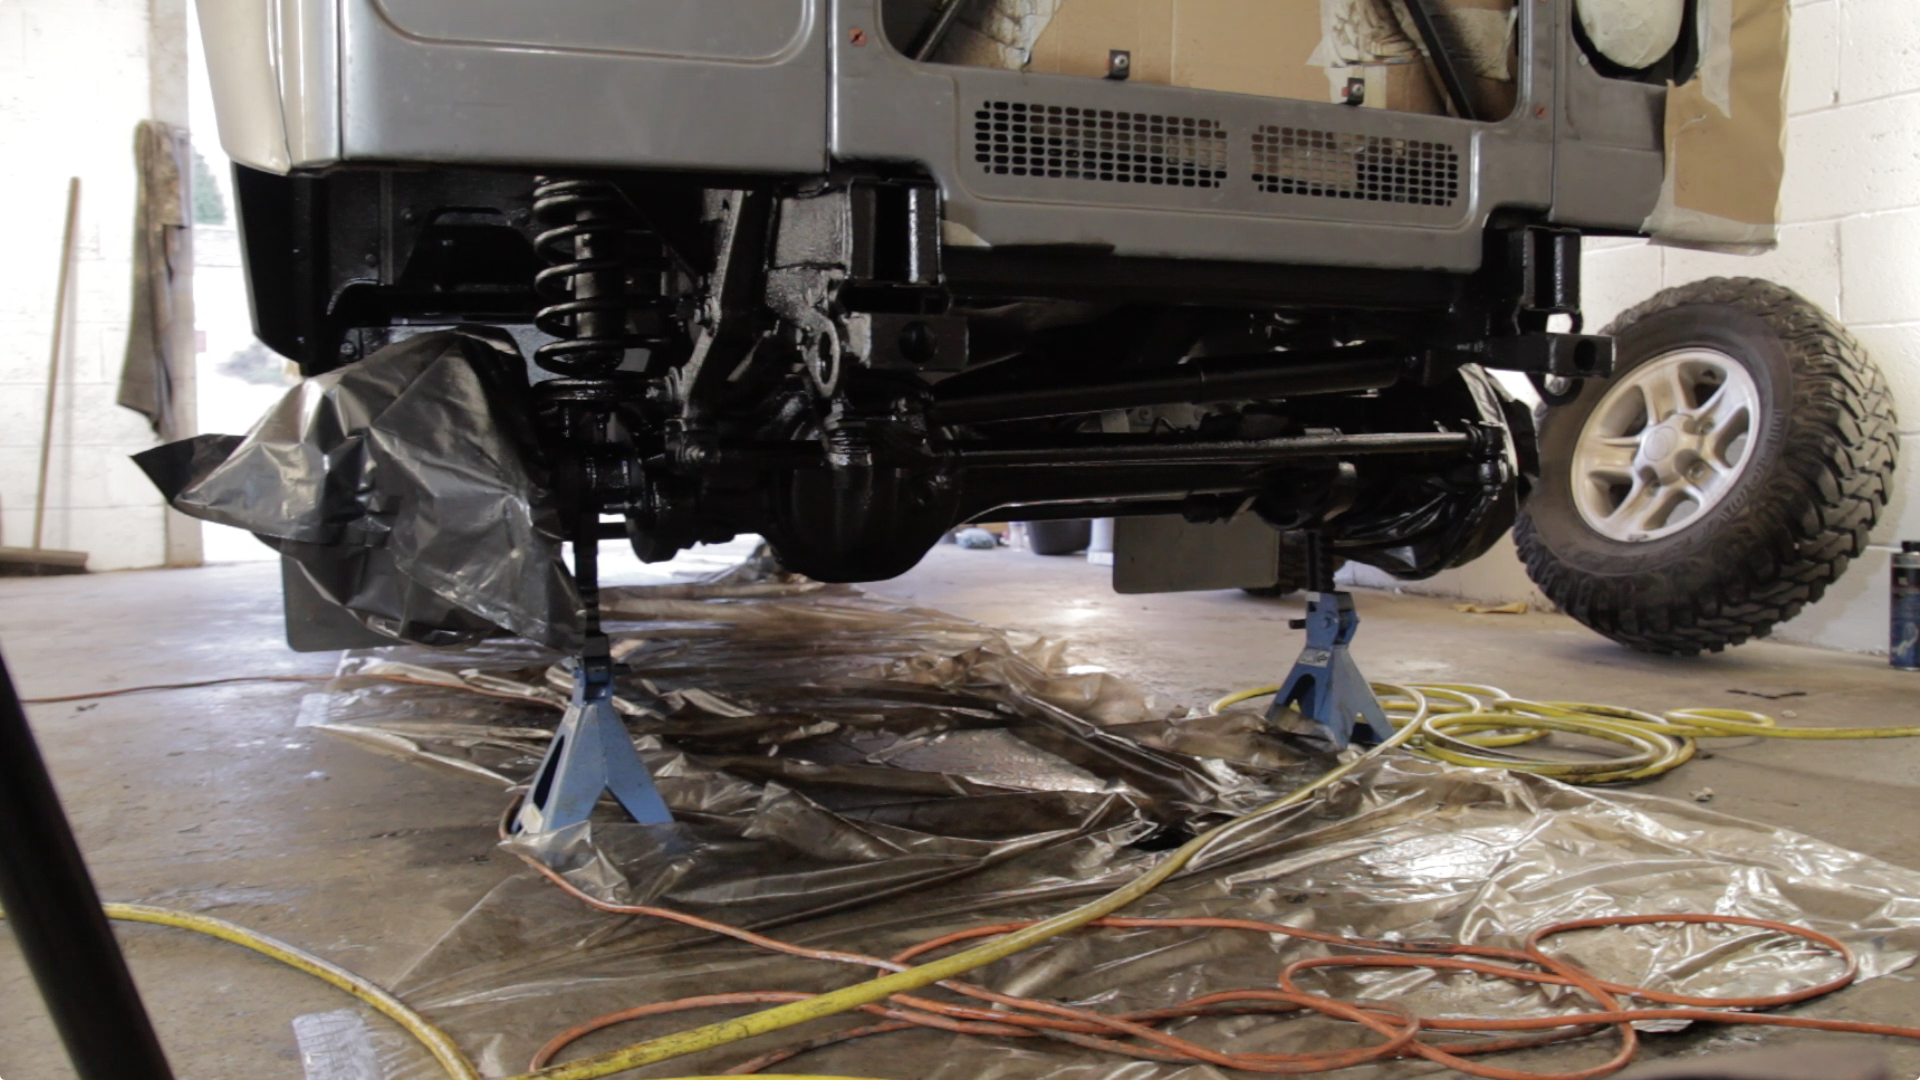
Step 3: Jack up the vehicle
Lay down a tarp , before driving the vehicle onto the tarp. Jack up your Land Rover and support it on 4, rated axle stands.
Step 4: Remove Select Trim Pieces
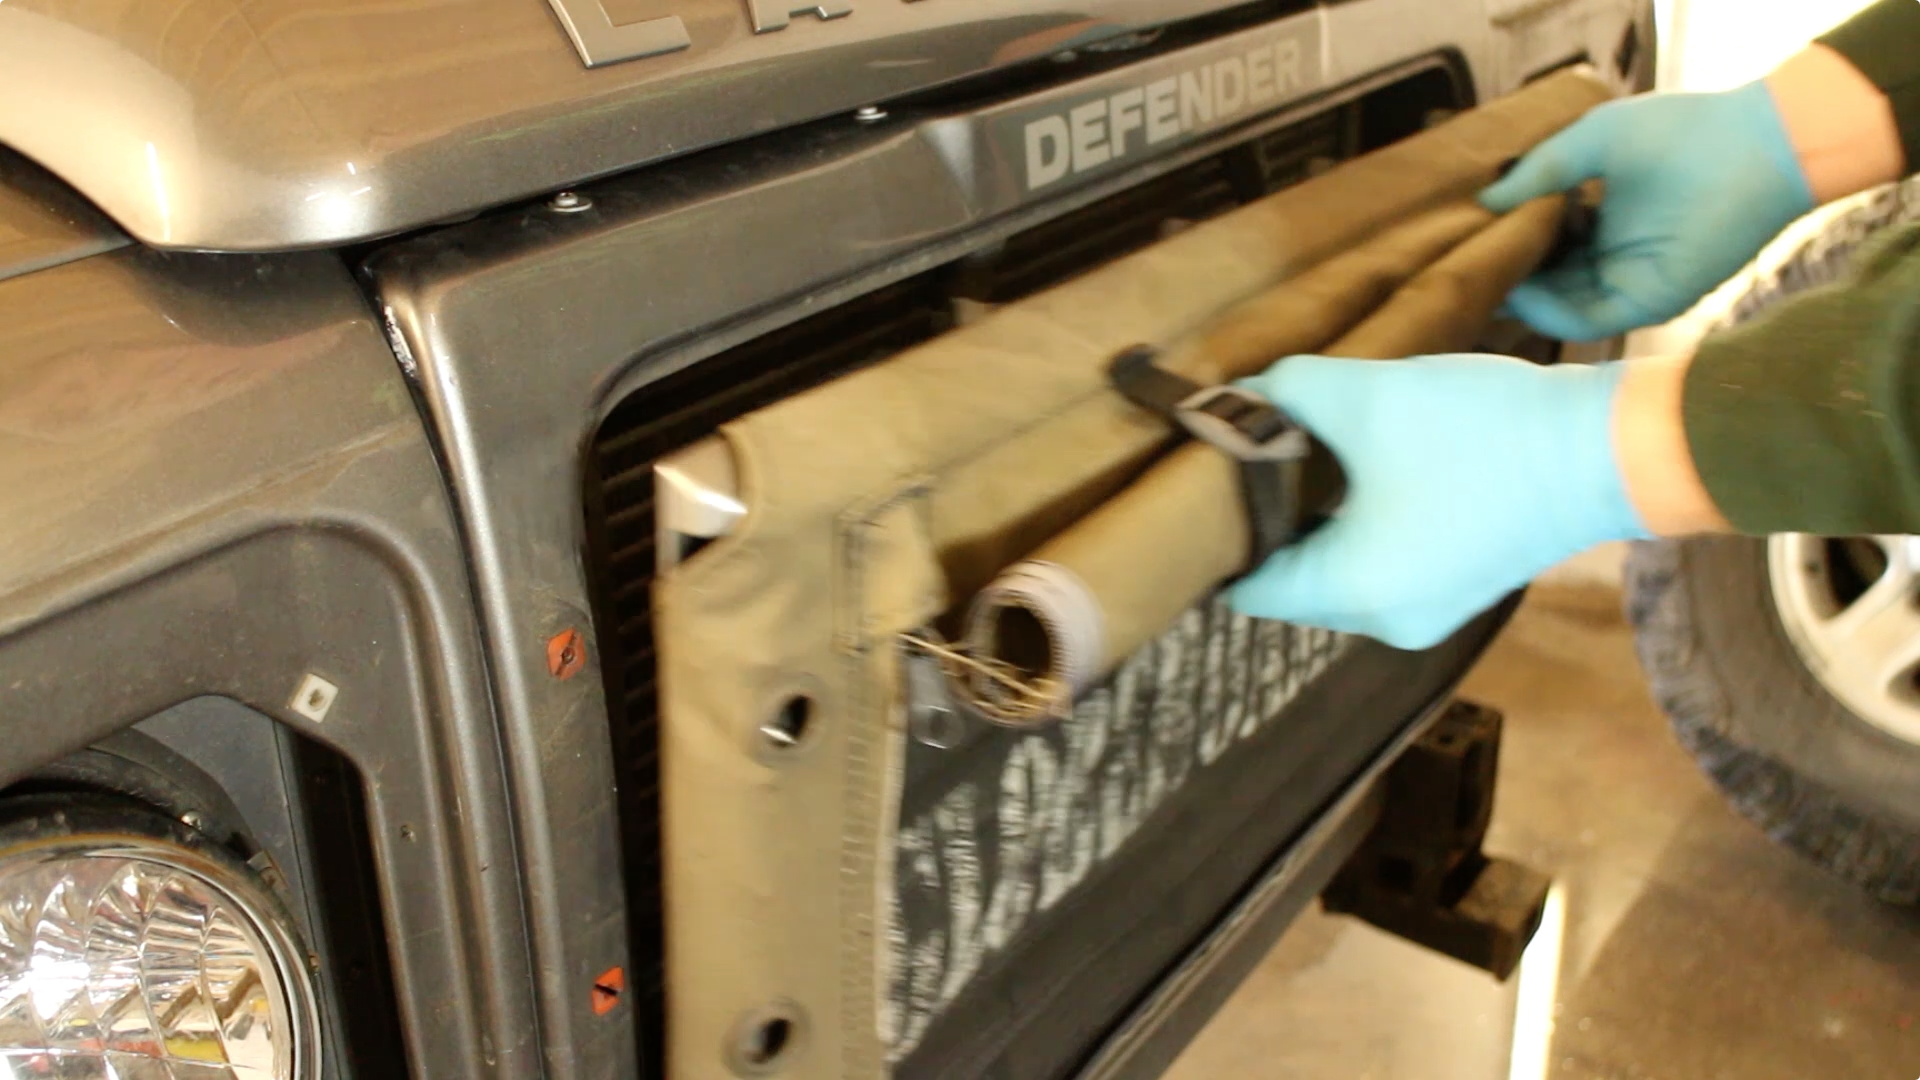
Remove the headlight surrounds, front grill, bumper & jacking plug in the dumb iron to improve access for the underbody schultz gun.
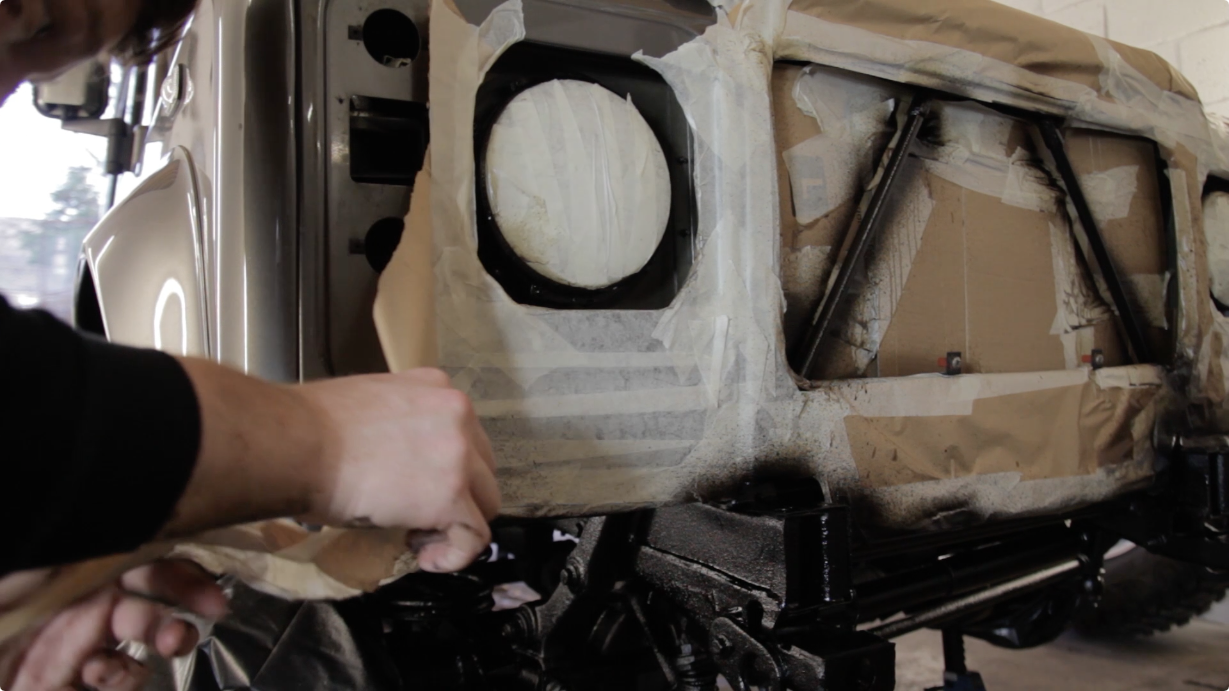
Step 5: Mask off the bodywork & critical components

Using the masking paper and tape, mask off the lower half of the Landy. This will save on clean-up time later. Take your time to mask off things like the door handles and headlights.
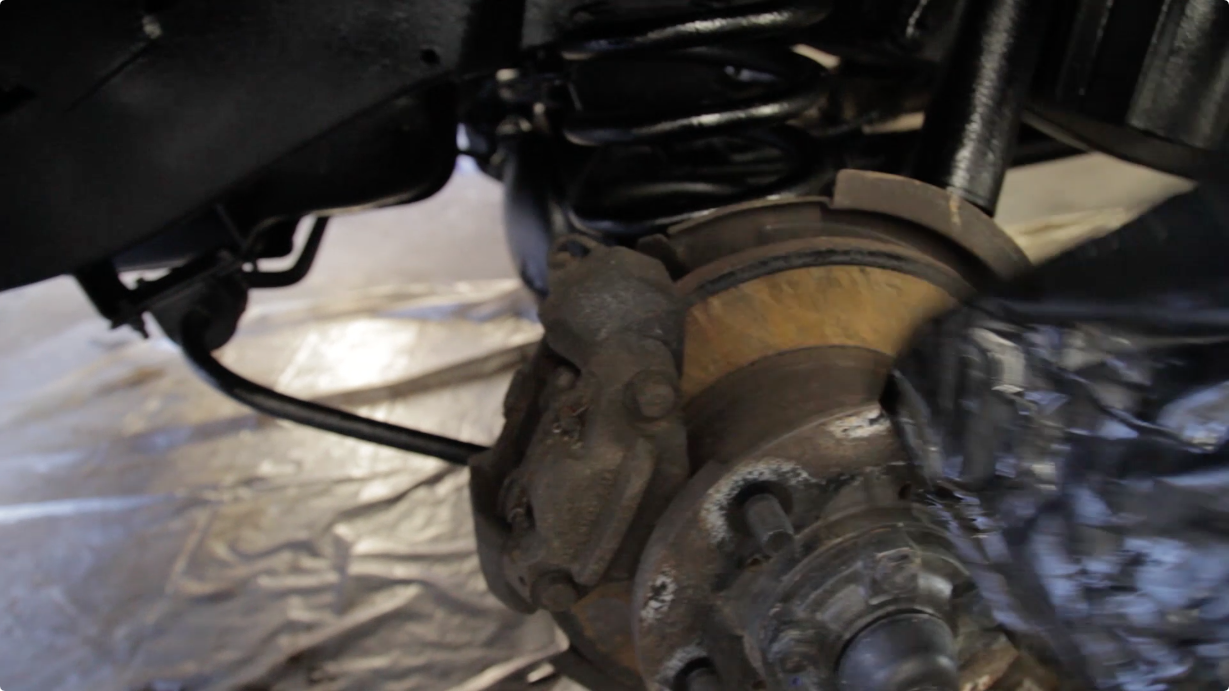
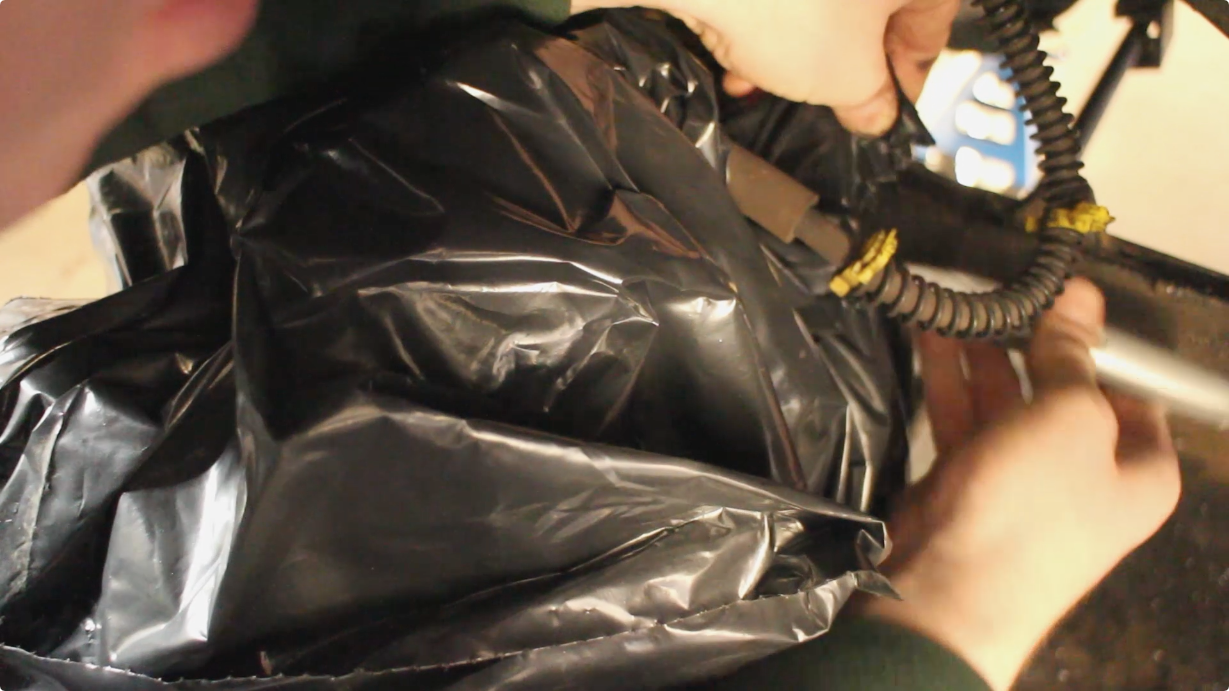 Place a bag over the brake callipers, we do not want wax getting on any part of the brake system. Cut the bag to form a perfect seal around the back of the brake shield or swivel hub.
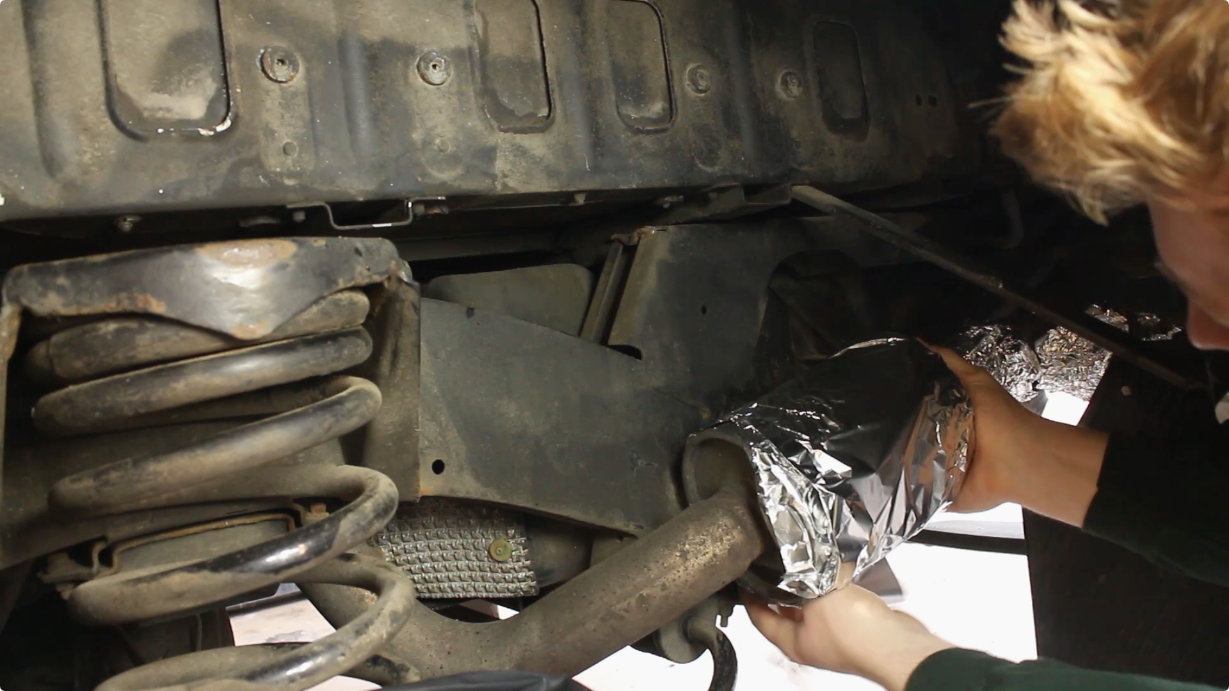
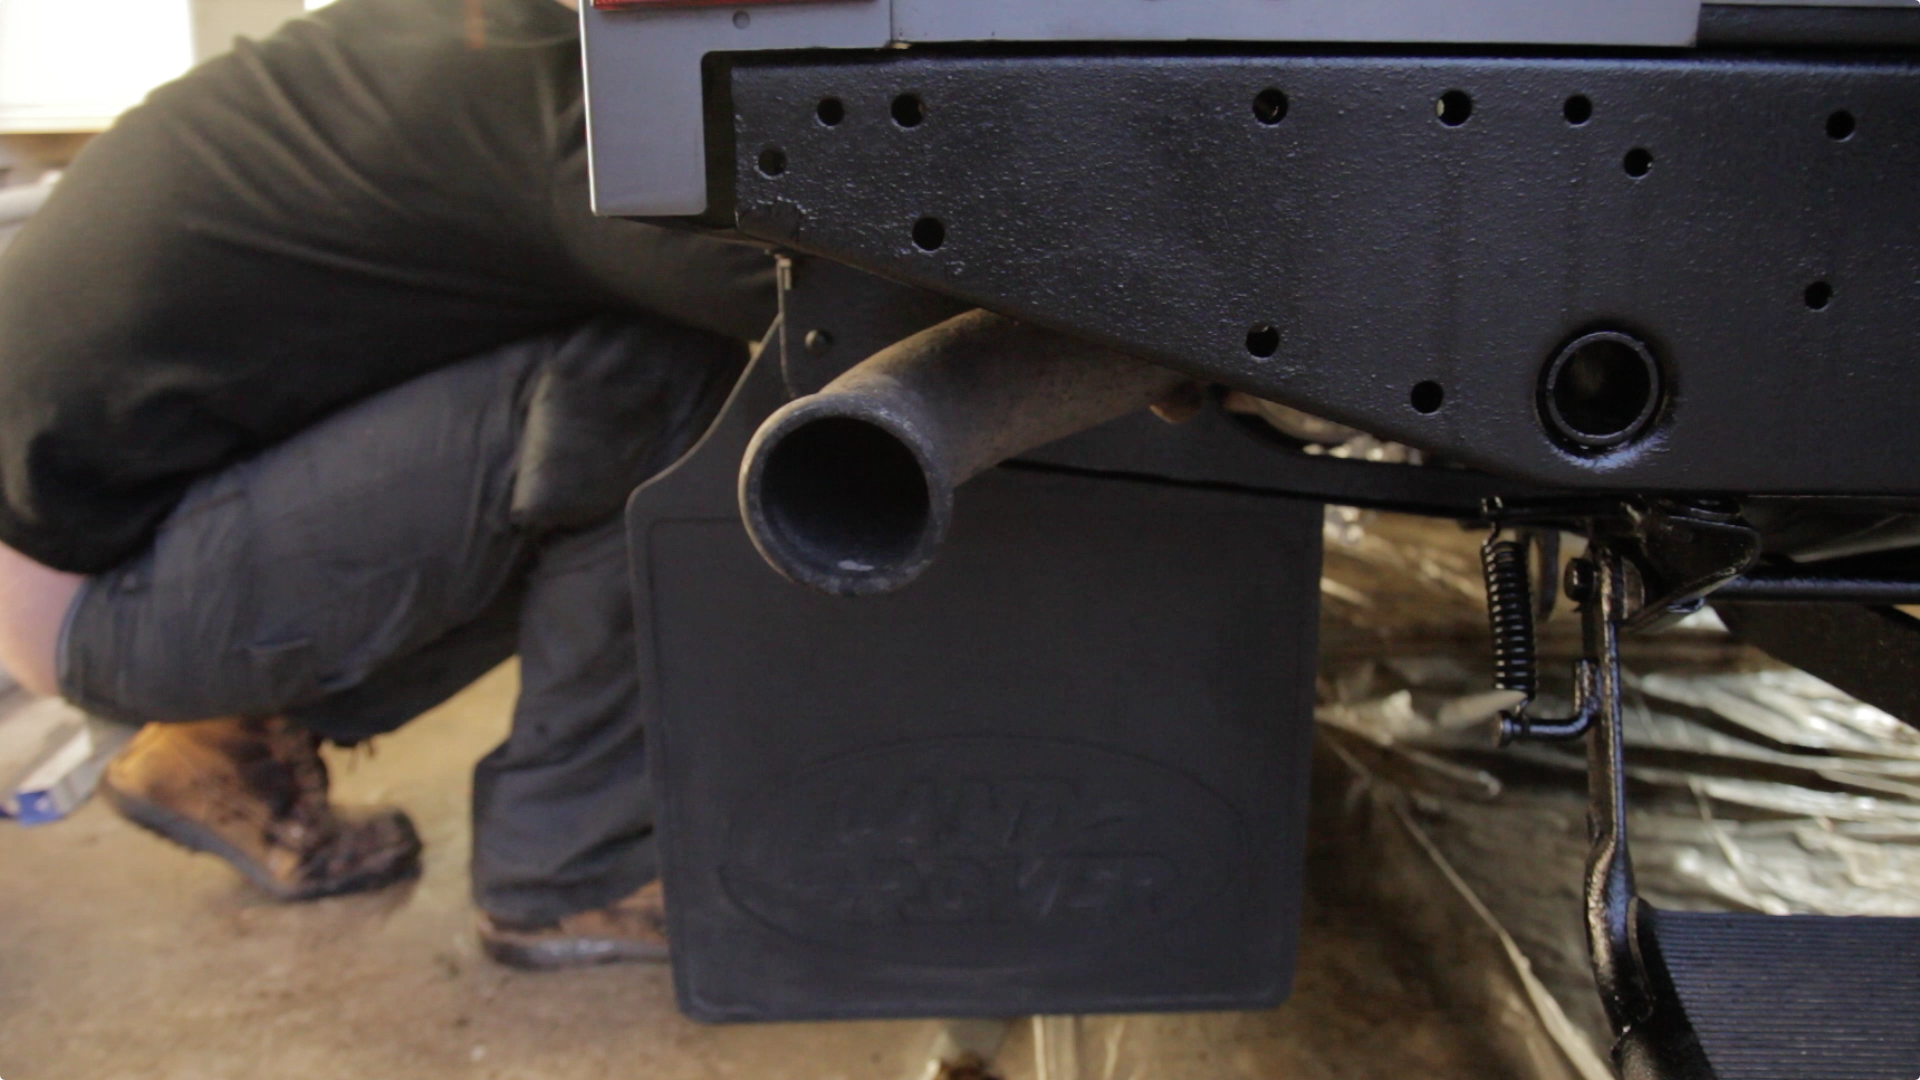
Aluminium foil is useful for masking awkwardly shaped components, such as the exhaust pipe. Cling film also works well for masking the mud flaps quickly and effectively.
Step 6: Optional Light Mechanical Rust removal
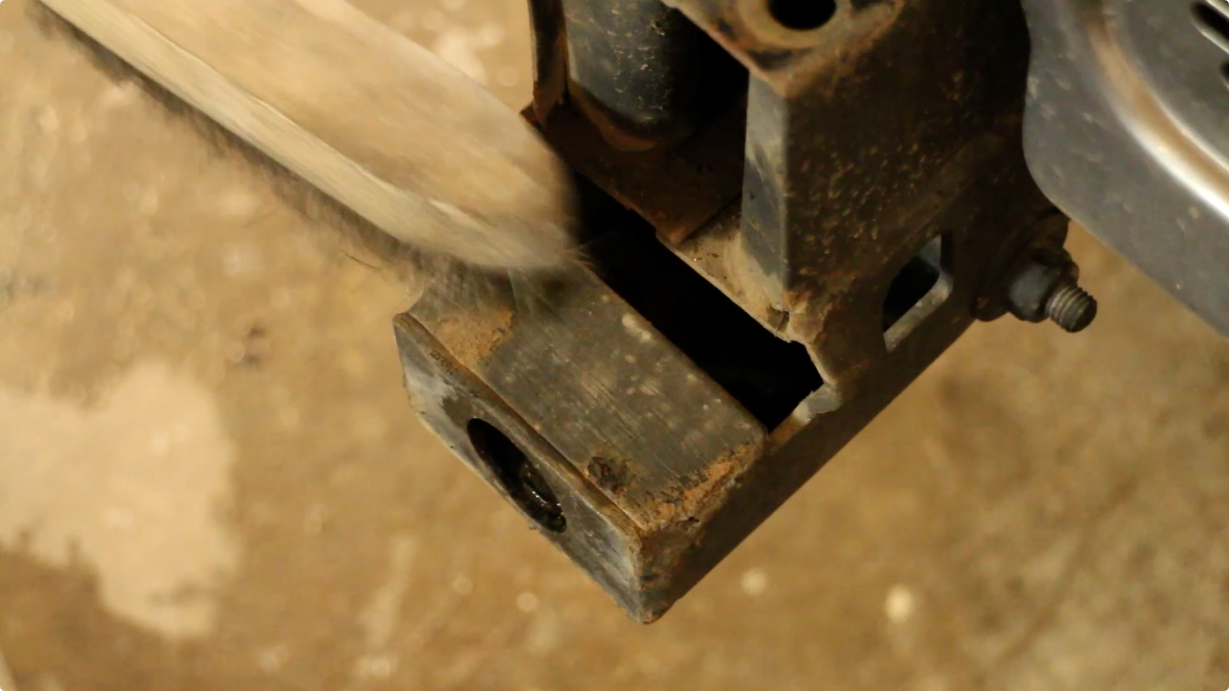
If you have any heavy, flaky corrosion, this can be removed with a wire brush, screw driver or wire cup. However, the rust conversion products we’re about to use require some oxidation on the surface to react with and encapsulate - so complete rust removal is not necessary or desired.

Use an airline to blow off any flakes of rust generated from wirebrushing. This will also remove any last traces of mud or sand and evaporate any traces of moisture. Even after 30 minutes pressure washing and the same amount of time steam cleaning, there were still deposits of dry mud / sand around the body work, so give the vehicle a final once over.
Step 7: Apply Dinitrol RC800
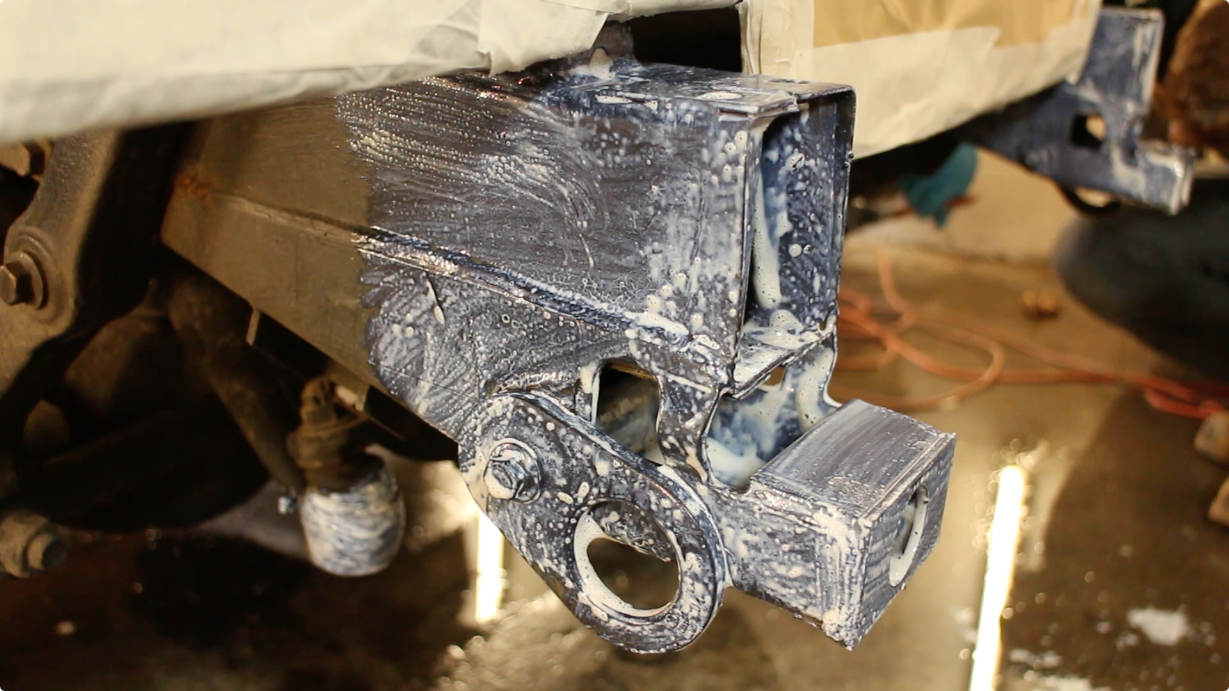
Using Dinitrol RC800, we can now dress any surface rust. Decant the milky emulsion into a cup and brush on over areas of rust. RC800 when freshly applied is the same colour as it is in the bottle, but the colour deepens to a blue hue before finally curing to a hard satin finish. When cured, it forms an impermeable barrier to oxygen and moisture, effectively sealing out any further corrosion and converting existing rust on the surface to a stable organic iron compound.
Step 8: Apply Dinitrol RC900

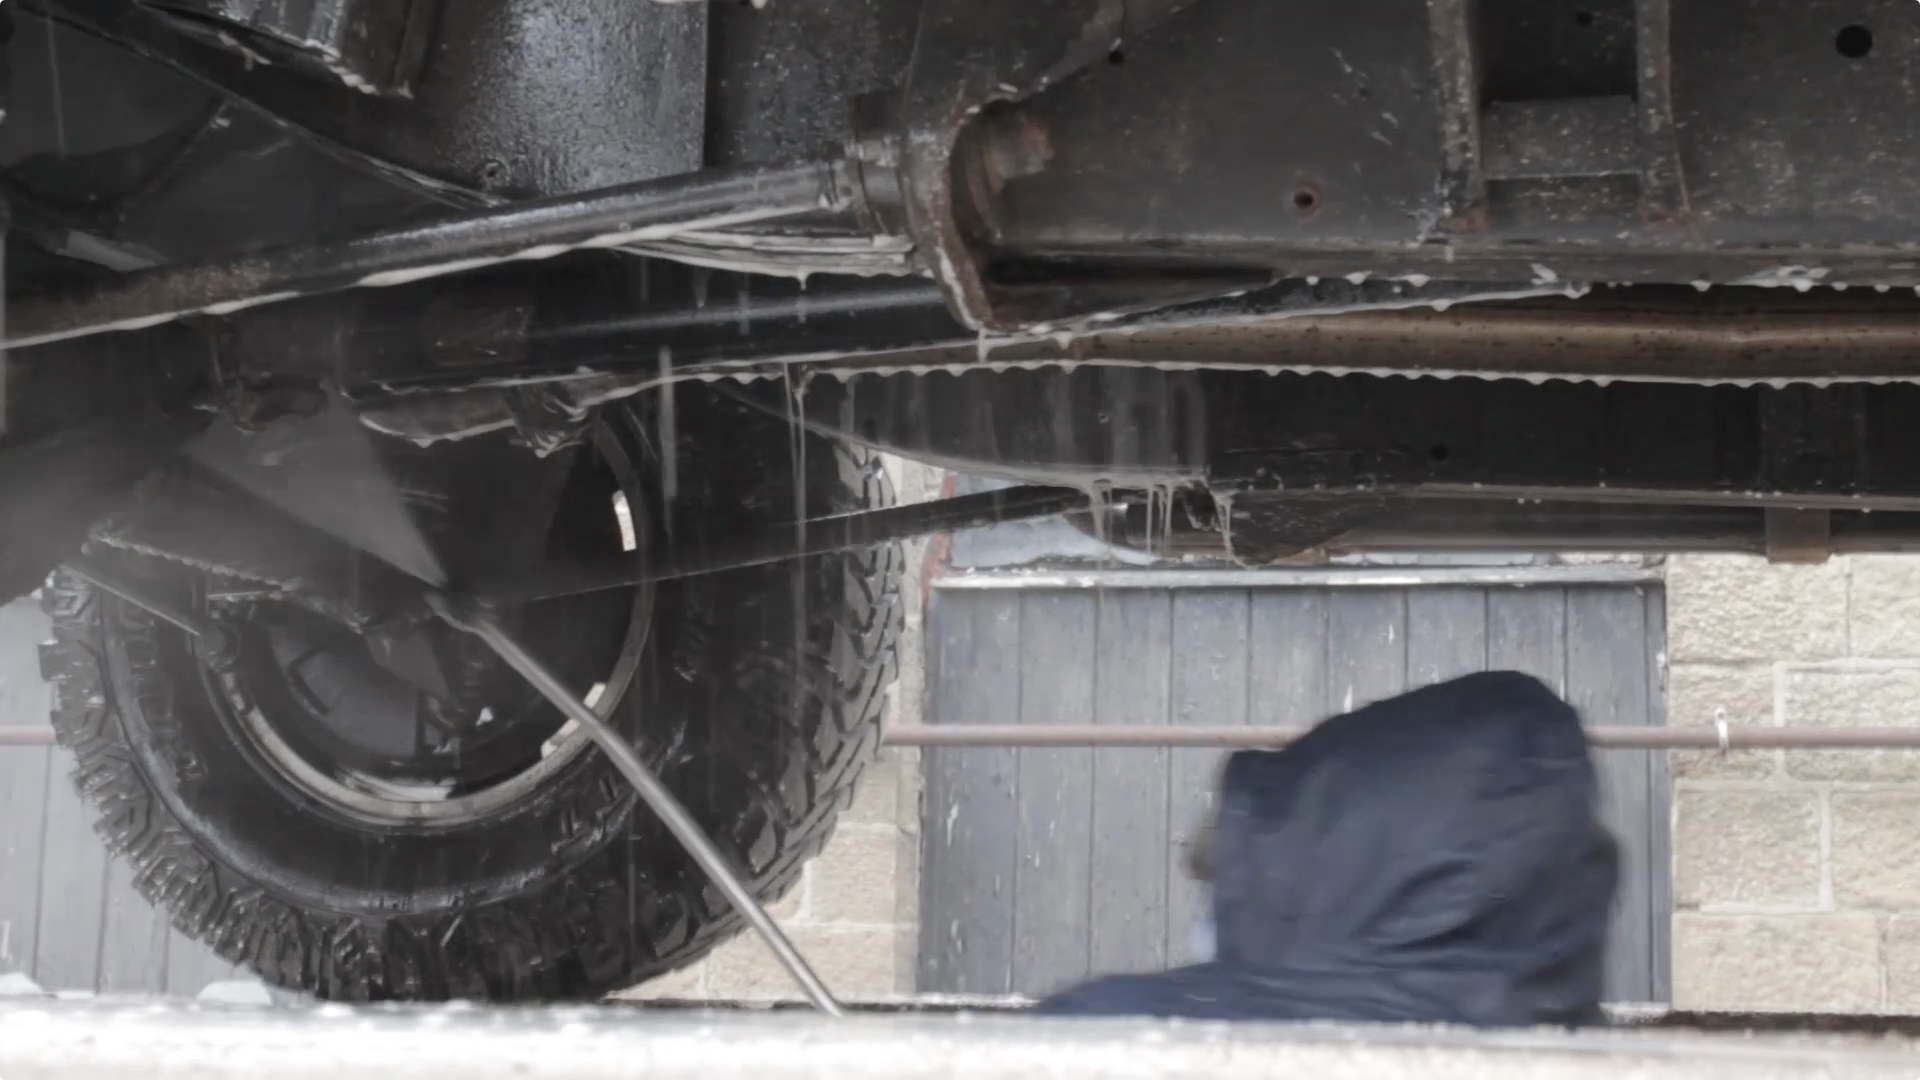
We can now use Dinitrol RC900 to convert rust inside the chassis cavities. Dinitrol RC900 penetrates around 7-10 times deeper into rust spores than ordinary rust convertor products. Use it on any corroded surface. Make sure to fit your respirator mask and rubber gloves. Also attach the spray lance and 'can gun' by Plastikote - which takes away the strain of using a spray can for extended periods
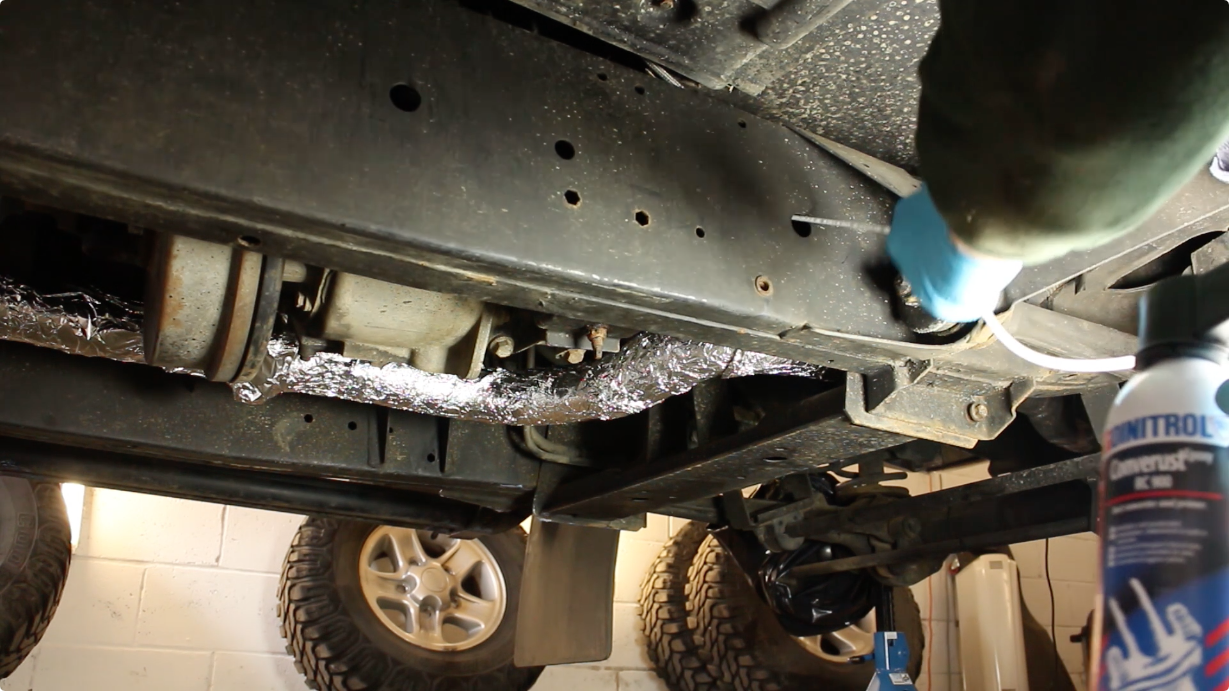
Then, we’ll follow the Dinitrol instructions and work our way around the chassis holes, in order. Spray in all directions in each hole, to ensure a full coverage. Also work on the inside of the chassis rails to be thorough.
Step 9: Apply Dinitrol ML 3125
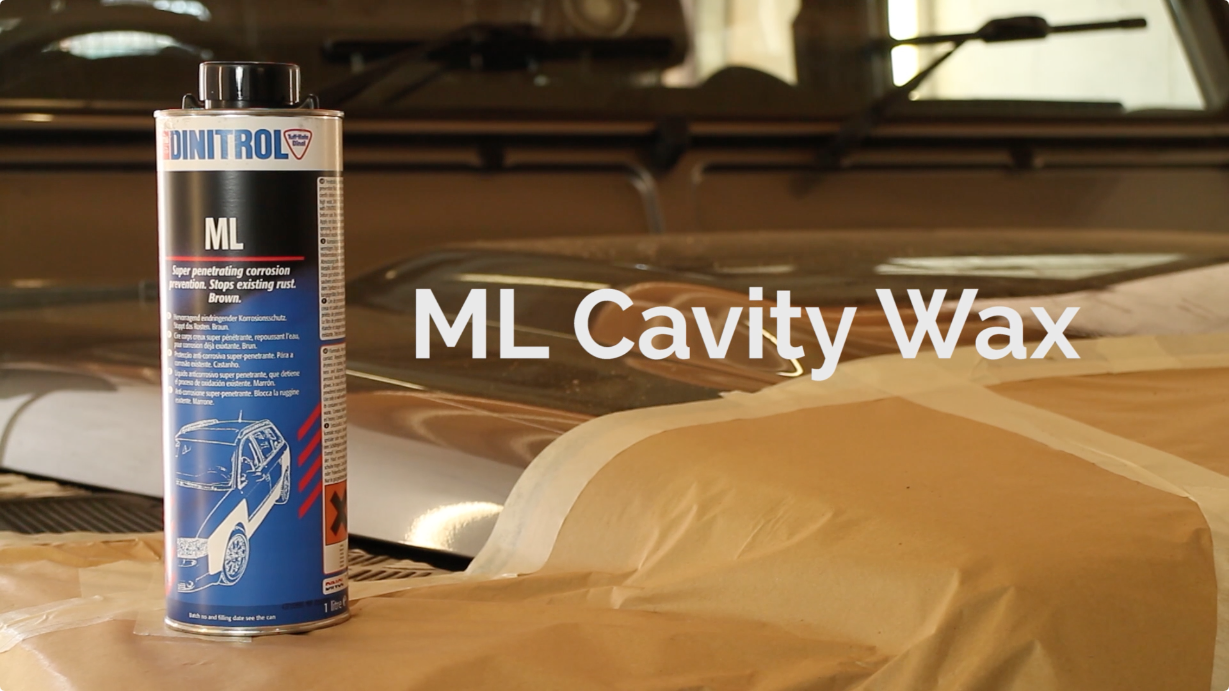
Once the Rc800 and 900 products have cured overnight, we can apply the ML penetrating cavity wax. If the ambient air temperature is low, then you’ll need to warm the can in a bucket of hot water. This wax is designed to creep and flow into the smallest of cracks, welds and seams - further protecting the chassis.
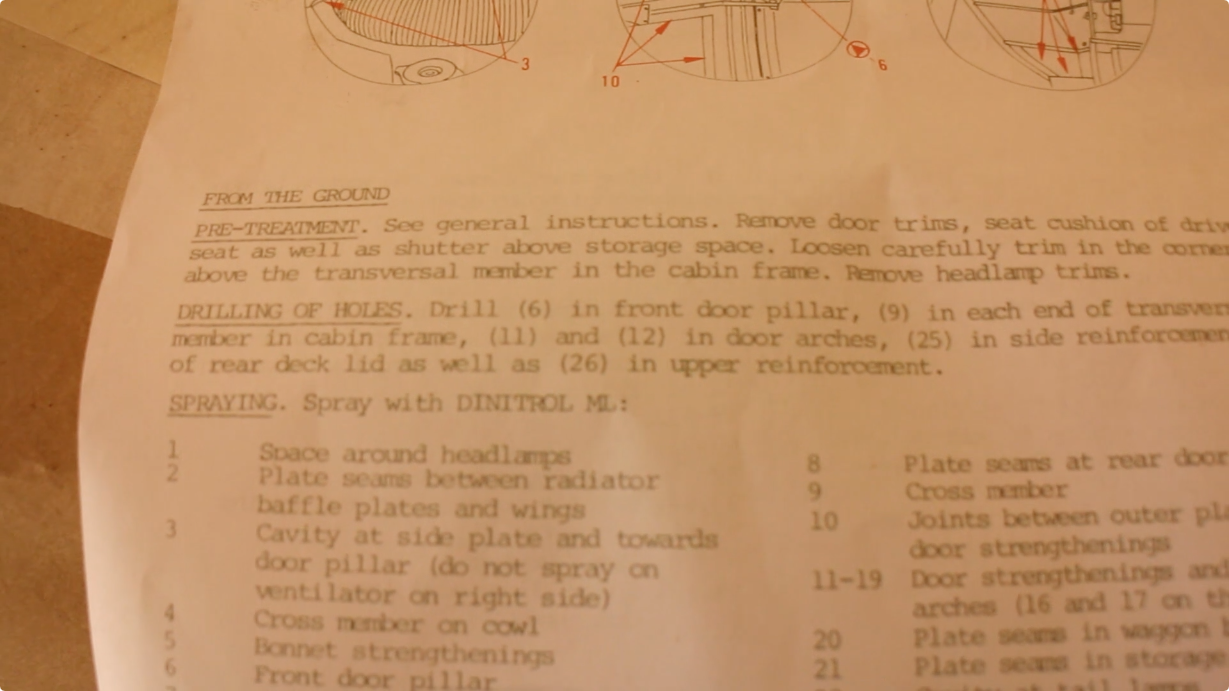
Dinitrol will supply you with a very full and thorough application instruction guide. Make sure to familiarize yourself with the process. Work each step in order, to make certain you have a complete coverage - both internally and externally. Mark the holes that need a rubber bung placing in them.
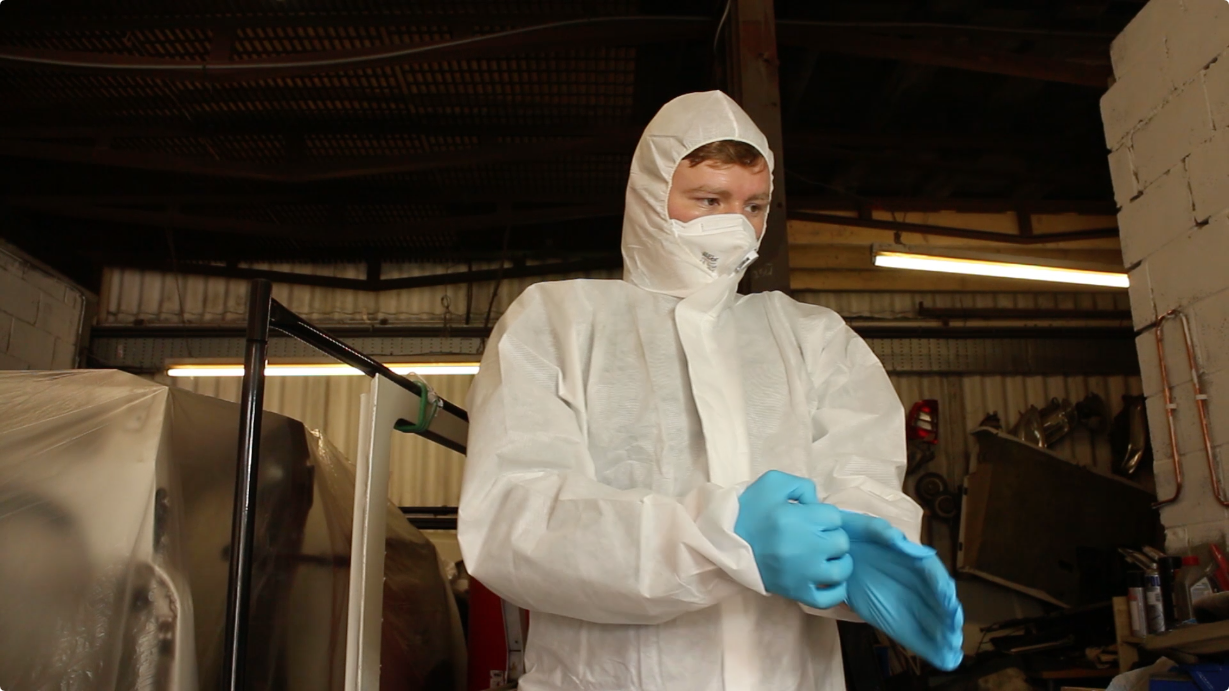
The spraying process can get messy, so to protect our clothes and skin, we’ll put on a disposable spray suit and shoe protectors. Smearing vaseline on the exposed parts of our face will reduce the time in the shower later. We’ll be wearing a breathing respirator throughout, protecting against inhalation of the product and the hood will stop wax from making our hair clumpy and matted. Cover other areas of exposed skin such as the hands.
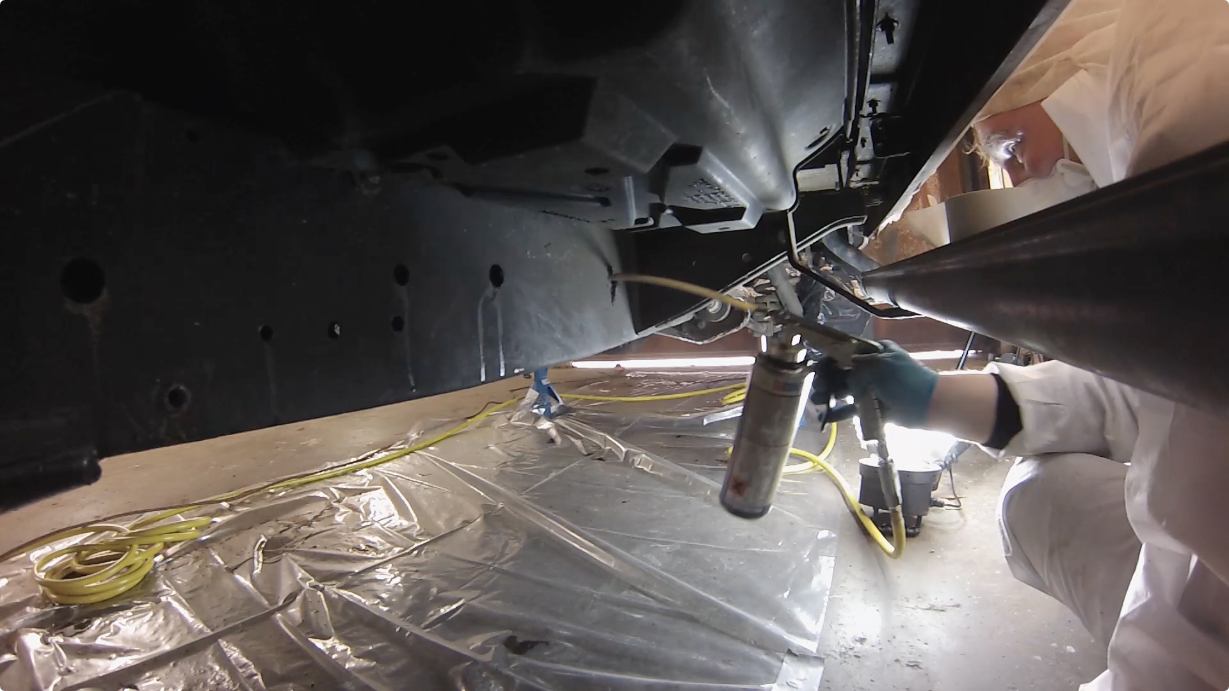
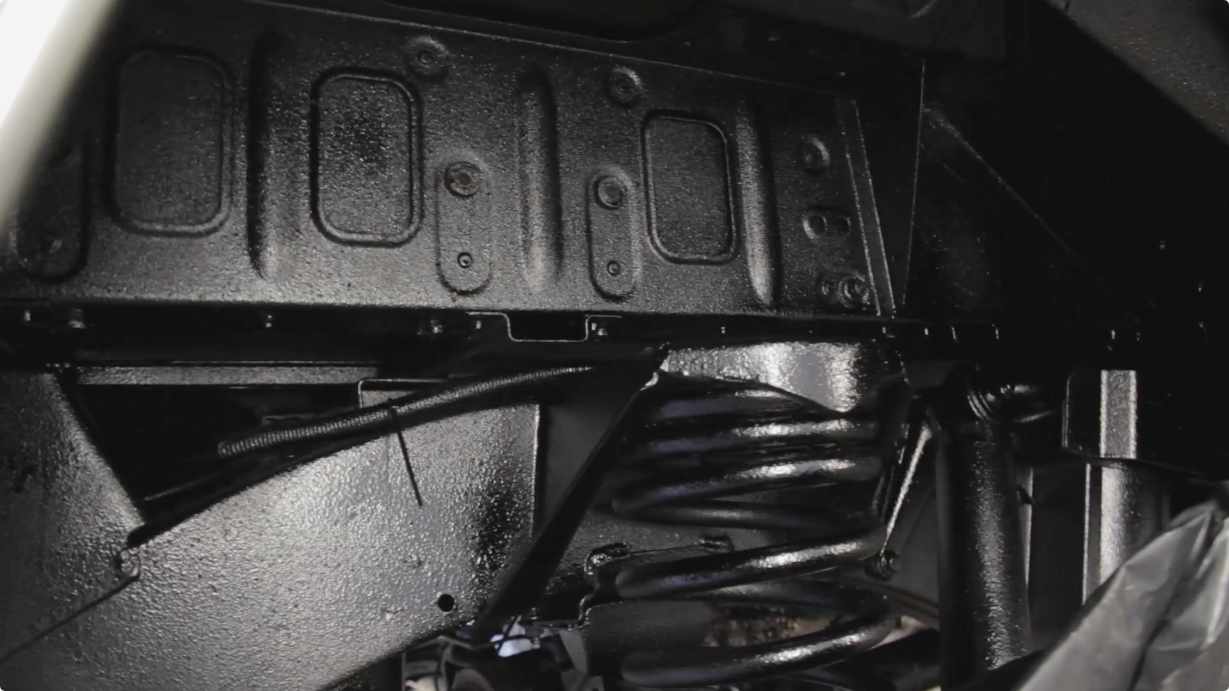
With the underbody gun lance attachment fitted, slide the lance into the various chassis holes and openings outlined in the instructions. The lance has a 4 way spray nozzle. Work in all directions from each hole, ensuring maximum coverage. The rear crossmember is particularly vulnerable to rust, so get a good coating inside. Once all cavities have been sprayed, apply 1 thin coating of ML Wax to the general underbody area and chassis.
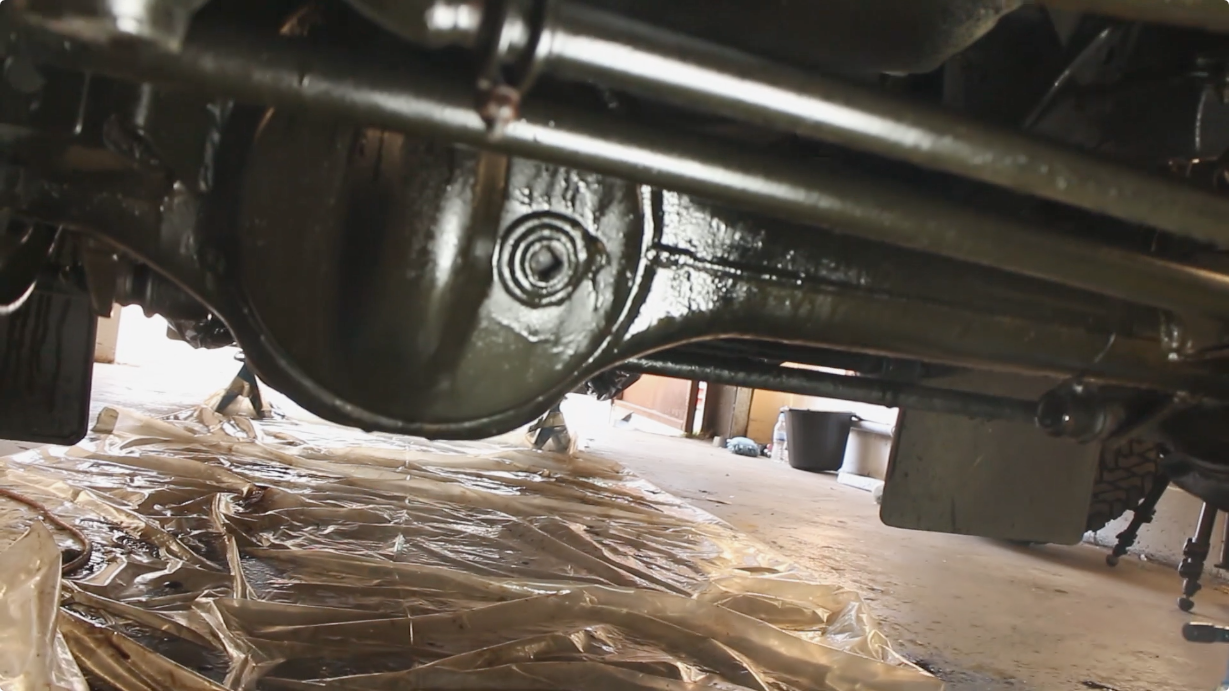
You’ll use quite a number of the ML product cans, this is normal. ML 3125 forms a slightly opaque, brown coating.
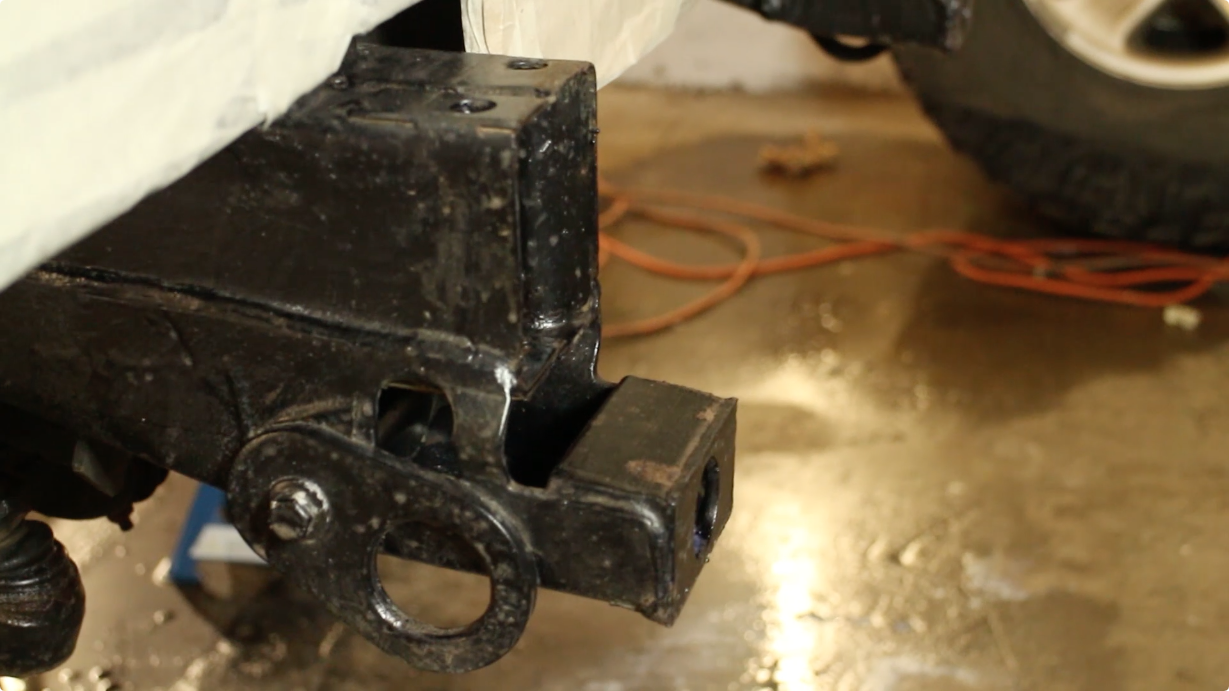
Step 10: Apply Dinitrol 4941 Underbody Wax
 Finally, we’ll apply 4941 Underbody wax, which forms a black, hard and waxy film. This will protect the layer of ML wax underneath and provide a nice, factory finish. Use an aerosol for any touching in you need to do after removing masking or axle stands.
Check your air pressure, then using a different underbody gun, with the standard spray nozzle, apply 4941 wax over general area of the vehicle. Avoid the propshafts so as not to unbalance then. Dinitrol 4941 Wax cures to make the underside of the Land Rover look brand new! The textured finish hides welds and seams and this is the final stage of protection for the chassis, well worth the preperation!
Step 11: Clean-up and De-mask
Now let’s get the vehicle road ready. Once the coats of wax have cured, we can remove our masking.
As you can see, there’s very little clean up - and the edges are nice and crisp. Remove the bags added to the calipers and the tin foil from the exhaust. For any areas of overspray, you can use 7225 Autocleaner and either a lint free cloth or paper towels to remove.
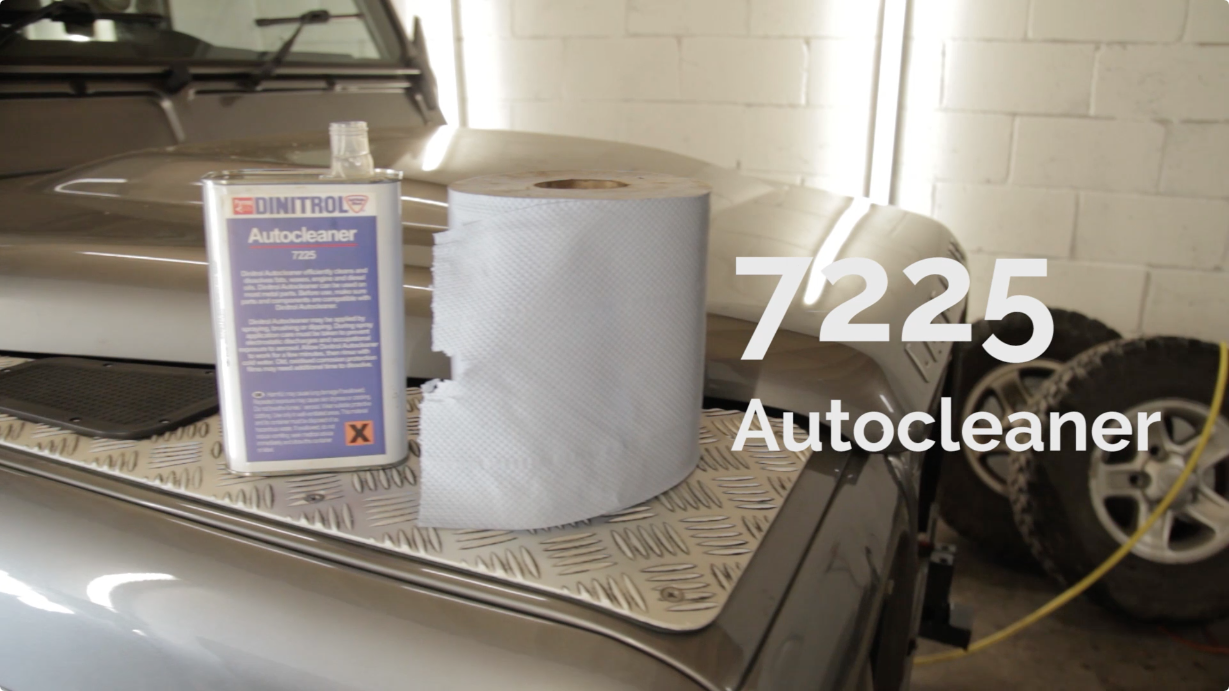
7225 Autocleaner works very well and requires little effort to take off even the worst of overspray.
Refit your wheels. Refit the bumper, grilles, headlight surrounds, then drop the vehicle back onto it’s wheels.
Related items for sale on eBay
| Ebay has returned a malformed xml response. This could be due to testing or a bug in the RSS2 Generator. Please check the support forums to see if there are any posts regarding recent RSS2 Generator bugs. CURL error code = 6. (Could not resolve host: rest.ebay.com) |
Verdict
Fantastic product, rewarding to work with and pretty fun job!
-
Build Quality

-
Value for Money
-
Ease of Fitting
-
FunRover Rating

Manufacturer
Dinitrol can be found at Rejel are the UK and Irish Distributors of Dinitrol
2 Comments
Leave a Reply
About Us
FunRover is a place for Land Rover enthusiasts to gather as a community and discuss the best 4x4 vehicles ever produced. We're building a library of high quality resources & articles to help owners along in their Land Rover ownership.
Popular Posts
8 Almost Useless Land Rover Mods
11th June 2014
Updated: What Makes a Defender Iconic?
29th November 2011
How to Plastidip your Land Rover Defender
19th August 2014
I can see how effective Dinitol is. Where can we possibly purchase the product?
Hi, what mask did you use?