
LucasBlack
September 12, 2011
Share post:


-

12K Subscribers
Subscribe
Search
Popular Articles
8 Almost Useless Land Rover Mods
11th June 2014
Updated: What Makes a Defender Iconic?
29th November 2011

Don't go and rip out your old distributor if you are fed up of points, or want something more reliable - There is a cheap, simple and effective option you can go for.
Our Landy started to misbehave. It broke down as the points welded themselves shut. A quick pry apart got the old tank home, but new points were needed. I had been made aware of a tidy little 'pointless module' that can be used in place of the old points part without needing to replace the entire system. This is a great step up between a full electronic ignition and the old mechanical points... so I thought I'd give that a go.
The part came with instructions... but they were slightly incorrect in my case, so I figure an easy to use photo guide would help some people. Our old Landy has a Lucas 45D type distributor.
The module I chose is a Britpart component from MM-4x4.com I purchased for £12.75 (at time of writing). The first module they supplied to me had a manufacturing fault, so MM-4x4 replaced it. These things happen, and the customer service was fast and great, so no harm done.
Tools needed
- All I really needed was a flat blade screwdriver and cross point screwdriver (No.2 size) (Or use one screwdriver with interchangeable heads...!).
- The large screwdriver and 11mm spanner are for tweaking timing if required AFTER fitting the module.
- The kit came with the module, an all in one rotor/trigger and a separate trigger (depending on your distributor type), all the required wires, coil tab (if required), cable tie, grease.
- You have to supply your own mug of tea.

Parts and Tools
Fitting Guide
- Loosen the small brass 'wing nut' on top of the air filter clamp and move the air filter to one side. This gives better access.
- Don't let the filter touch the battery terminals though.... unless you need waking up...

Move the air filter
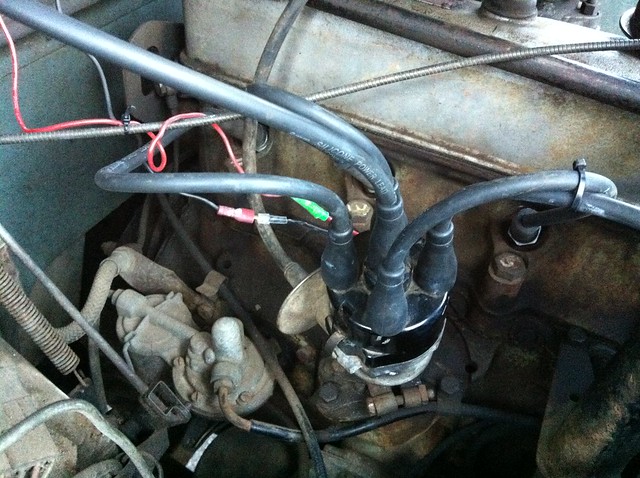
- Attach the supplied (red) wire to the coil. It should only fit one way due to the end fitting.

The coil
- Unclip the top of the distributor. (Leave all the spark plug leads plugged in, they don't need to be touched).
- Remove the black central rotor (the bit with the brass strip on top - It pulls straight up and off).
- Disconnect the contact breakers black wire from the black extension wire that comes down from the coil.
- Remove the old contact breaker and condenser (the little metal cylinder to the right).
- Keep the screws safe - you'll need them again. (Leave the wire that was attached to the condenser screw - you'll attach this end again later).
- Lift the old contact breaker and condenser out of the distributor and pull the black wire carefully out through the distributor body as you do so. (It is worth keeping this unit safe in the car somewhere, just in case you break down and need to fit it.... You probably will never need it, but hey, it doesn't take up any weight or much space!).

Undo the old fixing screws, remove the central rotor.
- Use the supplied white grease and coat the base of the new module. This makes sure it has a good contact with the distributor body.
- Using the screws removed earlier, fit the module into the distributor body.
- NOTE: Don't forget to refit that wire that used to be on the condenser (under the cross head screw).
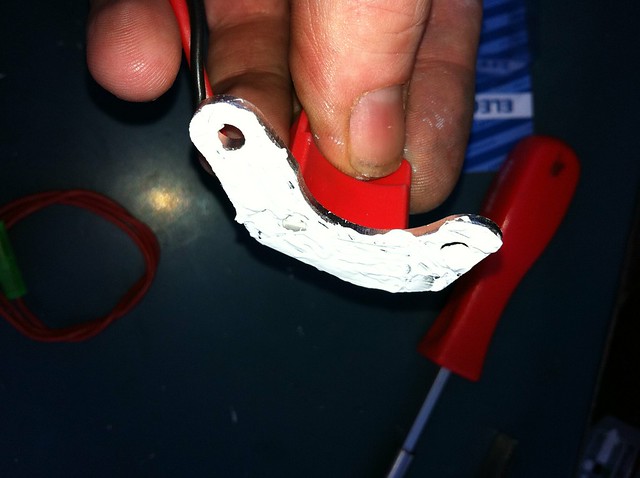
Splash it all over
- Select the new supplied combined black rotor and trigger assembly (on the right in the photo below).
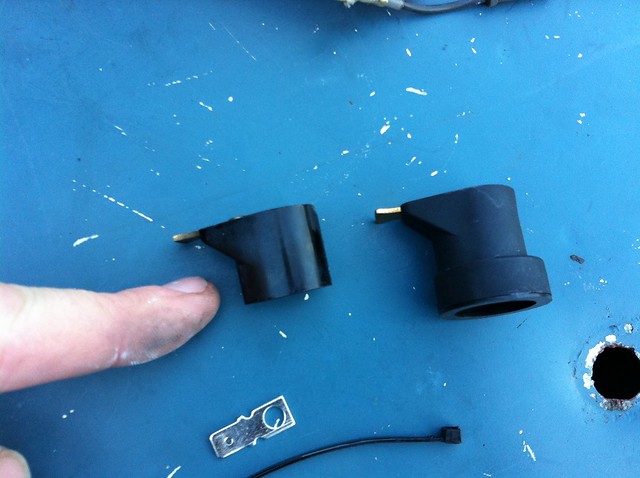
Choices...
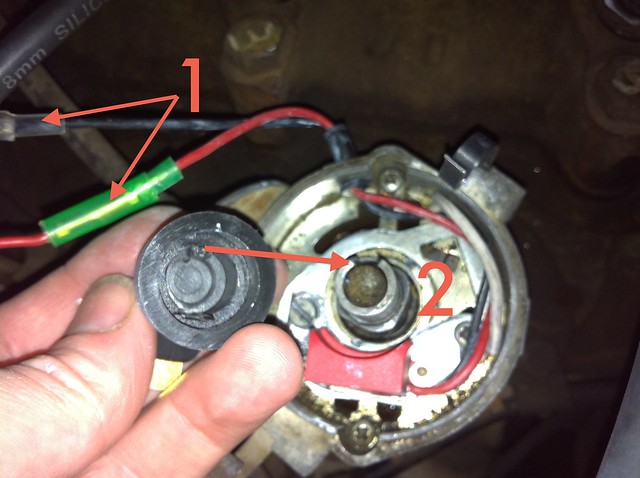
- Feed the black and red wires through the hole in the side of the distributor.
- Connect the black and red wires up to the red and black wires coming down from the coil. They should only fit one way - red to red, black to black - (see note 1 in the photo below).
- NOTE: The supplied instructions state to fit the new trigger (the black plastic ring) to the distributor, and refit the OLD rotor arm (the black plastic thing with the brass strip on top - Left on the photo above).
- This DID NOT work for our Land Rover (the vehicle totally failed to start).
- Instead, fit the combined rotor and trigger part into the distributor (the part on the RIGHT in the photo above).
- Make sure the lugs line up. (see note 2 in the photo below).
Putting it together…
- You are almost done....
- Make sure that the red and black wire have some slack in the distributor body. Pretty much make it look like the photo below, otherwise the wires can pull tight or foul the units operation when the engine is running.
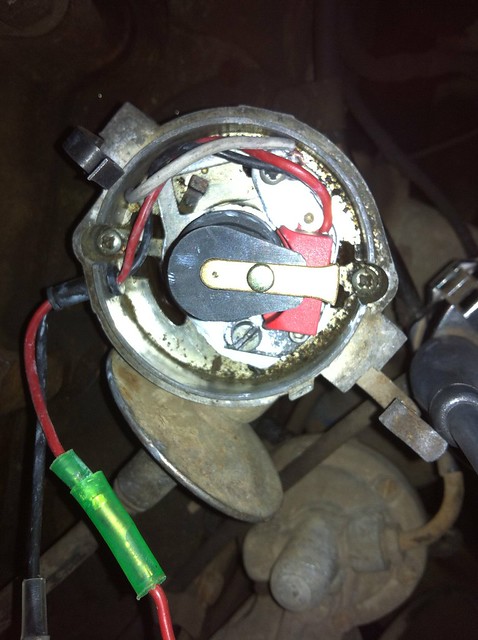
That's the internals done
- Clip the cap back on securely - Make sure you don't trap and of the wires.
- Double check that the black wire goes to the black wire, and the red to the red.
- Make sure the red and black wires are secure on the coil.
Ready yet?..... Yup!
- Now, you could drop the air filter back in place and tighten the brass wing nut up BEFORE trying to run the engine.... or you could now to run the engine, make sure it works, and THEN put the air filter back in place... It's up to you!
It's ALIVE!! - Click for movie
Does it run?
From what I understand, and from ALL the data I have found on the internet, the part should just drop into place and bingo, job done. Nothing to set up and it should run straight away.
If it doesn't, try re-checking all of your connections, wires and spark plug leads (you might have dislodged something). If it still doesn't work you could try removing the rotor and fitting the supplied trigger (the black ring) and fitting the OLD rotor on top of that.
Failing that, maybe drop me an email or message via this blog and I'll see if I can help.
11mm spanner and big screwdriver?
You might have been wondering what that was for. Well, lower down the distributor body (just below the catches that hold the cap on) there is a nut and bolt (a pinch bolt) that allows the distributor to be rotated to advance/retard the engine timing.
A bit more info on timing HERE.
Very, very basically - advance/retard changes when the distributor sends the spark to the spark plugs - and therefore when it ignites the fuel in the engine. Too soon or too late can effect performance and economy - and damage the engine.
Our Landy (and for all I know, all early Landies) can be set reasonably well by just using the charge light on the dashboard as a guide. The best thing to use is a timing light. You should always use the right equipment when you can... but if you can't, then here is a little tip...
If the engine ticks over and the light is on, or flickering, then you have too low an idle speed.
From what I have learnt the best thing is for the engine tick over (once warmed up) to be just fast enough to not have the charge light illuminate or flicker.

So...
- Run your engine until it is at normal operating temperature (about midway on your temperature gauge).
- Turn your engine off and carefully (it is HOT now), loosen the distributor pinch bolt. Just enough so that the distributor can be rotated.
- Turn the engine ON again and let it run.
- Wear insulated gloves to rotate the distributor so the engine slows until the charge light flickers or comes on.
- Now rotate it the other way until the light just goes out.
- Tighten up the pinch bolt.
- Job done.
The reason you wear insulated gloves is because you don't want to wet yourself, burn your hair off or kill yourself whilst touching the distributor, which is full of angry electricity that doesn't mind giving a loving Landy owner a bloody great kick last time I did it.... ahem....
I don't actually use gloves myself, I use the LONG INSULATED HANDLED SCREWDRIVER to gently tap on the distributor cap catch lugs to carefully rotate the distributor clockwise or anti-clockwise. This way I can stay away from the HOT engine and easily get to the distributor without reaching over all of the engine components, wires, muck etc...
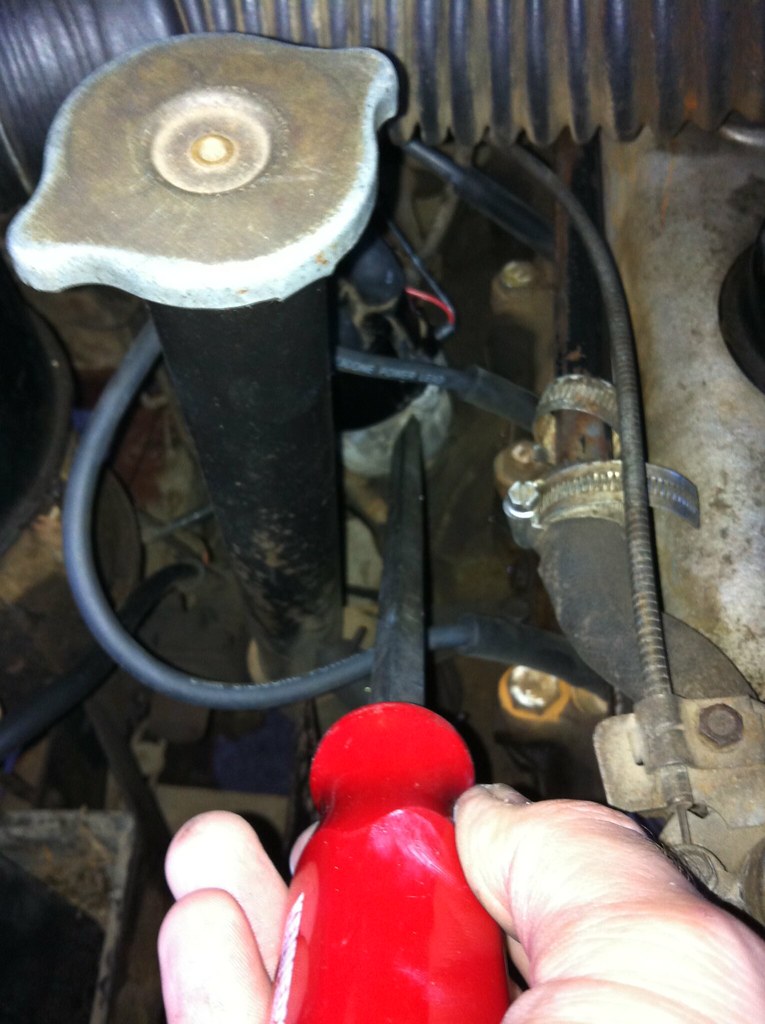
Safe....
Well, if that hasn't confused you too much, I think I'm done!
If you have any comments/improvements or techniques you'd like to add, please feel free.
If you don't know much about how old cars ignition works but would like to find out (always worthwhile), then take a look over at the 'how it all works' page on Sometimespace.com
Lucas BlackI have always been in engineering - mainly aviation, but now I'm mostly office rather than hands on - so having a Land Rover means I get plenty of 'tool time' to keep myself sane. I write blogs, love engineering of most kinds, work on the Landy, Kick Box, shoot target rifle and keep hens. Not all at the same time (tried that - it got messy).
My web site is SOMETIMESPACE.COM

Related items for sale on eBay
| Ebay has returned a malformed xml response. This could be due to testing or a bug in the RSS2 Generator. Please check the support forums to see if there are any posts regarding recent RSS2 Generator bugs. CURL error code = 6. (Could not resolve host: rest.ebay.com) |
1 Comment
Leave a Reply
About Us
FunRover is a place for Land Rover enthusiasts to gather as a community and discuss the best 4x4 vehicles ever produced. We're building a library of high quality resources & articles to help owners along in their Land Rover ownership.
Popular Posts
8 Almost Useless Land Rover Mods
11th June 2014
Updated: What Makes a Defender Iconic?
29th November 2011
How to Plastidip your Land Rover Defender
19th August 2014
Hi there,
Thanks for sharing this article regarding the ‘pointless’ module – just wondered how it’s performed since you installed it and if you’re happy to made the switch?
Many thanks,
Chris