
Willem
December 30, 2010
Share post:


-

12K Subscribers
Subscribe
Search
Popular Articles
8 Almost Useless Land Rover Mods
11th June 2014
Updated: What Makes a Defender Iconic?
29th November 2011

Willem, 31 yrs, living in the Netherlands and a passionate Land Rover Driver. I own a 1998 300tdi Defender 90 hardtop which I drive on club days (LRCH) and in the weekends for recreational trips. I share my passion for Defenders with others on www.landrover-defender.eu (in dutch).
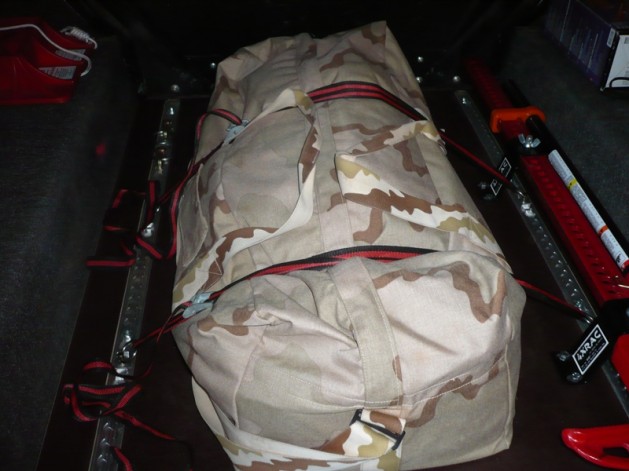
Have you ever been worried about all that kit in the back when driving off-road or frustrated by the noise your loose stuff in the back makes when driving a bad road? A few tie down rings will help, but you can be sure they are in the wrong place most of the time. A new load bed with embedded cargo rail will do the trick.
It all starts with a tight fitting piece of waterproof plywood with anti slip coating. For a Defender 90 this has to be approximately 91 cm wide by 123 cm long and 18mm thick. My Defender actually was square which is unique for a Land Rover, so measure twice. Besides this I used a light cargo rail. There is also a heavy duty one, but light should do for normal use and besides that the heavy duty one is 13,5 mm thick (versus 9,6 mm of the light one) which makes it hard to countersink it in the plywood.
After checking the size of the plywood once again, I took of a little piece of the passenger side corner at the door. This way I can easily put it in place behind the bulkhead and lower it at the door side. Because of the tight fit and the room between the wheel arches being wider at the bottom than at the top, it was not possible to lower the wood from right to left.
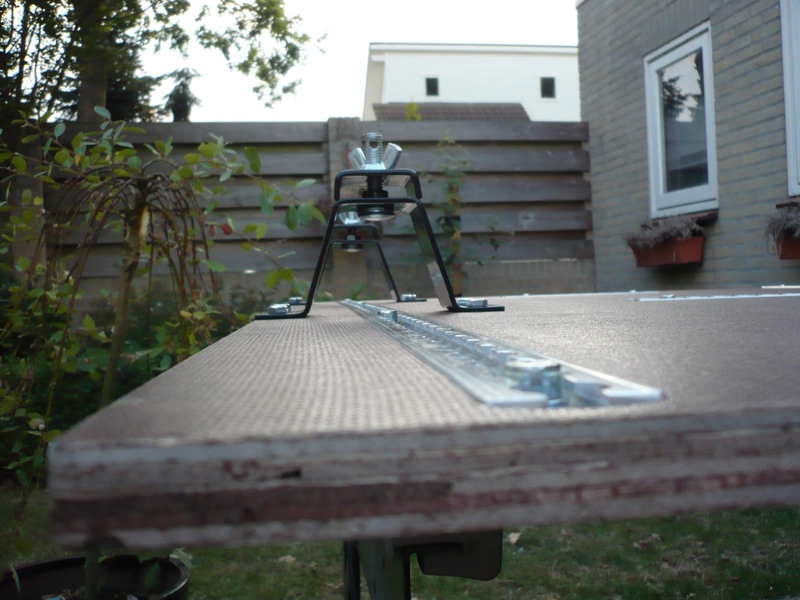
Next step is to decide where you want to have the rail. To me it was already clear it would go left and right and three smaller pieces (third one at the bulk head added later) from top to bottom. I still had to decide how far from the wheel arches I would place the rail. Because I also wanted to fit support brackets for my high lift I took the middle of those brackets as guidance.
With a router I removed the layers of wood and test fitted the rail. A perfect fit!
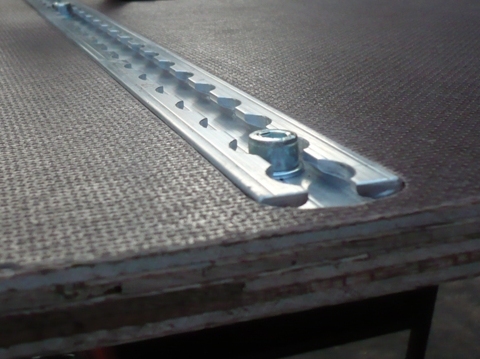
After making the holes in the rail, they are taking over on the wood and drilled. After that I turned over the sheet and started working on the other side. With a speed drill I removed the coating of the plywood. This to make sure the blow nuts I used would get counter sunk in the wood and not stick out. It is very important to align the height of the spikes of the blow nuts and the left material under the rail. If you take the router too deep, the rail will touch the spikes of the blow nut.
After putting all the blow nuts in place, the sheet can be turned over and the rail can be bolted on. The advantage of this construction is you can remove or tighten the bolts from above without removing the construction from the car.
When this is done the Hi lift brackets are put in place in the same way.
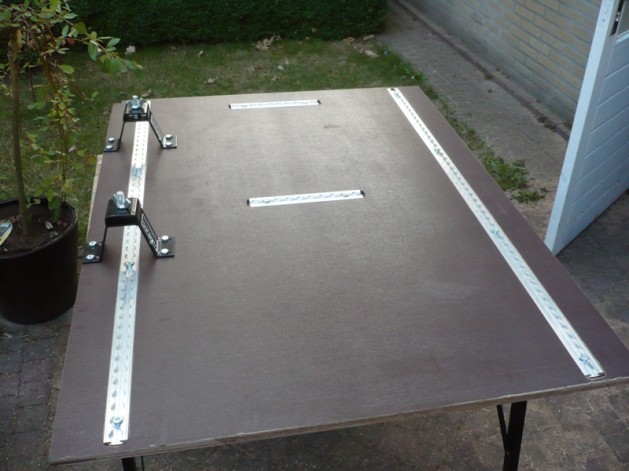
Now the load bed can be put in place.
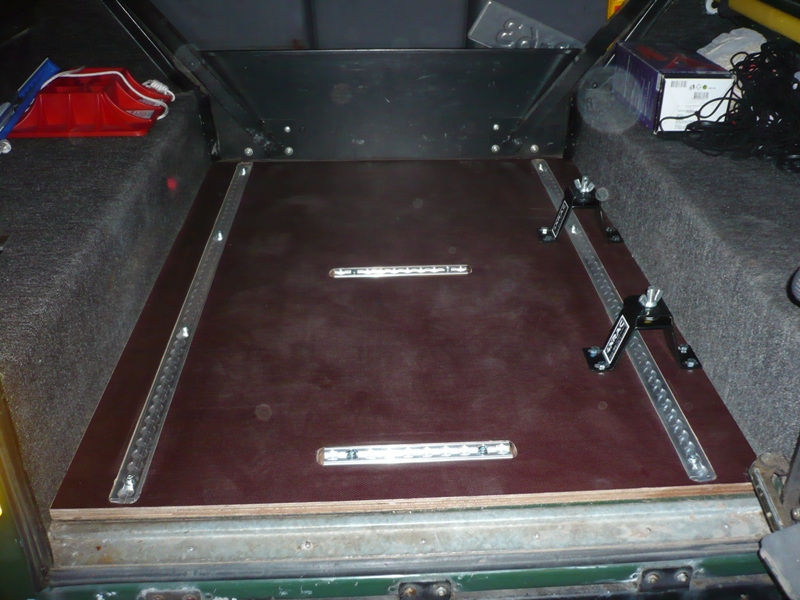
I did not want to drill through the bottom of the car, so all that’s left now is replacing the strip under the rear door with a larger one that also covers the load bed and putting a strip on the bulkhead that secures the load bed there.
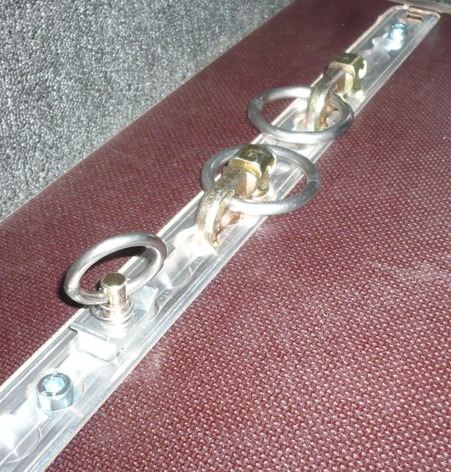
Now you can put the tie down eyes in the rail and you are ready to go!

Related items for sale on eBay
| Ebay has returned a malformed xml response. This could be due to testing or a bug in the RSS2 Generator. Please check the support forums to see if there are any posts regarding recent RSS2 Generator bugs. CURL error code = 6. (Could not resolve host: rest.ebay.com) |
5 Comments
Leave a Reply
About Us
FunRover is a place for Land Rover enthusiasts to gather as a community and discuss the best 4x4 vehicles ever produced. We're building a library of high quality resources & articles to help owners along in their Land Rover ownership.
Popular Posts
8 Almost Useless Land Rover Mods
11th June 2014
Updated: What Makes a Defender Iconic?
29th November 2011
How to Plastidip your Land Rover Defender
19th August 2014
Wow, this looks great! Nice and flush too, definitely going to do something like this to my 110
My Series III 88″ already has plywood for the bed, so this would be ideal.
How easily are the tie down eyes inserted into and and removed from the rails? I generally have my dog with me, so wouldn’t want her catching her feet or falling on the tie-downs. If they just pop out, than it’d be easy to toss the existing mat over when she’s back there.
Hi Morgan,
Removing them is extremely easy.
For the small ones you keep two fingers on each side of the eyes (the silver part) and then puse the brass part with the actual eye down. Then you can remove or slide the eye.
The large ones can be removed just as easy, but for those you have to grab the extended part of the eye, pull it upwards and the eye can be removed.
I think this solution would really fitt the purpose you mention.
Good luck!
Willem
[…] We also want to look into fitting sunken cargo rails and cargo rings to secure everything for the rear load bed and will be following Willem’s Excellent article here. […]
[…] Re: What floor for utility trailer? I found this the other day check it out. and the rail idea I am going to use in my trailer Load Bed with Cargo Rail for Land Rover Defender | FunRover – A Land Rover Blog for Landy nuts […]