
Ben Gribbin
September 30, 2015
Share post:


-

12K Subscribers
Subscribe
Search
Popular Articles
8 Almost Useless Land Rover Mods
11th June 2014
Updated: What Makes a Defender Iconic?
29th November 2011

In this series of videos we’re building a stripped back, fitting tribute to the Land Rover Defender and you can follow along every step of the way. This week, there’s been a bit of a delay with the shotblasted parts - which has meant I’ve had time get on with other jobs on the Landy.
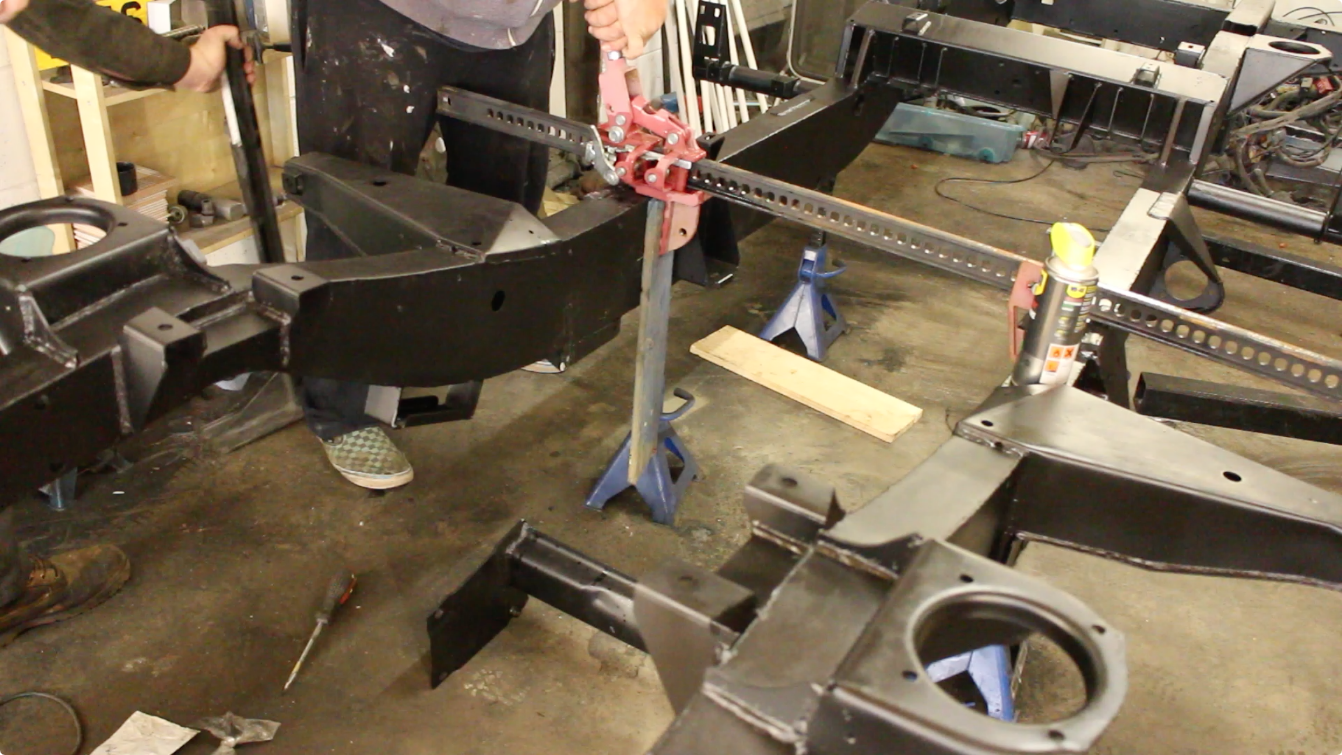
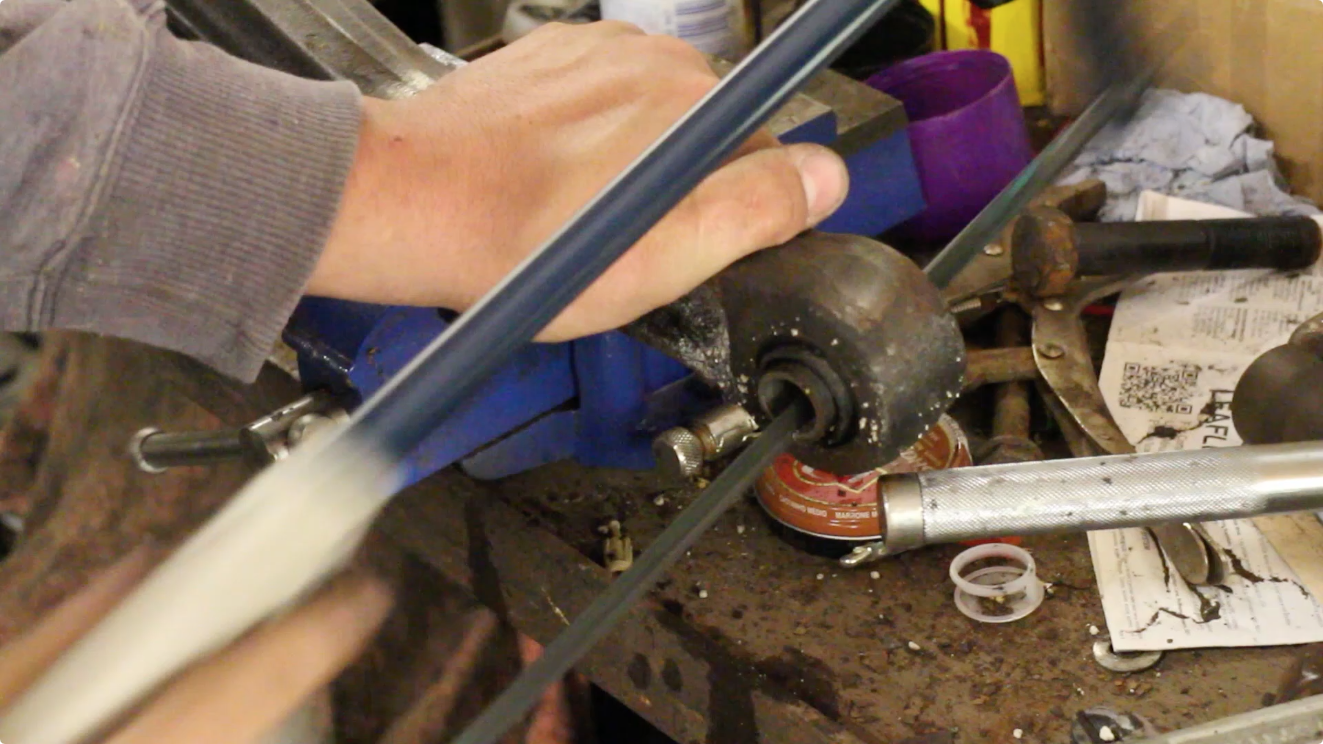
First off, my mate Karl (who is a massive Land Rover enthusiast) came over to help and we fitted the gearbox crossmember, which has also been painted up to match the chassis with the Frost Extreme Satin black. We had to use a farm jack to slightly spread the chassis to fit, something that seems to be quite common. If you use this method, always pack out the jack legs with wood or something that will protect your paint finish and galv. The crossmember was thoroughly lubed up, Karl applied a half click on the jack and the crossmember slotted into place with some persuasion from a lump hammer.
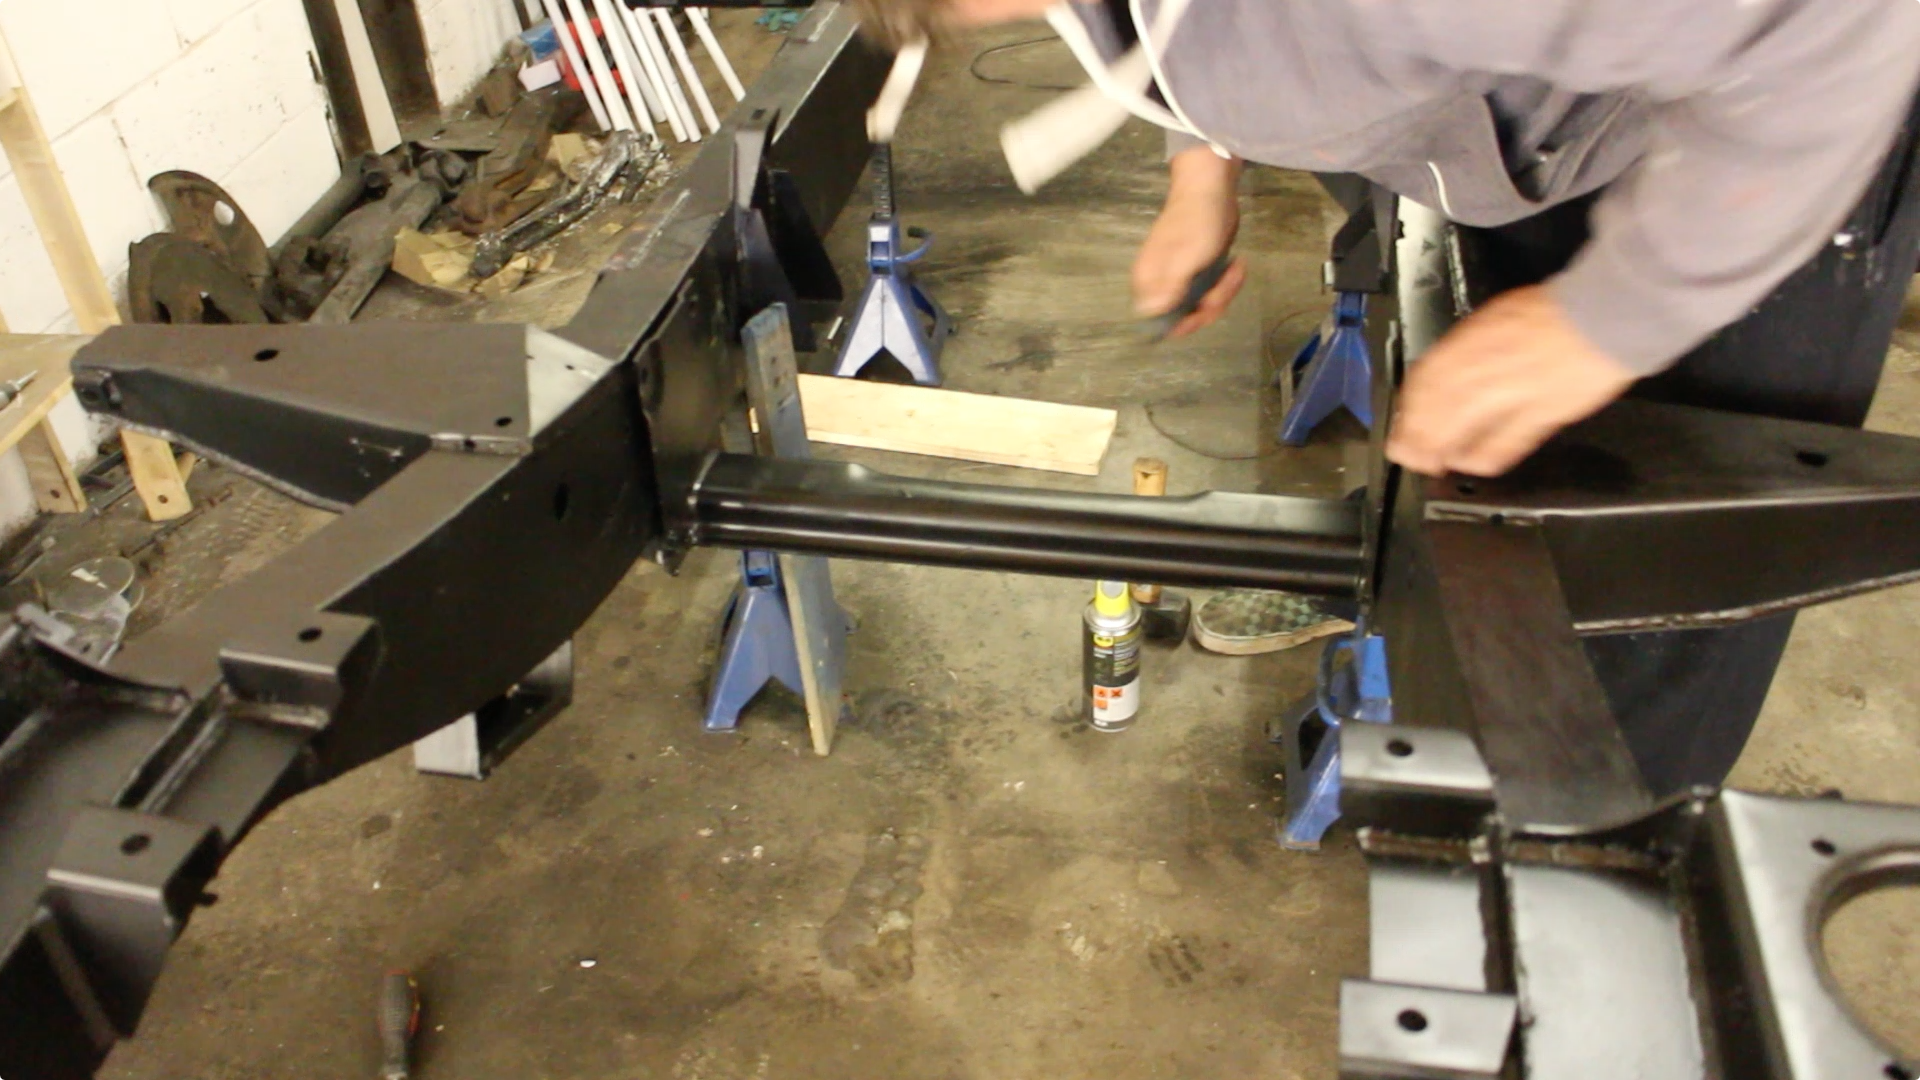
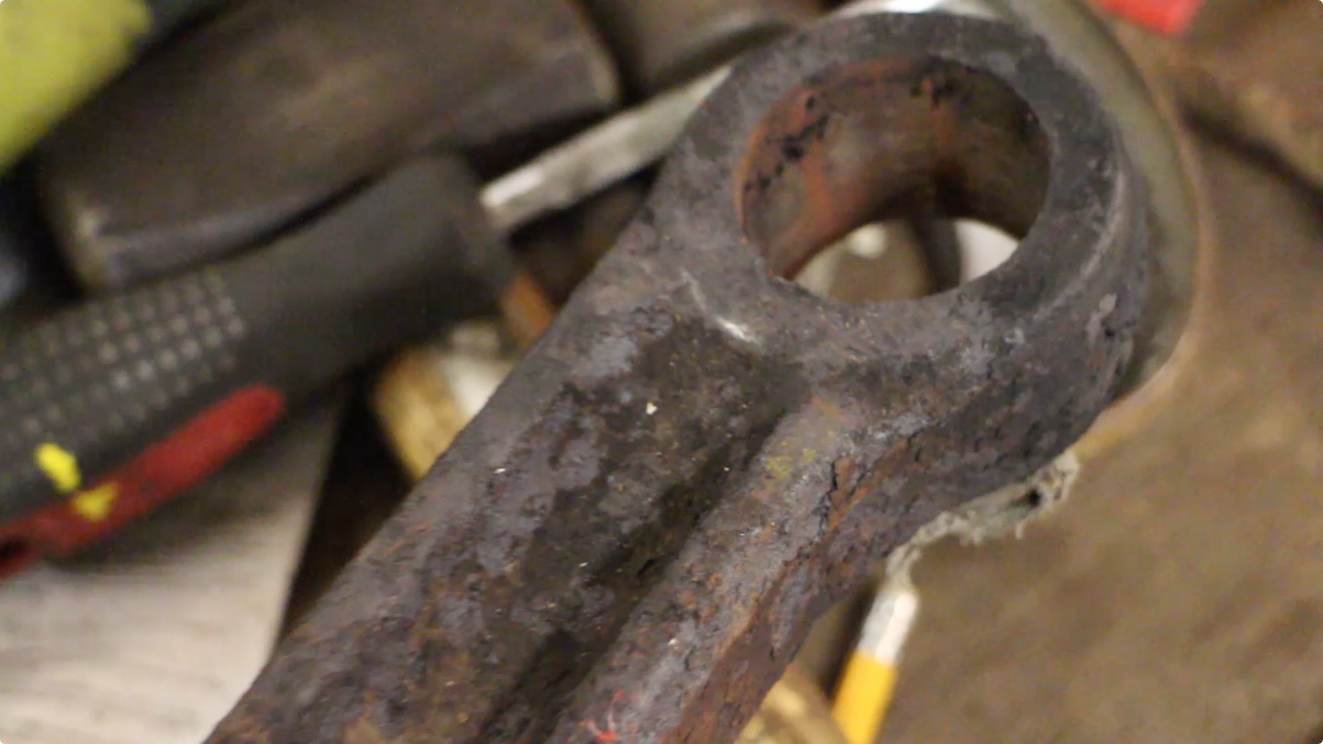
Using a pry bar or similar you can then position the holes correctly and bolt up the cross member. Then, we can go about assembling the parts washer sent to us by SIP - a great company, we love their tools. We currently use a number SIP products, and have found them to be good quality and very good value.
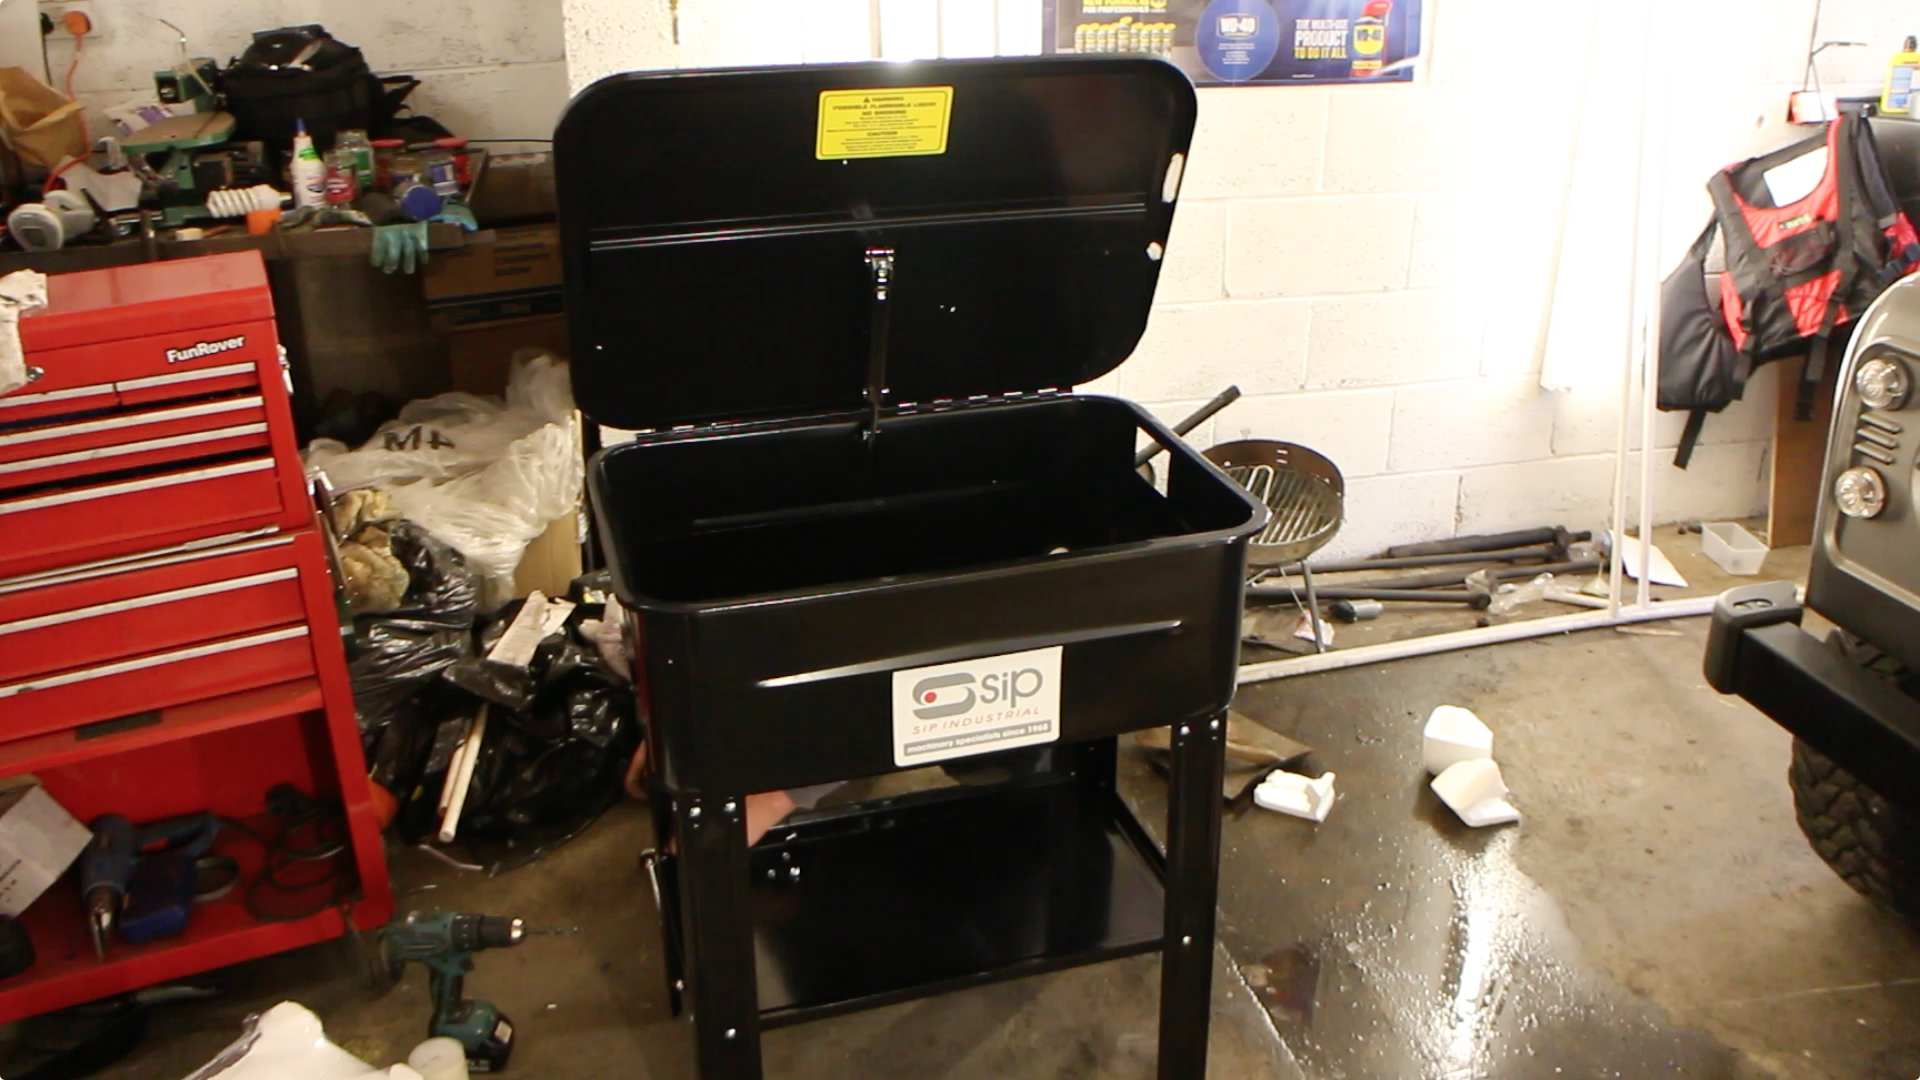
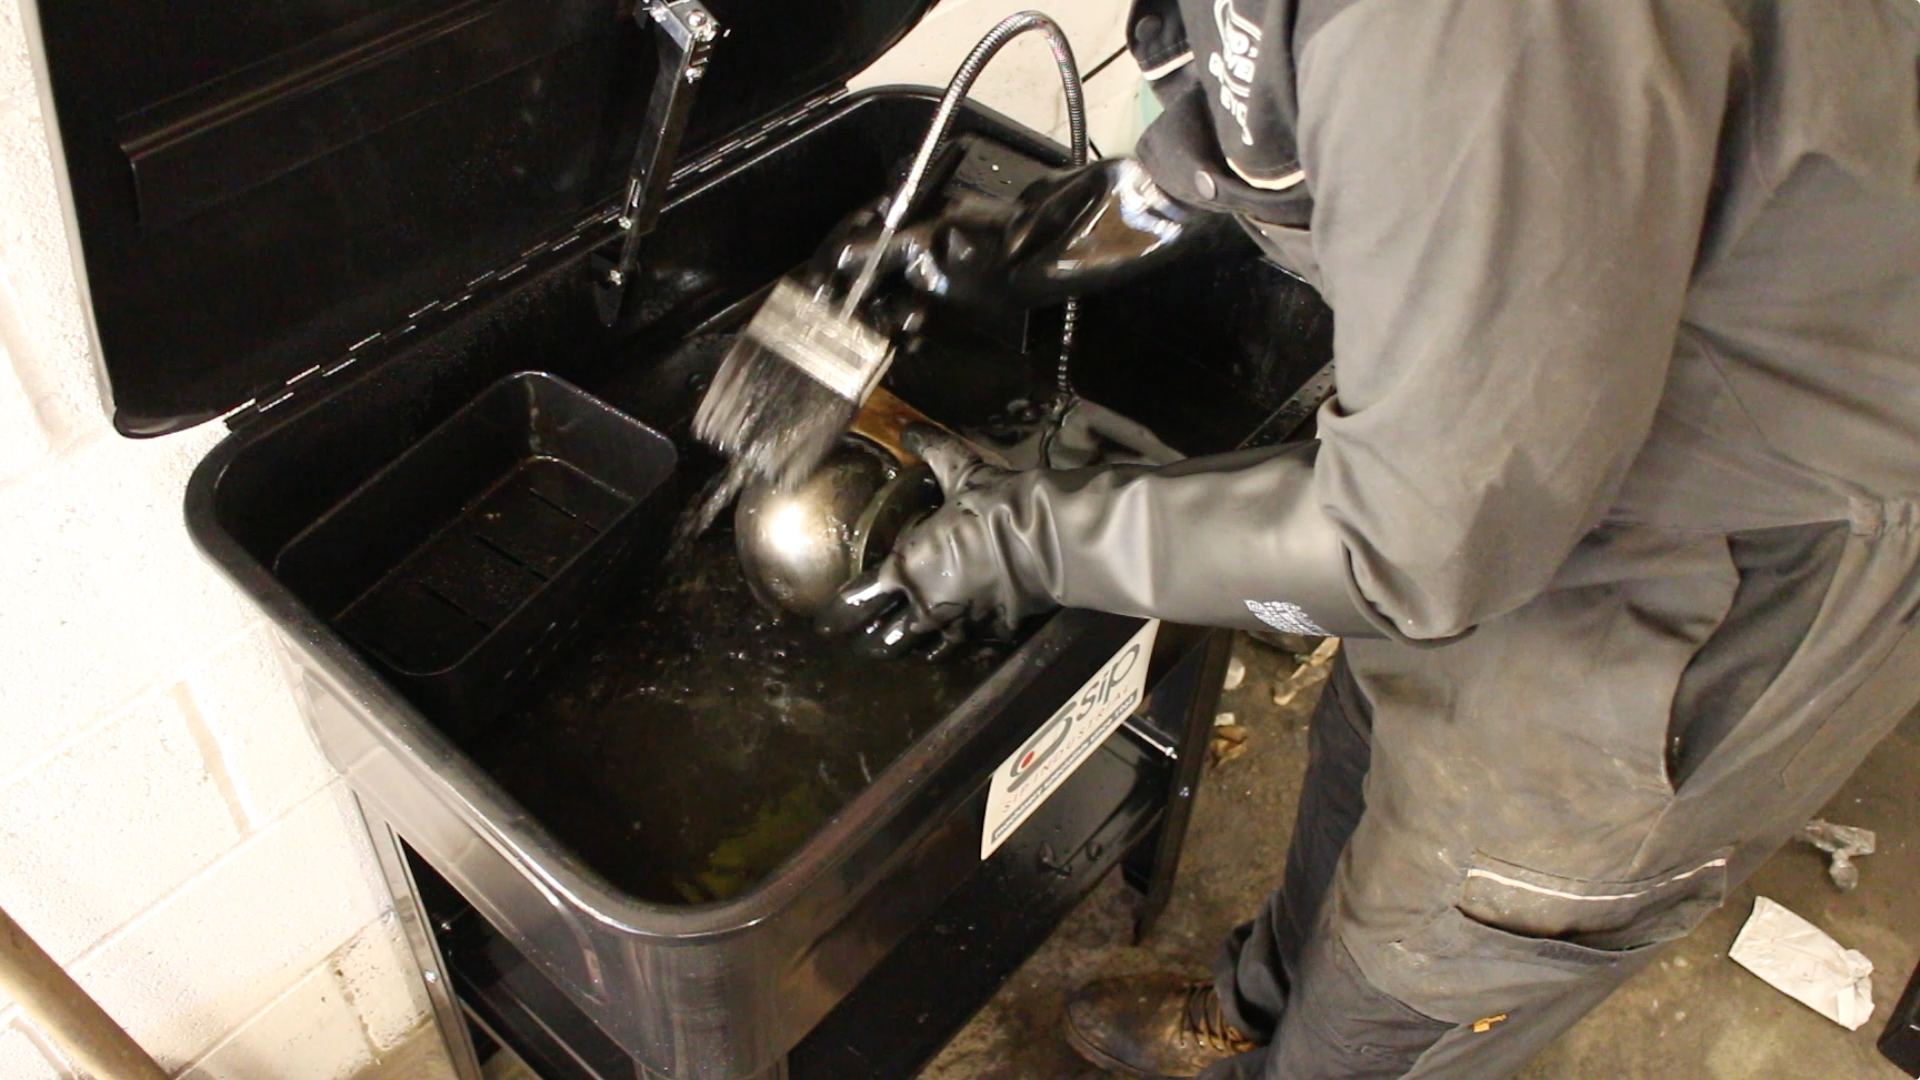
The parts washer needs some assembly, nothing too taxing. This one will hold 20 gallons or 75 litres of parts degreaser. It’s much bigger than a bench top style washer. It has a handy shelf for drying washed components too - a nice touch. I bought 25l of washing fluid that can be mixed up to 20 parts water to:1 washer, here it’s only 3:1 - so is a lot stronger. Using some old brushes and set of industrial gauntlets - you can then easily clean grease, oil and muck off with little effort. The pump head provides enough pressure to remove grease and oil. Don’t just use diesel in your parts washer - it will leave a film on the part which will need removing before painting.
The rear upper link arms still had metalastic bushes - we’re switching to superpro all around to help with future replacement and give an improved ride.
There are several ways to remove them, but here we started cutting the metal sleeve with a hacksaw, after realising the blade was dull with no replacements, we burned out the bushing instead. This is much easier! Simply light with a blow torch and leave to burn through. You can remove the final sleeve with a hammer and chisel.

Next, we cleaned up the trailing arms, hubs, swivels, radius arms and upper links for painting - using a twisted wire cup. These work well at removing rust but not damaging the original part. A vice mounted on a sturdy work bench is very handy.
These components had a lot of flaky rust - despite been waxoyled in the past. Then it’s a case of spending several hours cleaning each item.
Wear fullface protection, gauntlets and overalls - the cup spits out wires and flaky rust. Use a hand wire brush on critical fitment areas.
Then we had to collect 600 bolts, washers and nuts. We purchased a large selection as they are handy to have in stock.

BAPP bolts are a well priced fixing supplier and they have chains dotted around the UK.
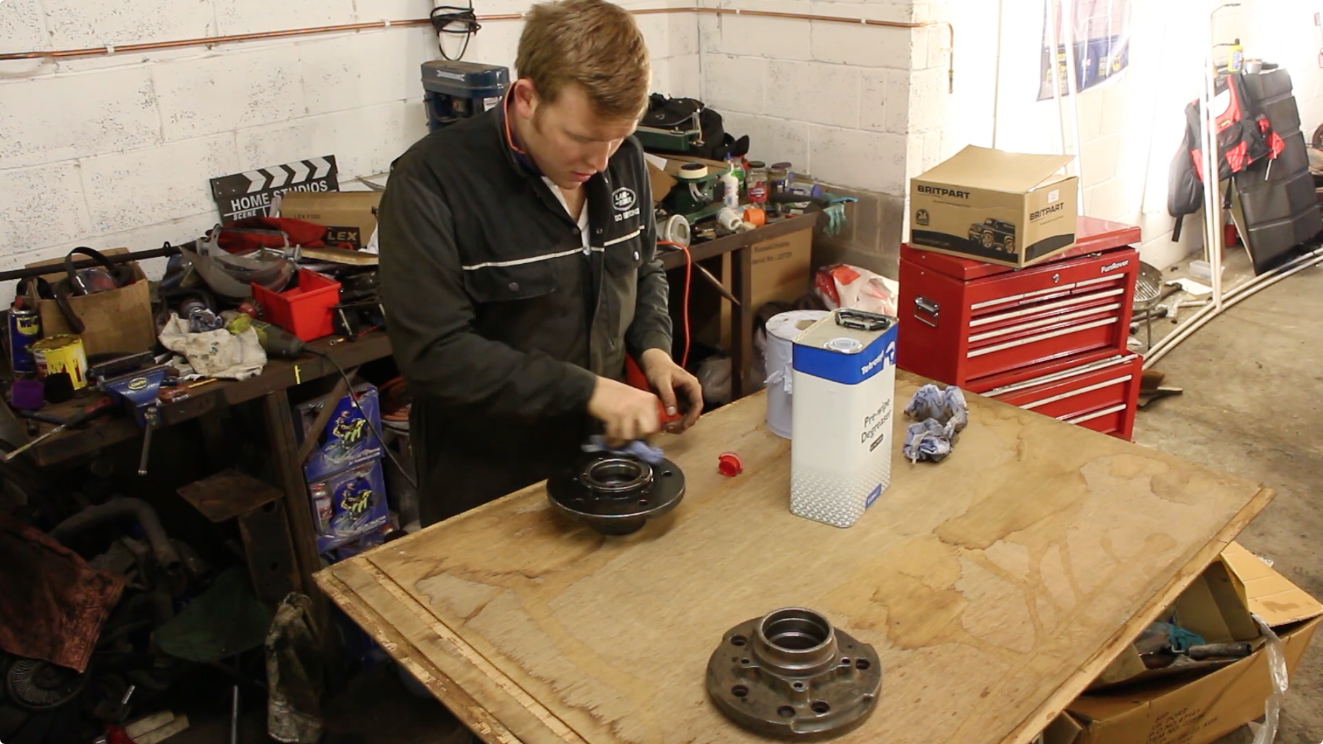
Then components had a final degreasing with solvent wipe. Spend time here as grease and dust will ruin our paint finish. Change your rag frequently. Afterwards, it’s time to mask up gasket surfaces and holes where we do not want paint. Get the widest masking tape you can, it saves a lot of time on components like this. Now you could spend time carefully cutting around the edges of the item. This is slow and time-consuming.
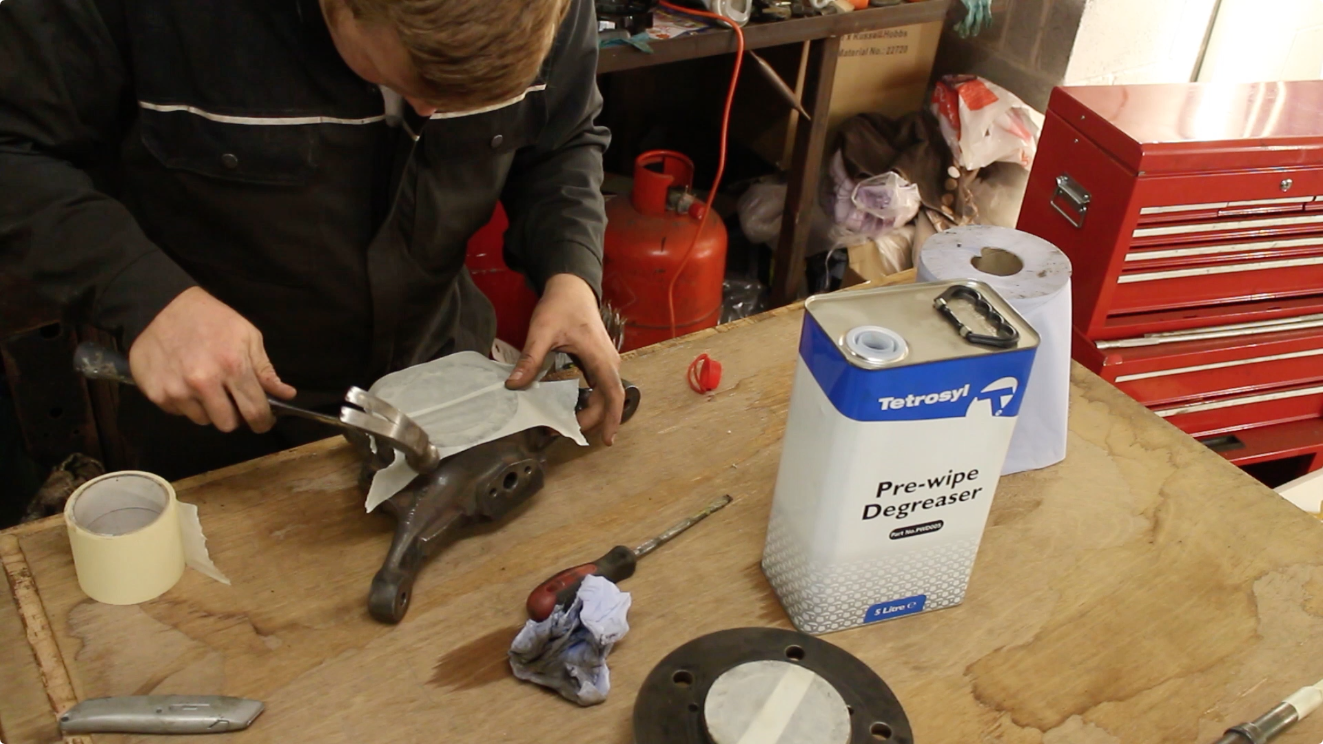
Instead, we picked up a neat trick from Kim Barnett who is rebuilding a Defender on the mig-welding forum. She uses a hammer to gently tap the corner of the part, which cuts the masking tape perfectly to shape, this is quick and very accurate. A great little trick!

These were then hung using stainless welding wire from a clothes rail, these can be found on eBay very cheap and will hold a Land Rover door no problem for painting.
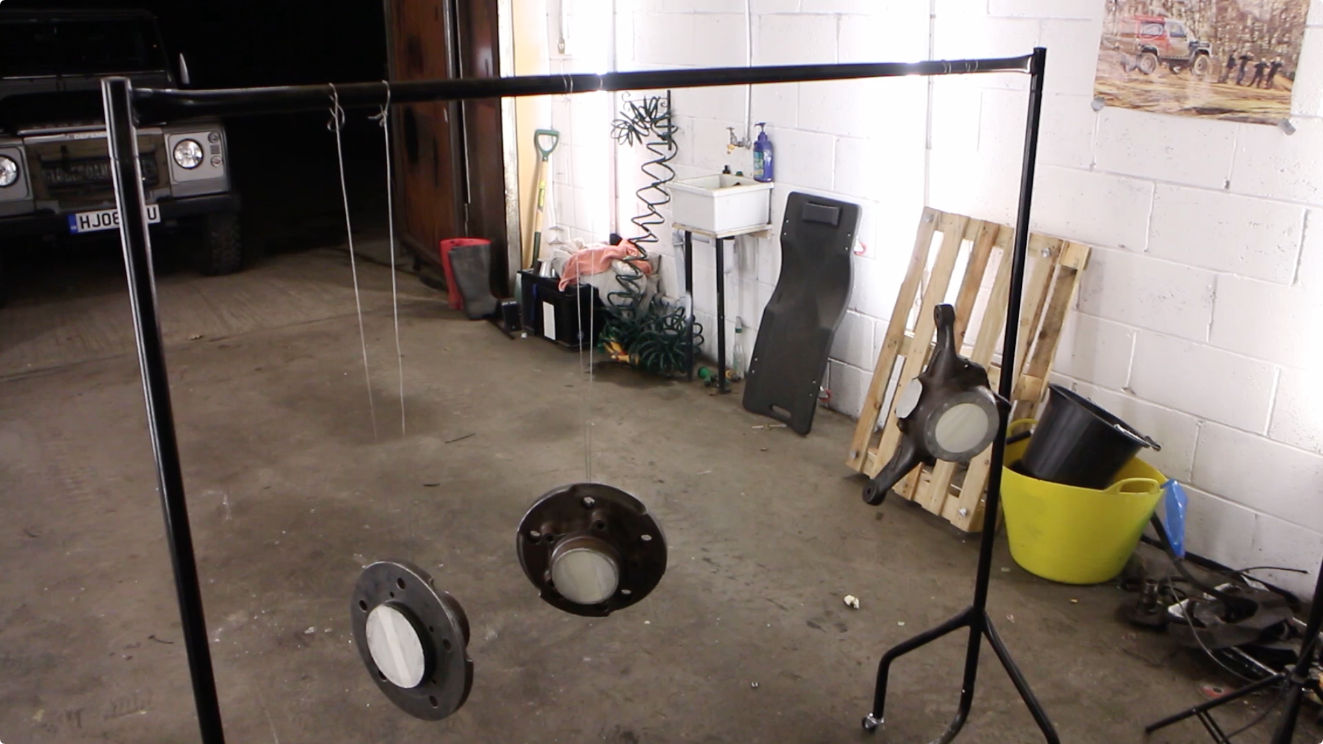
For painting the radius and trailing arms, we cut a 25mm hole in a pallet. They then stand nicely on end, protecting the thread (which was masked anyway) - giving you 360 degree access for painting.

The whole lot was then hit with a light coating of etch primer, the same stuff we used on the chassis to promote adhesion for our paint and primers - etch primer must be given a few days to cure, top coat painting will be shown in our next video
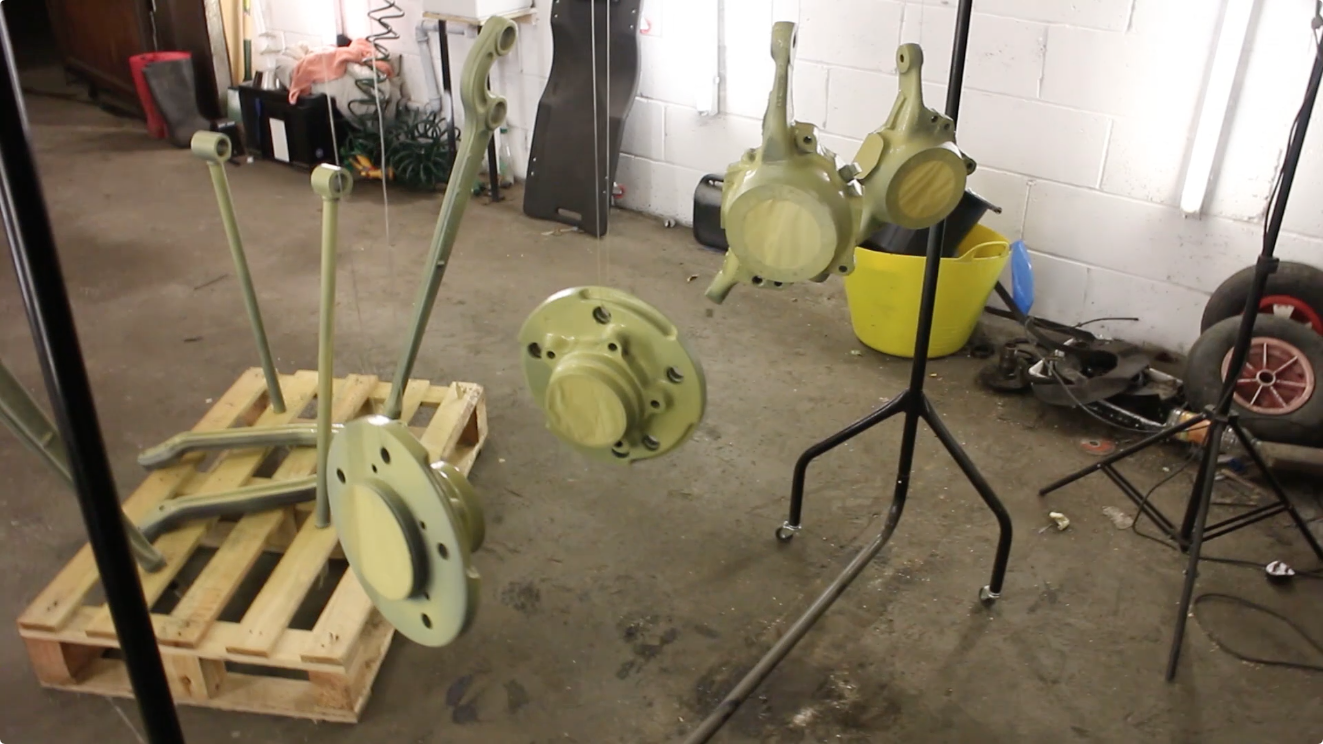
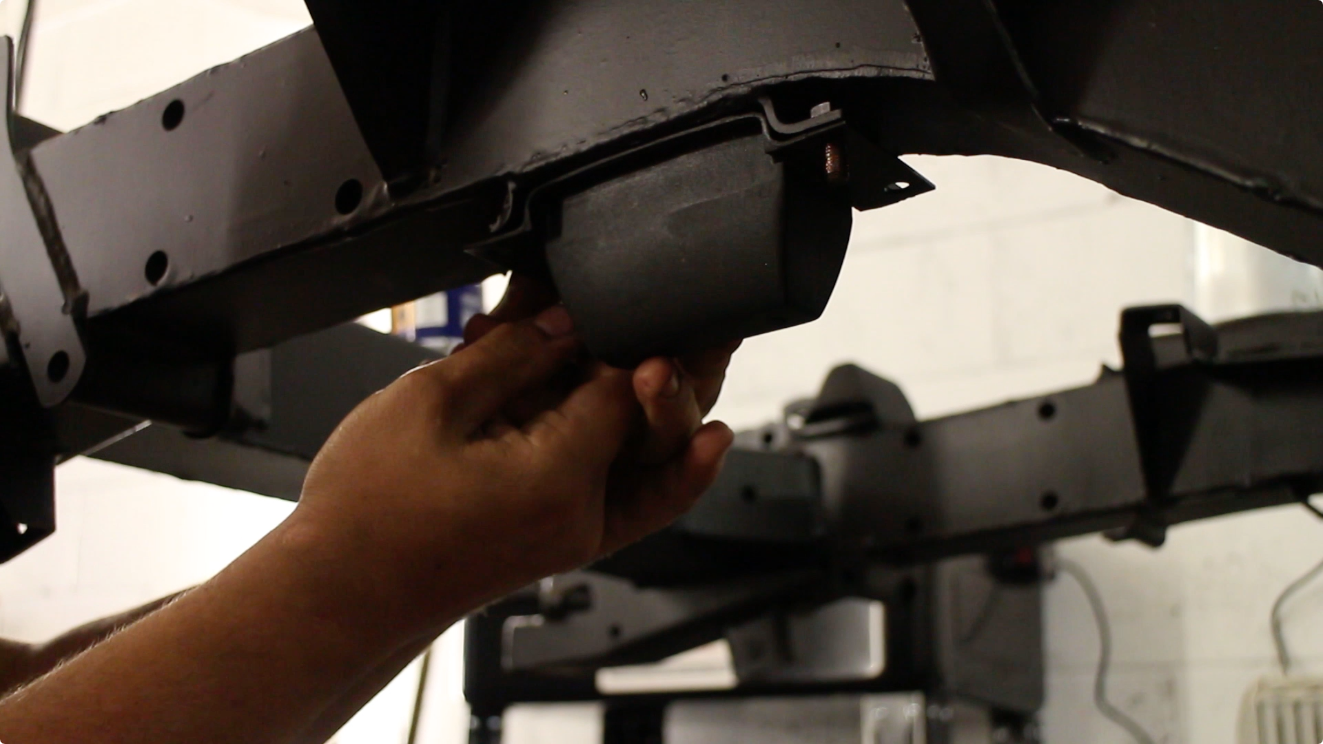
Finally, the bump stops were bolted on as the axles are ready to collect from the blasters - so we can get the whole lot rolling as soon as possible!
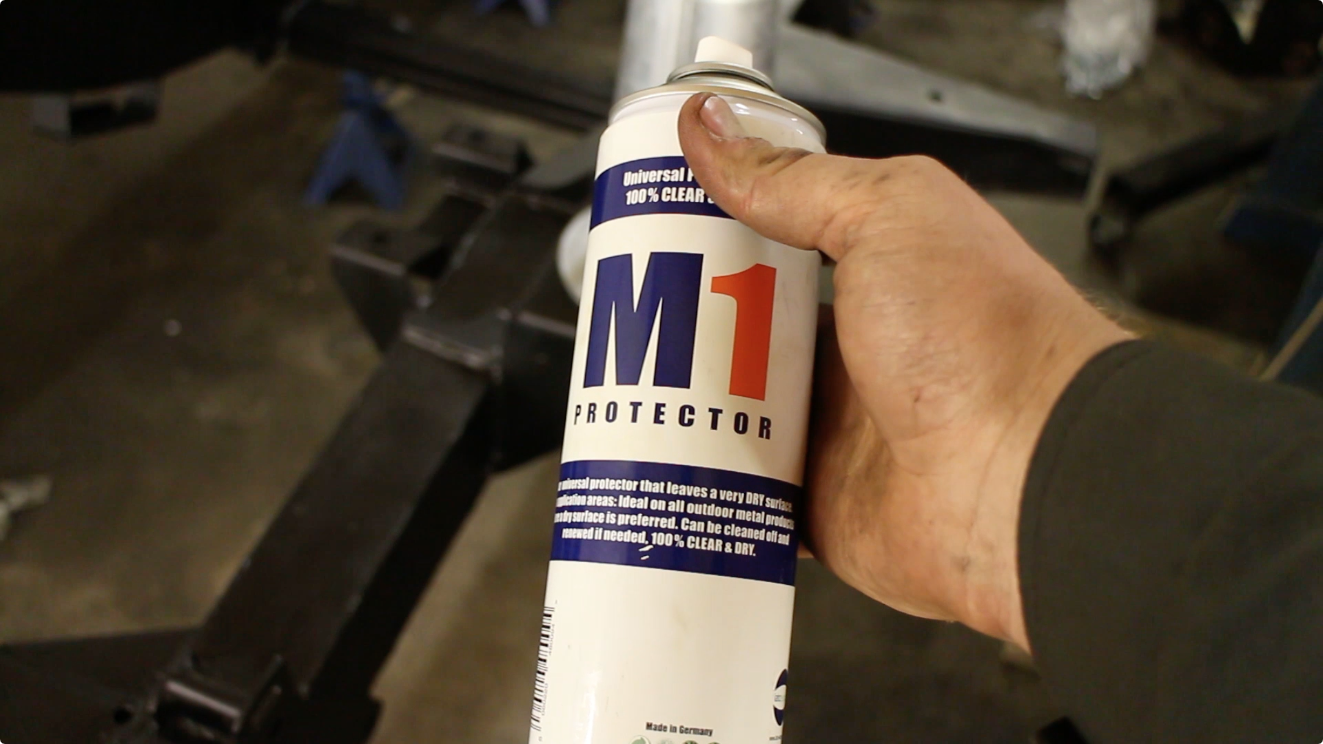
I took the time to treat each fixing with the M1 spray I discussed last episode - it will help in protecting the fixings from rusting.
Related items for sale on eBay
| Ebay has returned a malformed xml response. This could be due to testing or a bug in the RSS2 Generator. Please check the support forums to see if there are any posts regarding recent RSS2 Generator bugs. CURL error code = 6. (Could not resolve host: rest.ebay.com) |
About Us
FunRover is a place for Land Rover enthusiasts to gather as a community and discuss the best 4x4 vehicles ever produced. We're building a library of high quality resources & articles to help owners along in their Land Rover ownership.
Popular Posts
8 Almost Useless Land Rover Mods
11th June 2014
Updated: What Makes a Defender Iconic?
29th November 2011
How to Plastidip your Land Rover Defender
19th August 2014