
Ben Gribbin
January 12, 2016
Share post:


-

12K Subscribers
Subscribe
Search
Popular Articles
8 Almost Useless Land Rover Mods
11th June 2014
Updated: What Makes a Defender Iconic?
29th November 2011

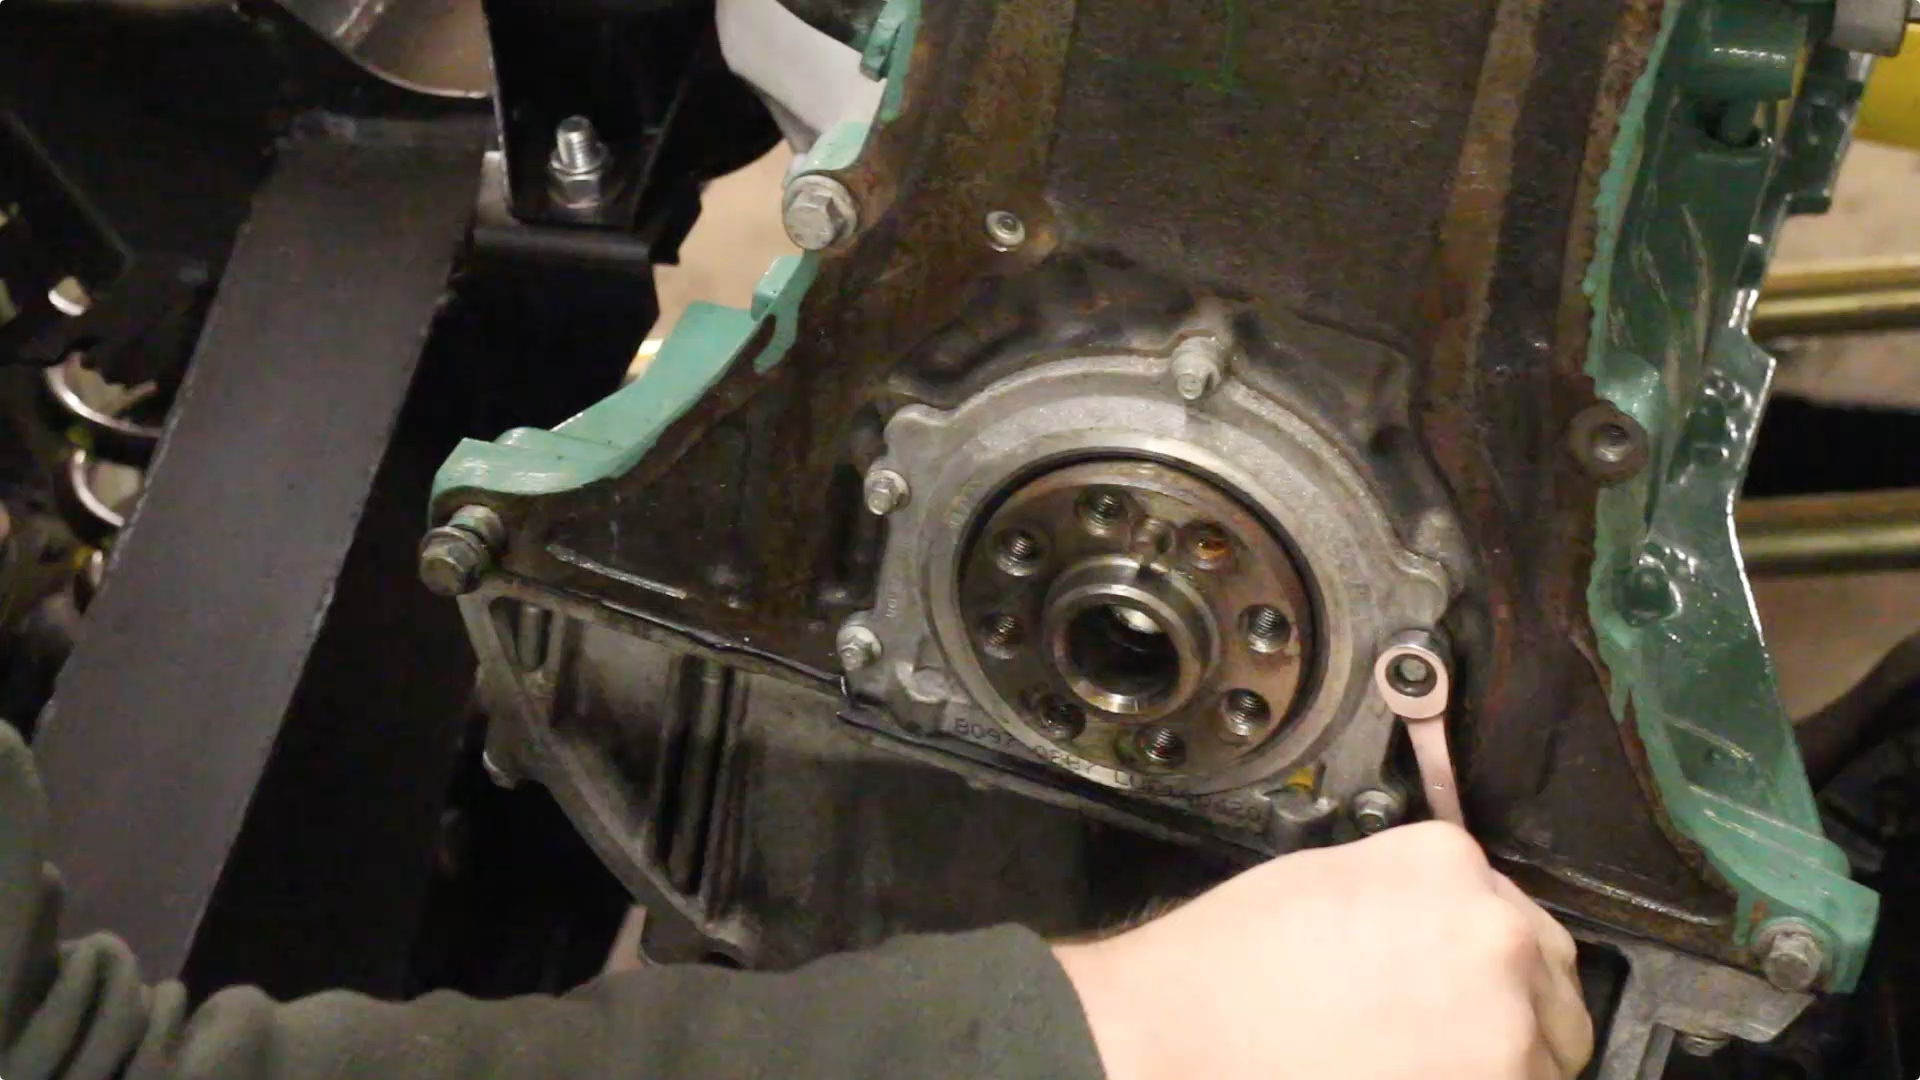
One of the many brilliant things about YouTube is that we can get feedback directly from our viewers. Some of these these comments are very useful (in fact we read and respond to every single one). One fan told us a woeful story when he had to remove his gearbox for a 2nd time after forgetting to change the rear crankshaft oil seal on a high mileage TD5. So a replacement was sort from LR Parts.
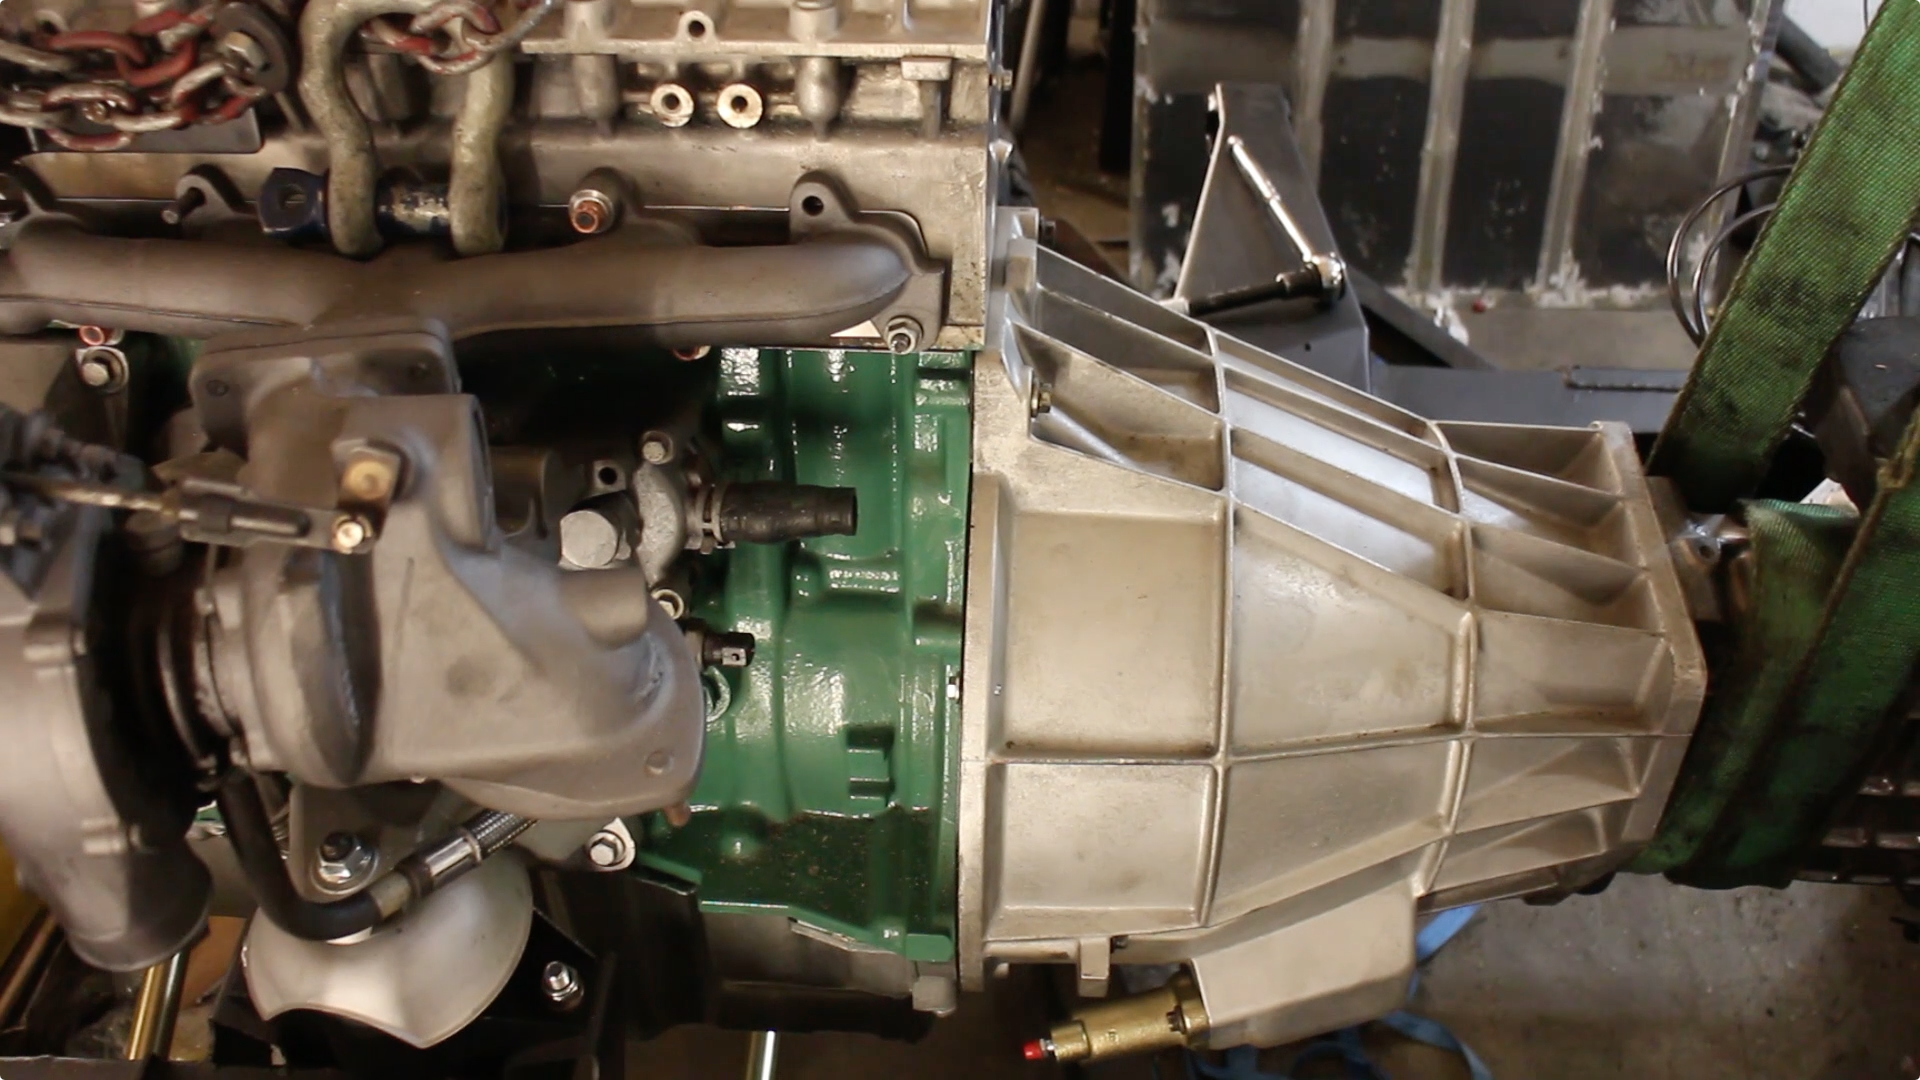
Once the new item was in place (see video for fitting), the spigot bush was pressed into place. This had been soaked in engine oil for a few days. This is an old school trick I read about that helps sintered bronze bushes (which are supposedly porous) to add extra lubrication to a material that is already self-lubricating. I've read of premature spigot bush failings and figured it was worth a shot. The rear of the engine block was cleaned up too.

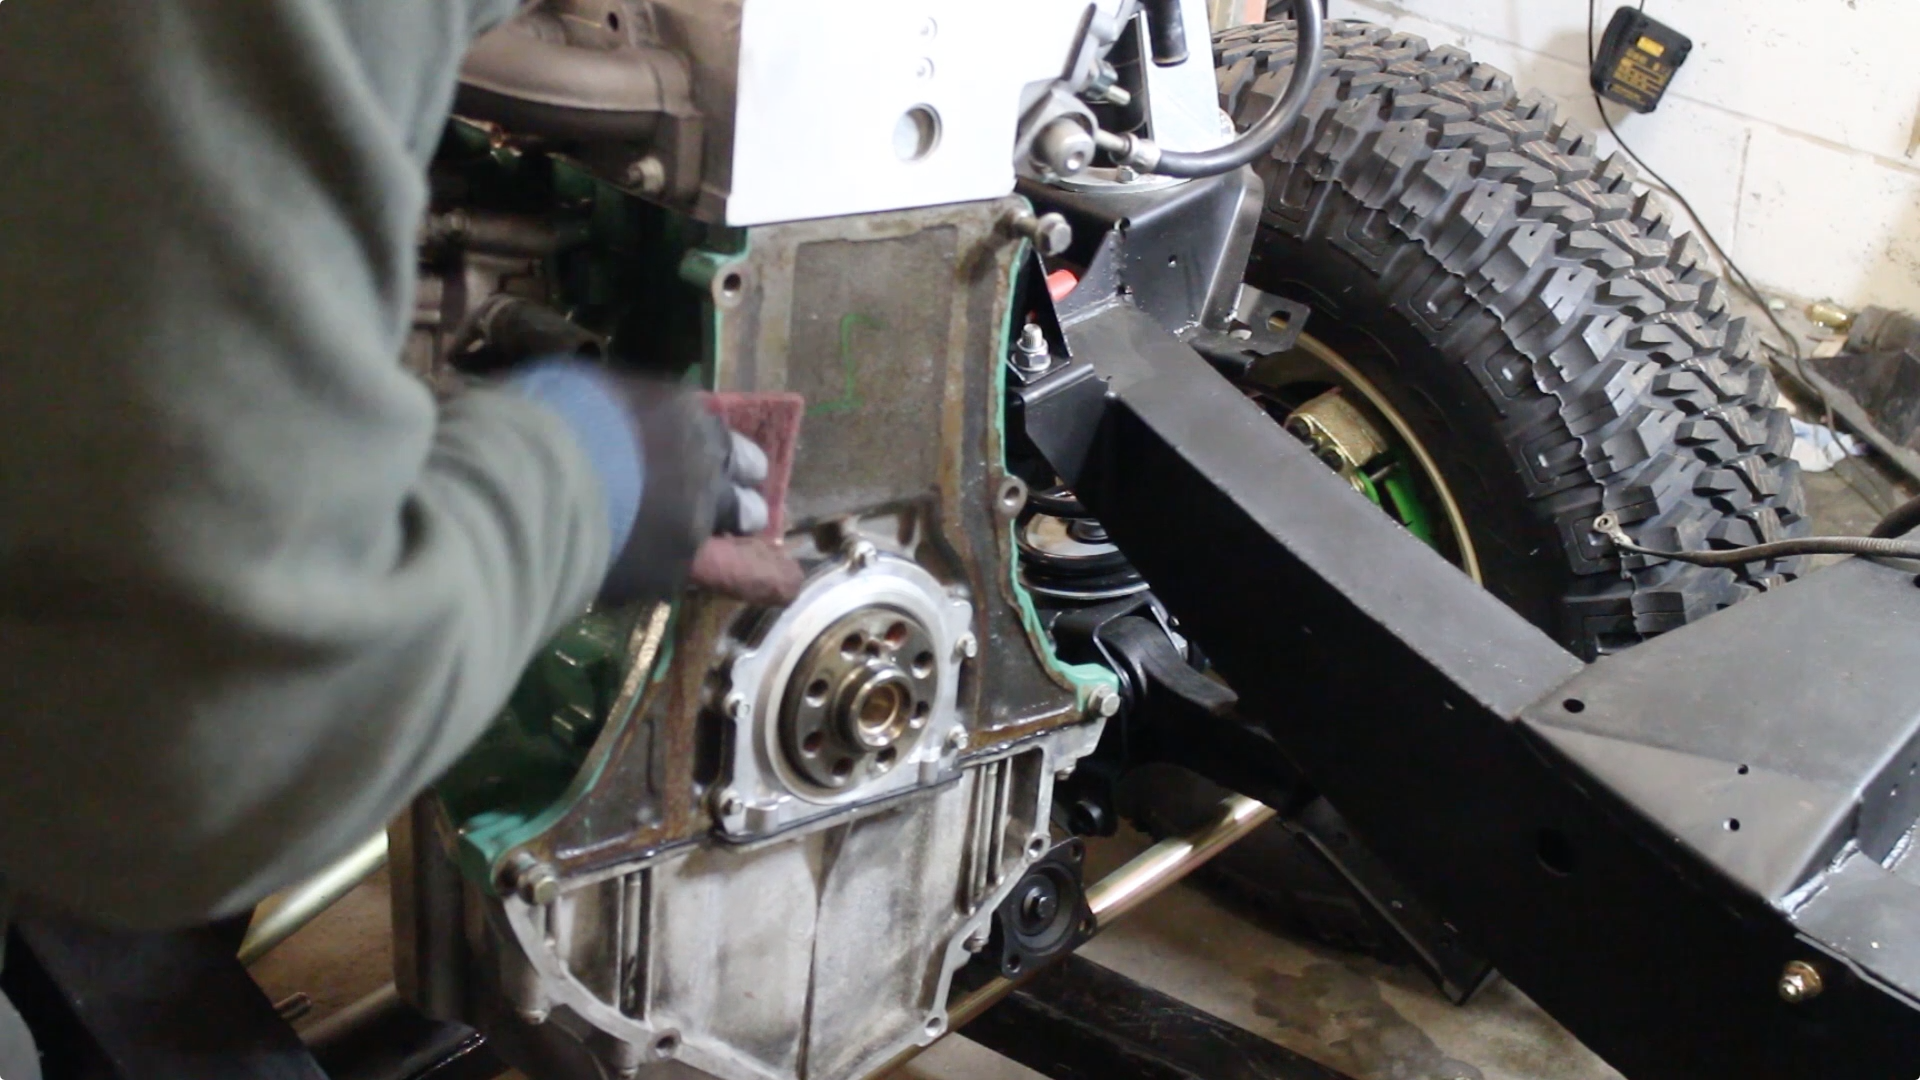
Once cleaned off, the gearbox shim plate / cover and DMF were fitted up. You can purchase a flywheel holder to fasten down the 2 stage bolts, or simply get someone else to hold it. The bolts are tightened up by diagonal selection (star pattern).
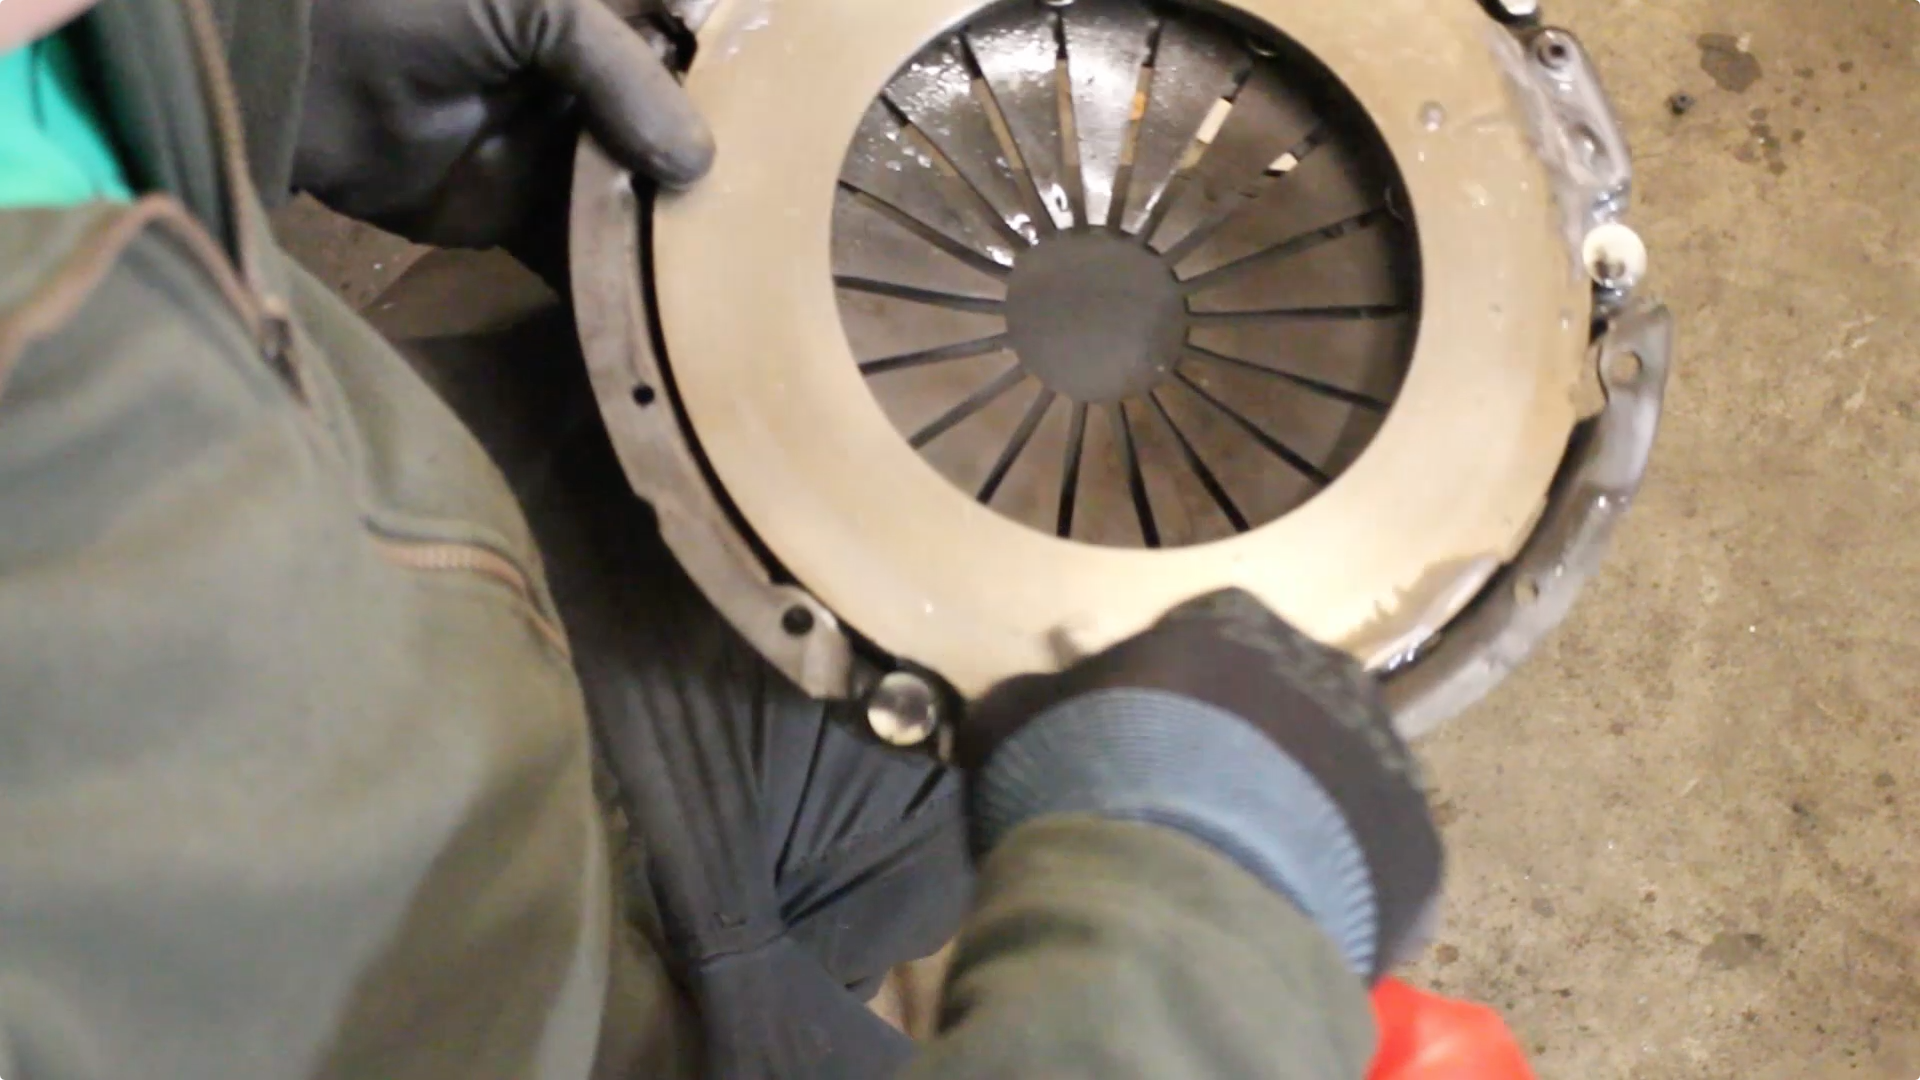
The clutch cover (and flywheel) were cleaned up using Brake & Clutch cleaner.
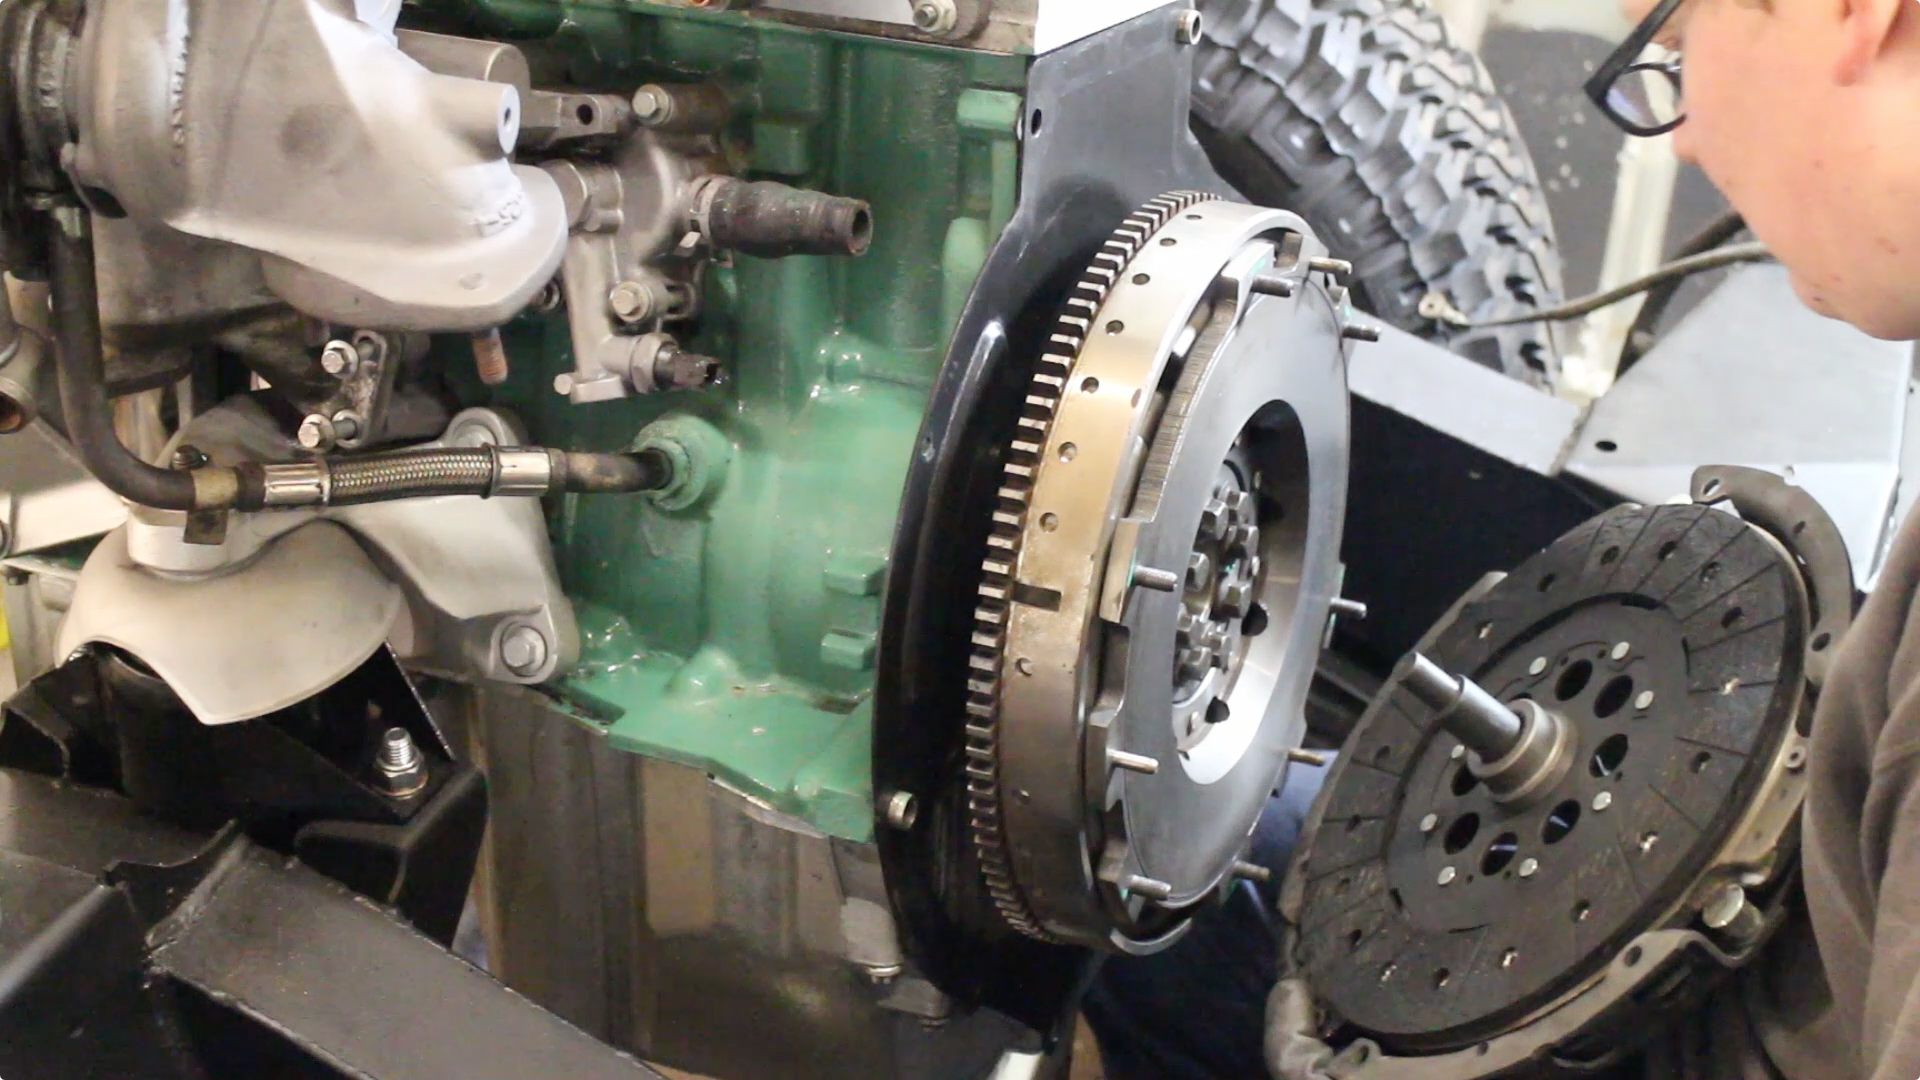
Using a clutch alignment tool (these are available on eBay at a good price), the clutch plate was offered up and correctly positioned.
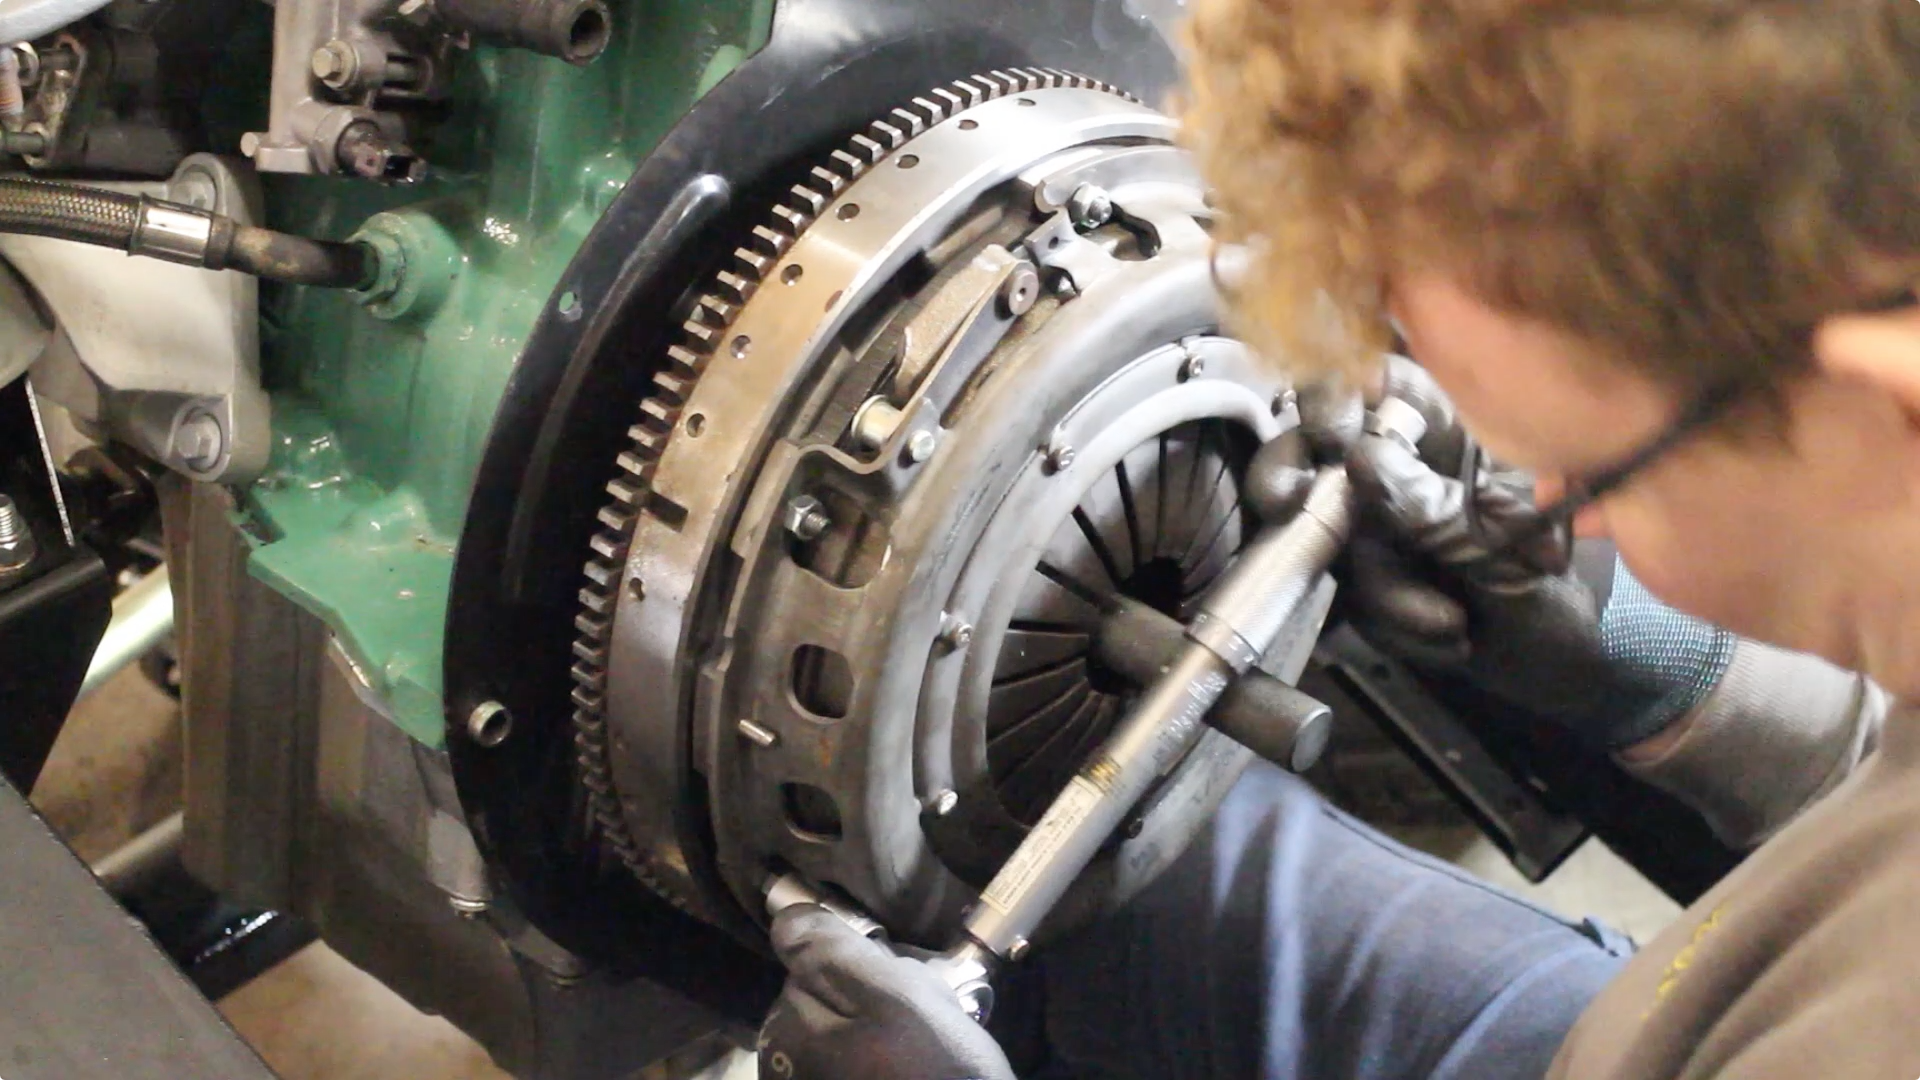
And the 3/8 torque wrench broken out to secure down the clutch cover
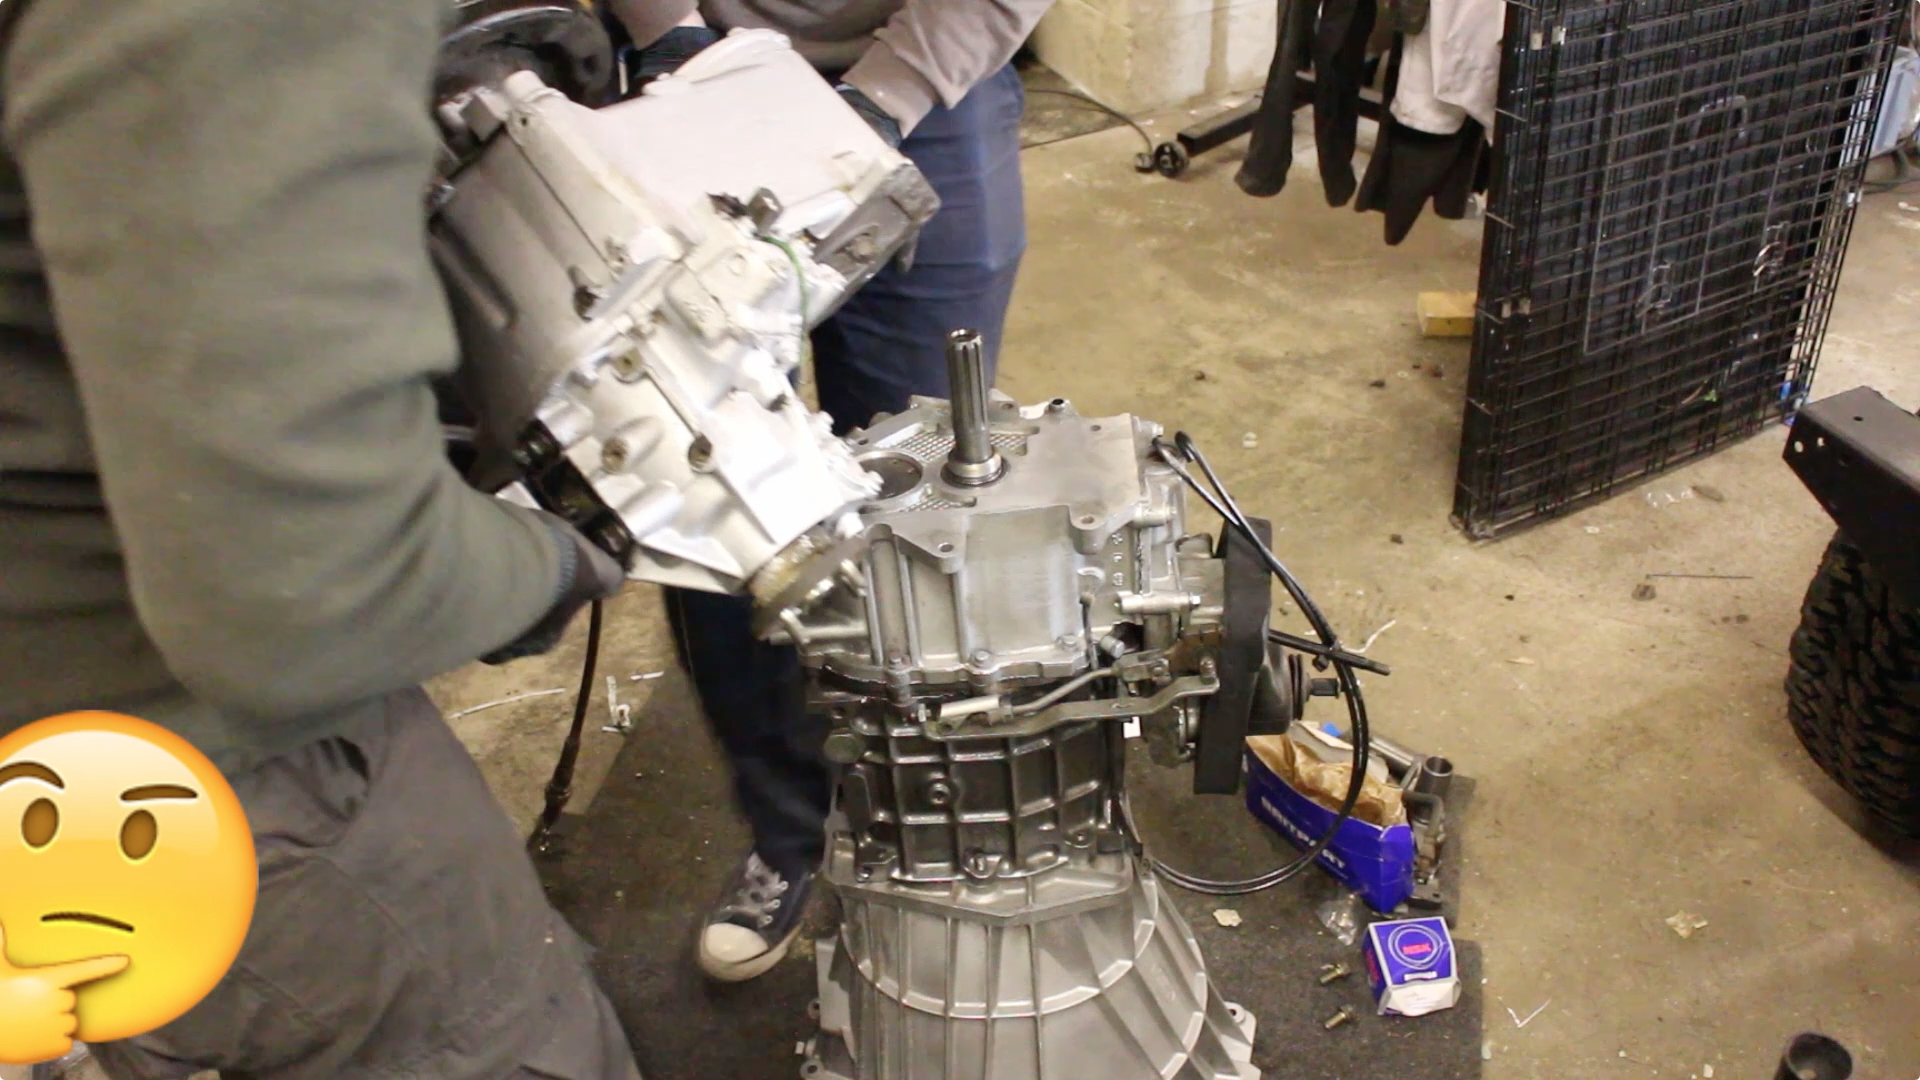
Moving onto the transfer box, this needed to be reunited with the reconditioned R380. I toyed with the idea of fitting a Discovery transfer box, with it's preferable ratio that offers lower revs at cruising speeds. On balance, I decided against fitting the disco box as I rarely go on substantial motorway trips to warrant such a change. This was most easily achieved by standing the gearbox on end, then square lifting the transfer box onto the output shaft of the gearbox.

Torque settings can be found in the manual. We'll re-finish the hand brake drum once the gearbox is in place, as it will undoubtedly get scratched during fitting.
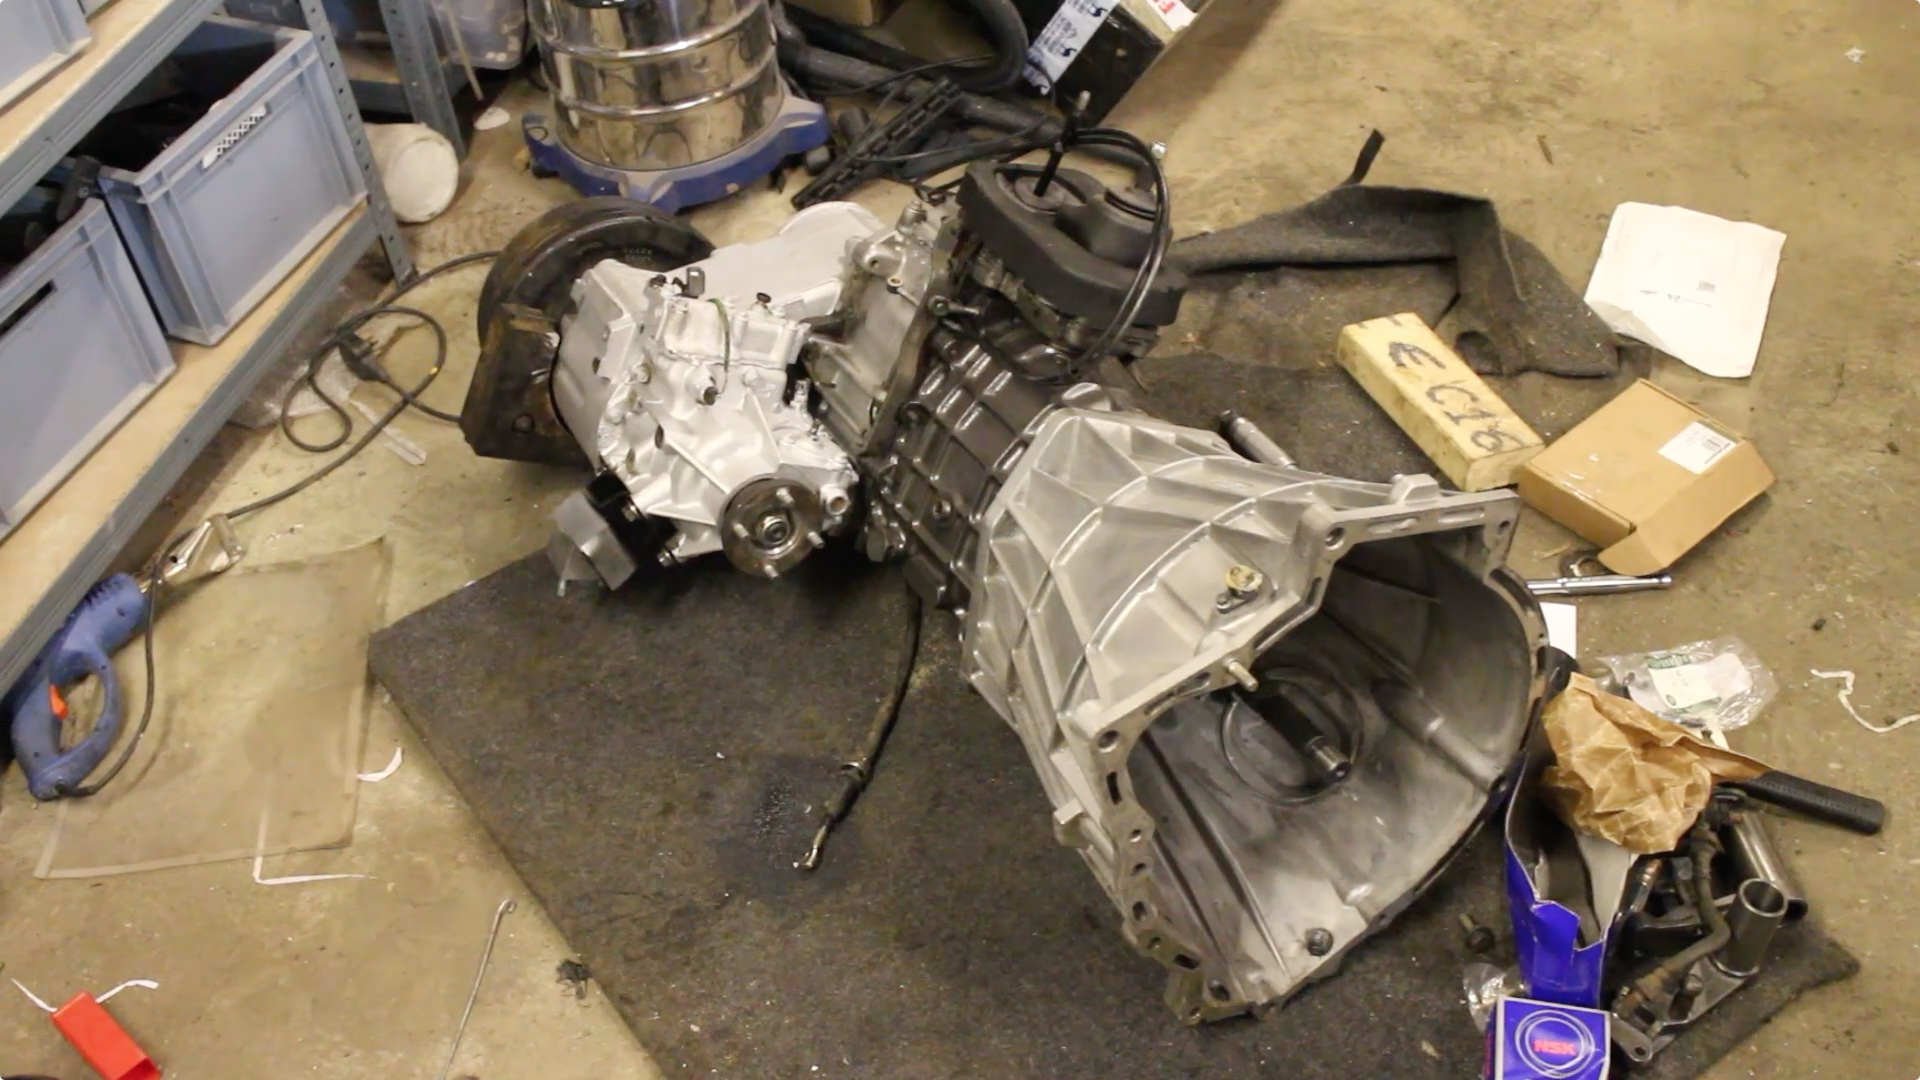
The gearbox and transfer box are joined once more! Incidentally, I've been making use of some carpeted plywood panels as assembly mats. We removed them from the 90 on disassembly, but they've proven useful at preventing newly painted components from getting marked and scuffed up.
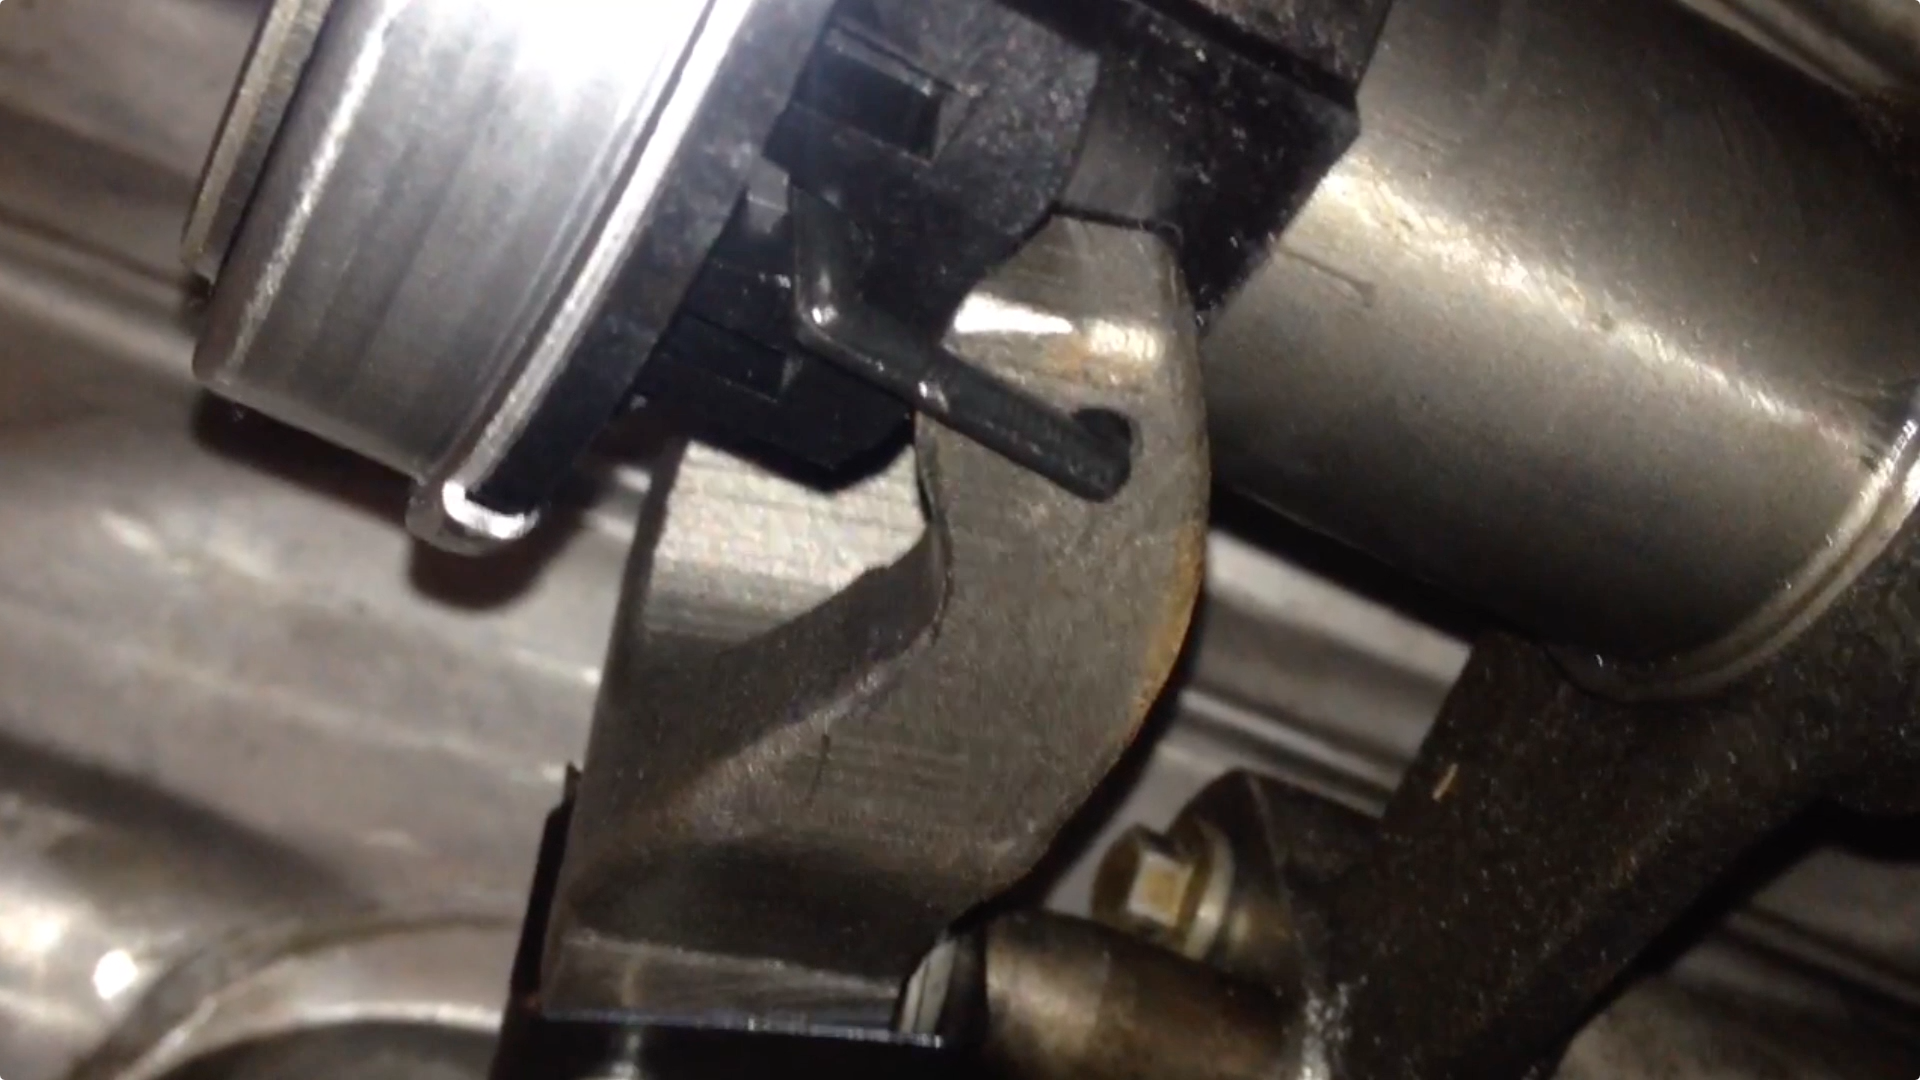
We next fitted the clutch release bearing guide (of which I now have 3, thanks to ordering one part that was completely wrong and losing my original one and then finding it a few days later). The clutch fork, push rod and clips such as this one above that prevent the whole lot from dislodging and destroying the clutch plate, were secured also. Molybdenum grease was used in appropriate areas.
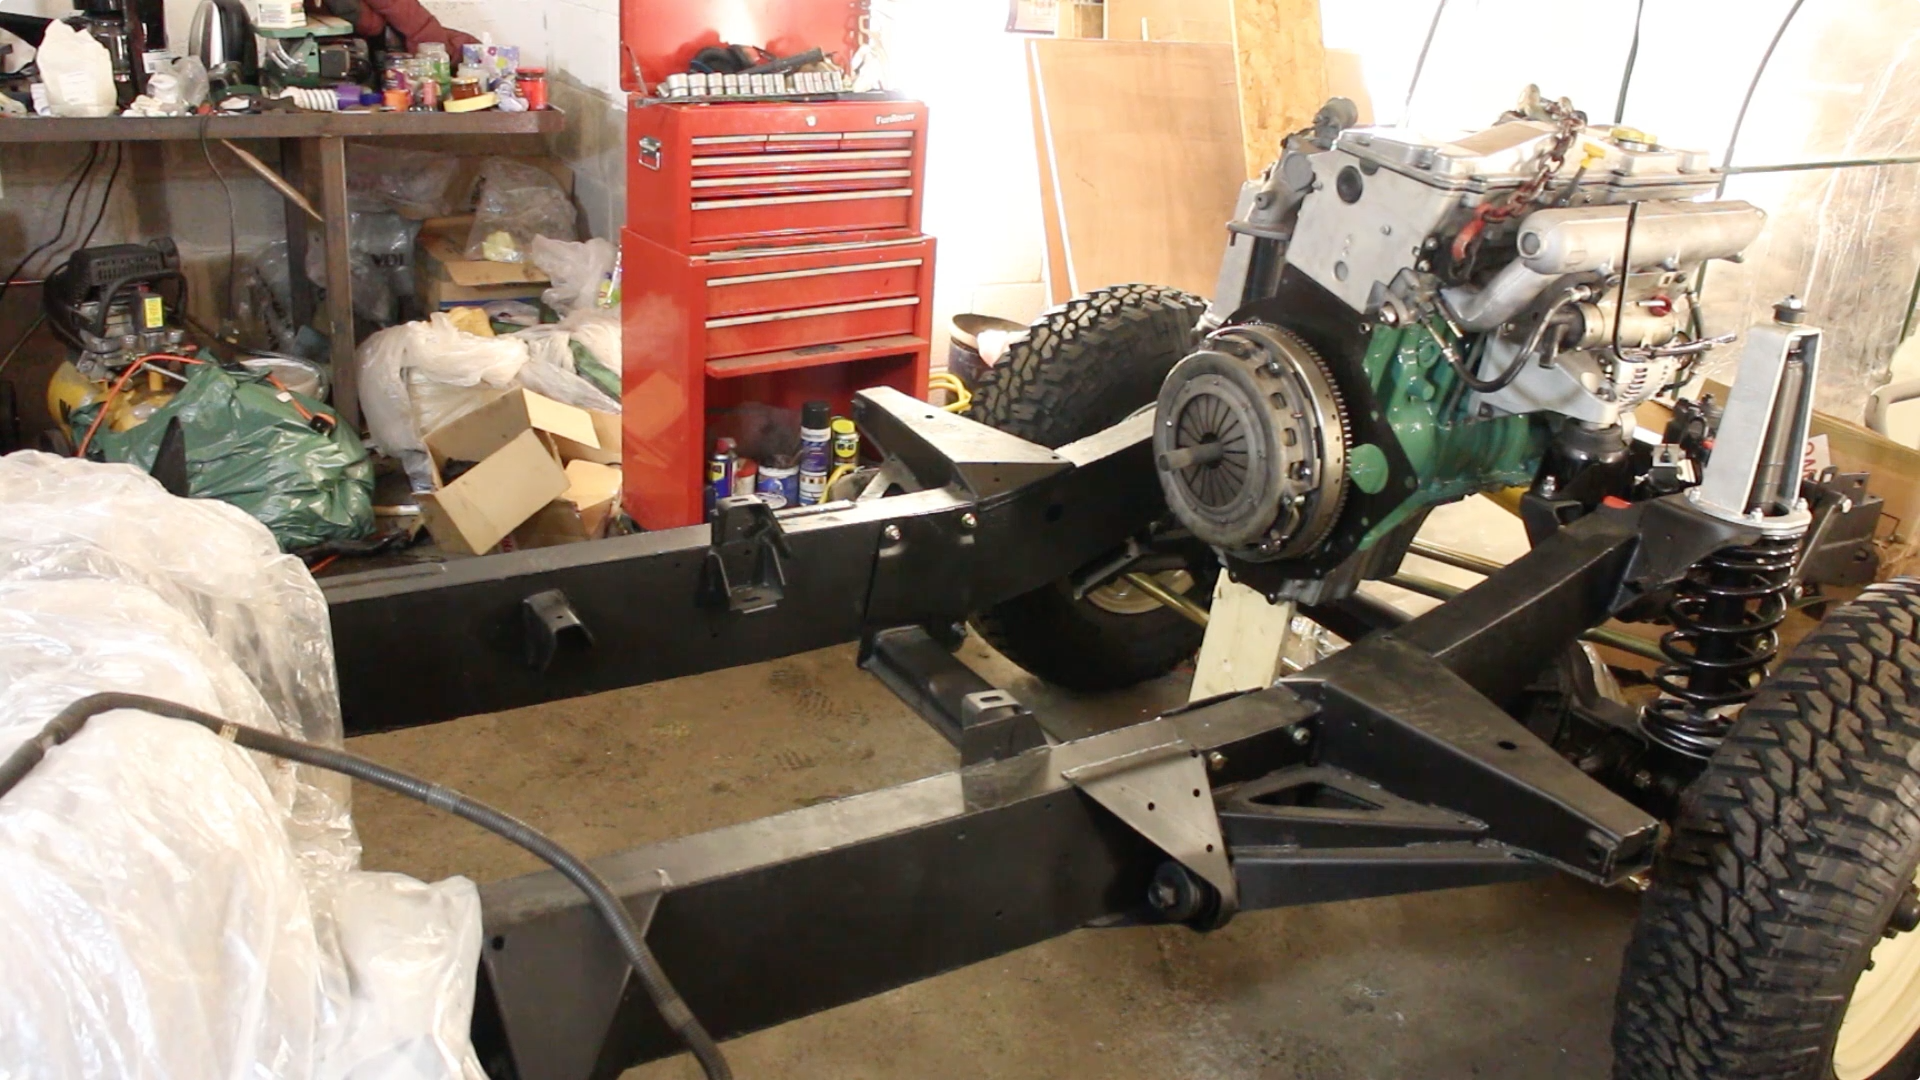
The engine ready to receive the gearbox /transfer box assembly.

An engine crane is worth it's weight in gold here. A second pair of hands (thanks Phil, he always brings biscuits!) make lighter work of aligning the box, as does a high lift trolley jack to fine tune positioning. Strap the gearbox to the crane as though the bell housing wasn't present as this weighs almost nothing. Try go diagonally across the gearbox casing and transfer box to get as level a lift as possible.
Reconditioned gearbox meets the engine for the first time! Meshing the splines together was a little tricky and took a while, but once done, it's very satisfying! Need to fire some oil in both of those now. I'm going to run some cheap oil through both to flush them out (just in case)
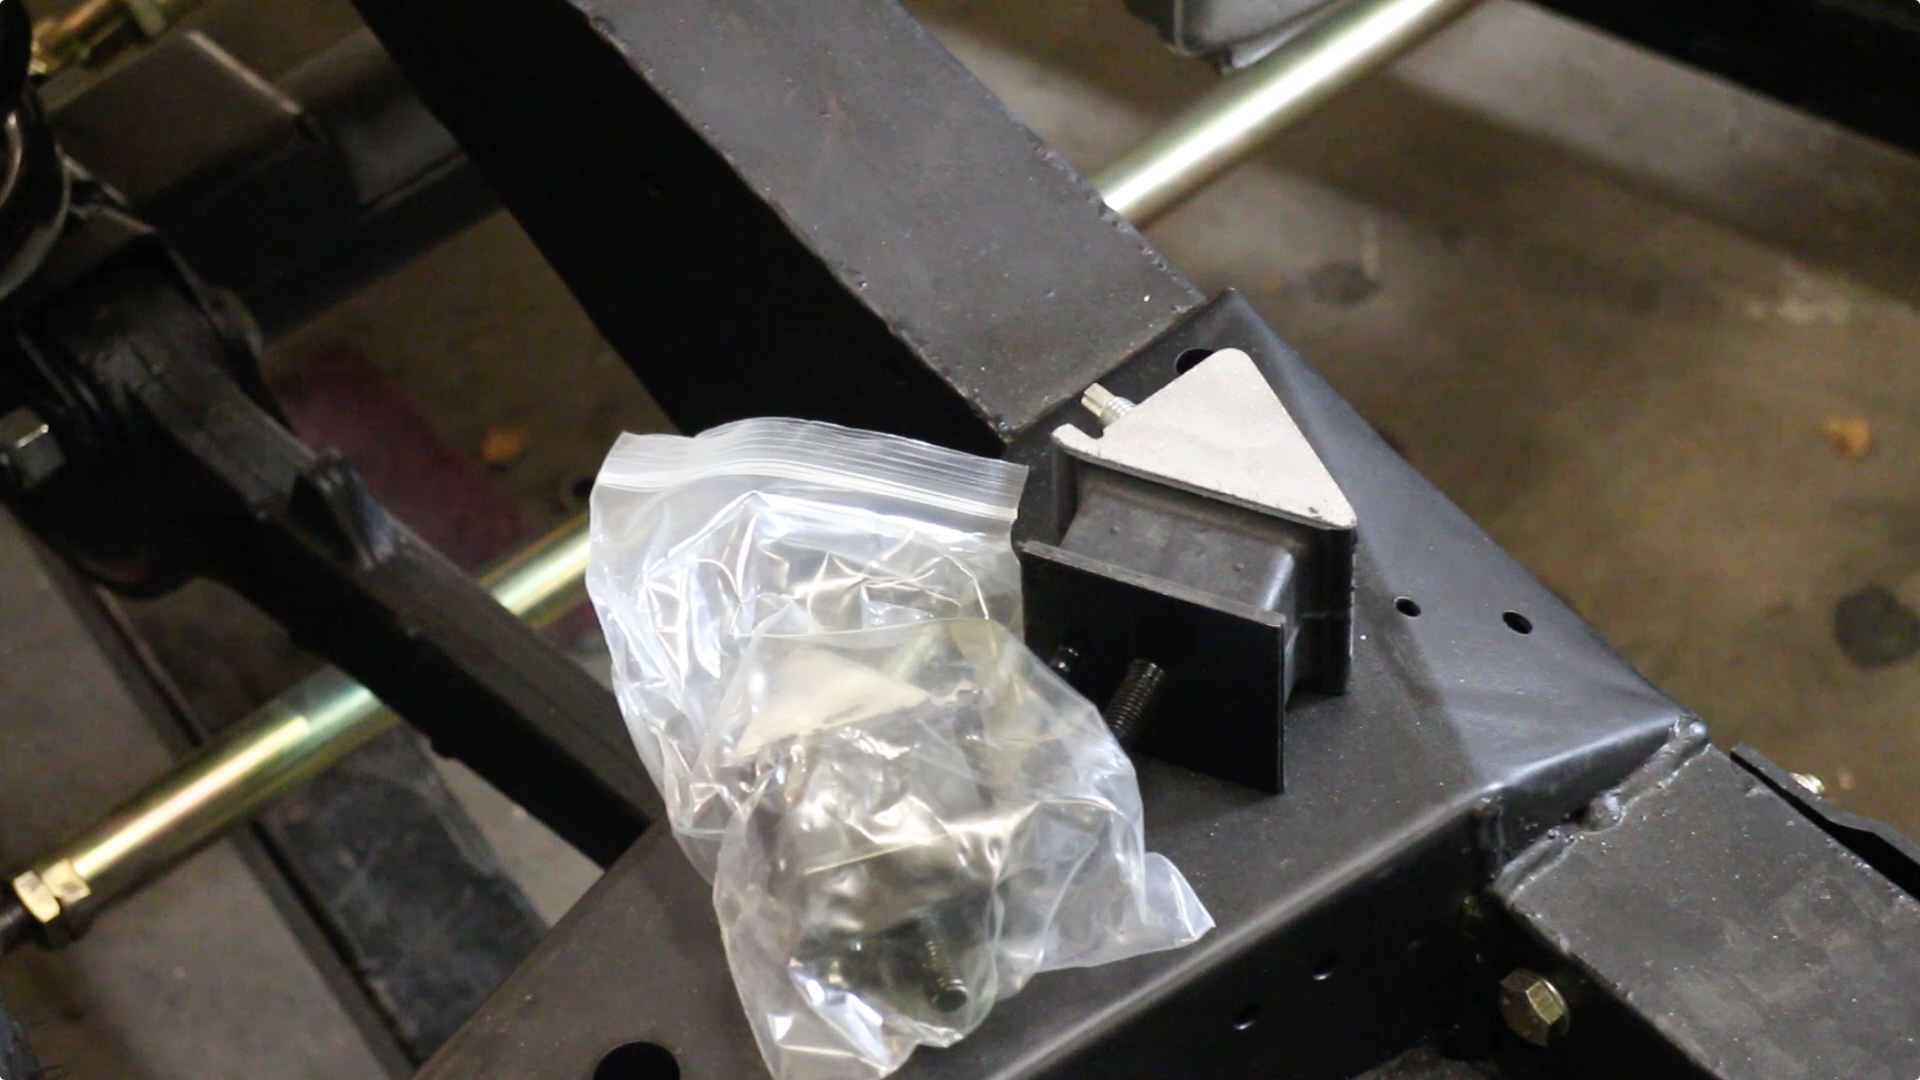
Took the chance to renew the gearbox mounts whilst I had access. These are OEM replacements.
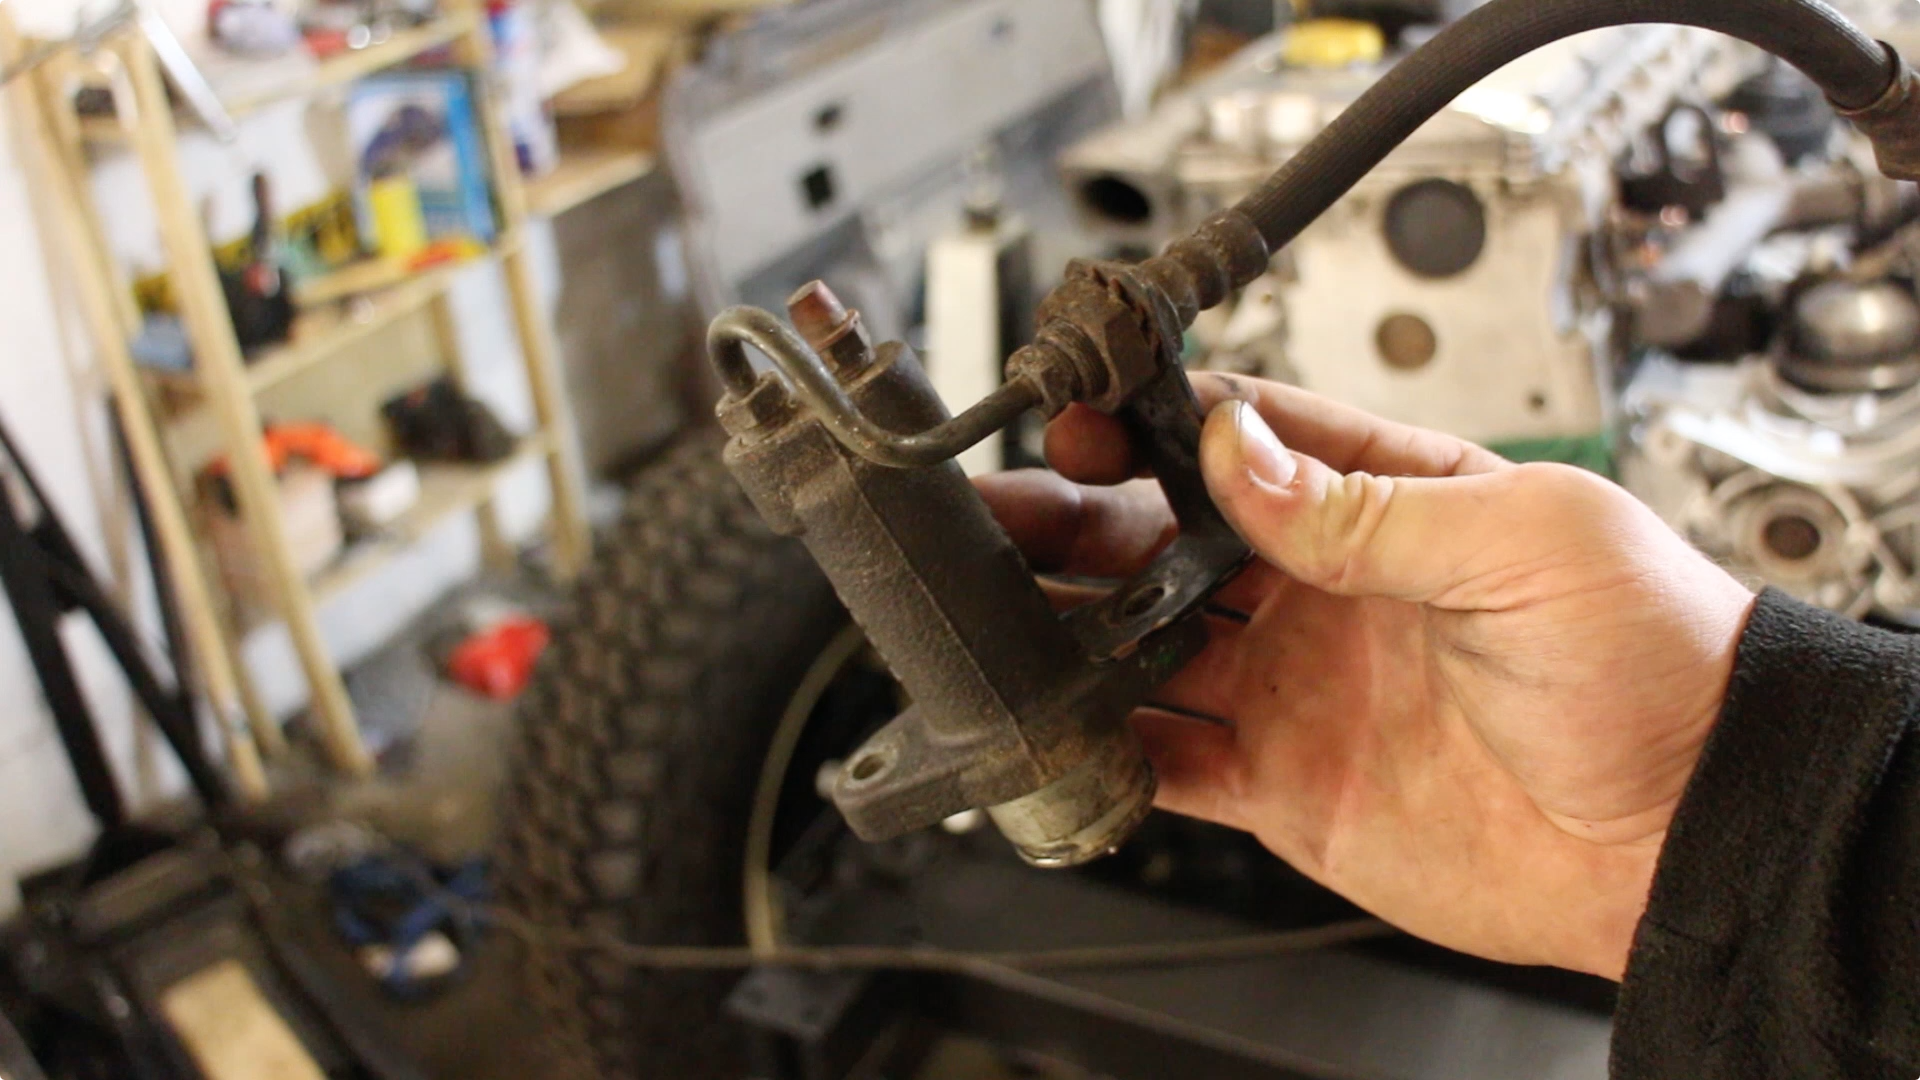
The slave cylinder and associated pipes were looking worse for wear. It was decided to replace them as the cost isn't particularly prohibitive and it's an easy job.

The only original parts saved were the bracket and the nuts (albeit, cleaned up on the wire wheel and the bracket was sanded and painted). I've popped a pen lid on there to stop any dirt from the ceiling dropping in (there's a shop above mine and when they walk around, tiny specs of chipboard dust fall everywhere)

Once that's sorted, I can put my new props on. In the end, the decision came down to either reconditioning the old ones, replacing them with large and expensive HD ones or just purchasing new OEM ones. I chose OEM ones from Britpart as I've been told these are produced by Hardy Spicer (well, GKN as they bought out HS apparently). Time will tell if this was the right decision. Fitting the props is made easier if you jack up one wheel, allowing the transmission to freely rotate.
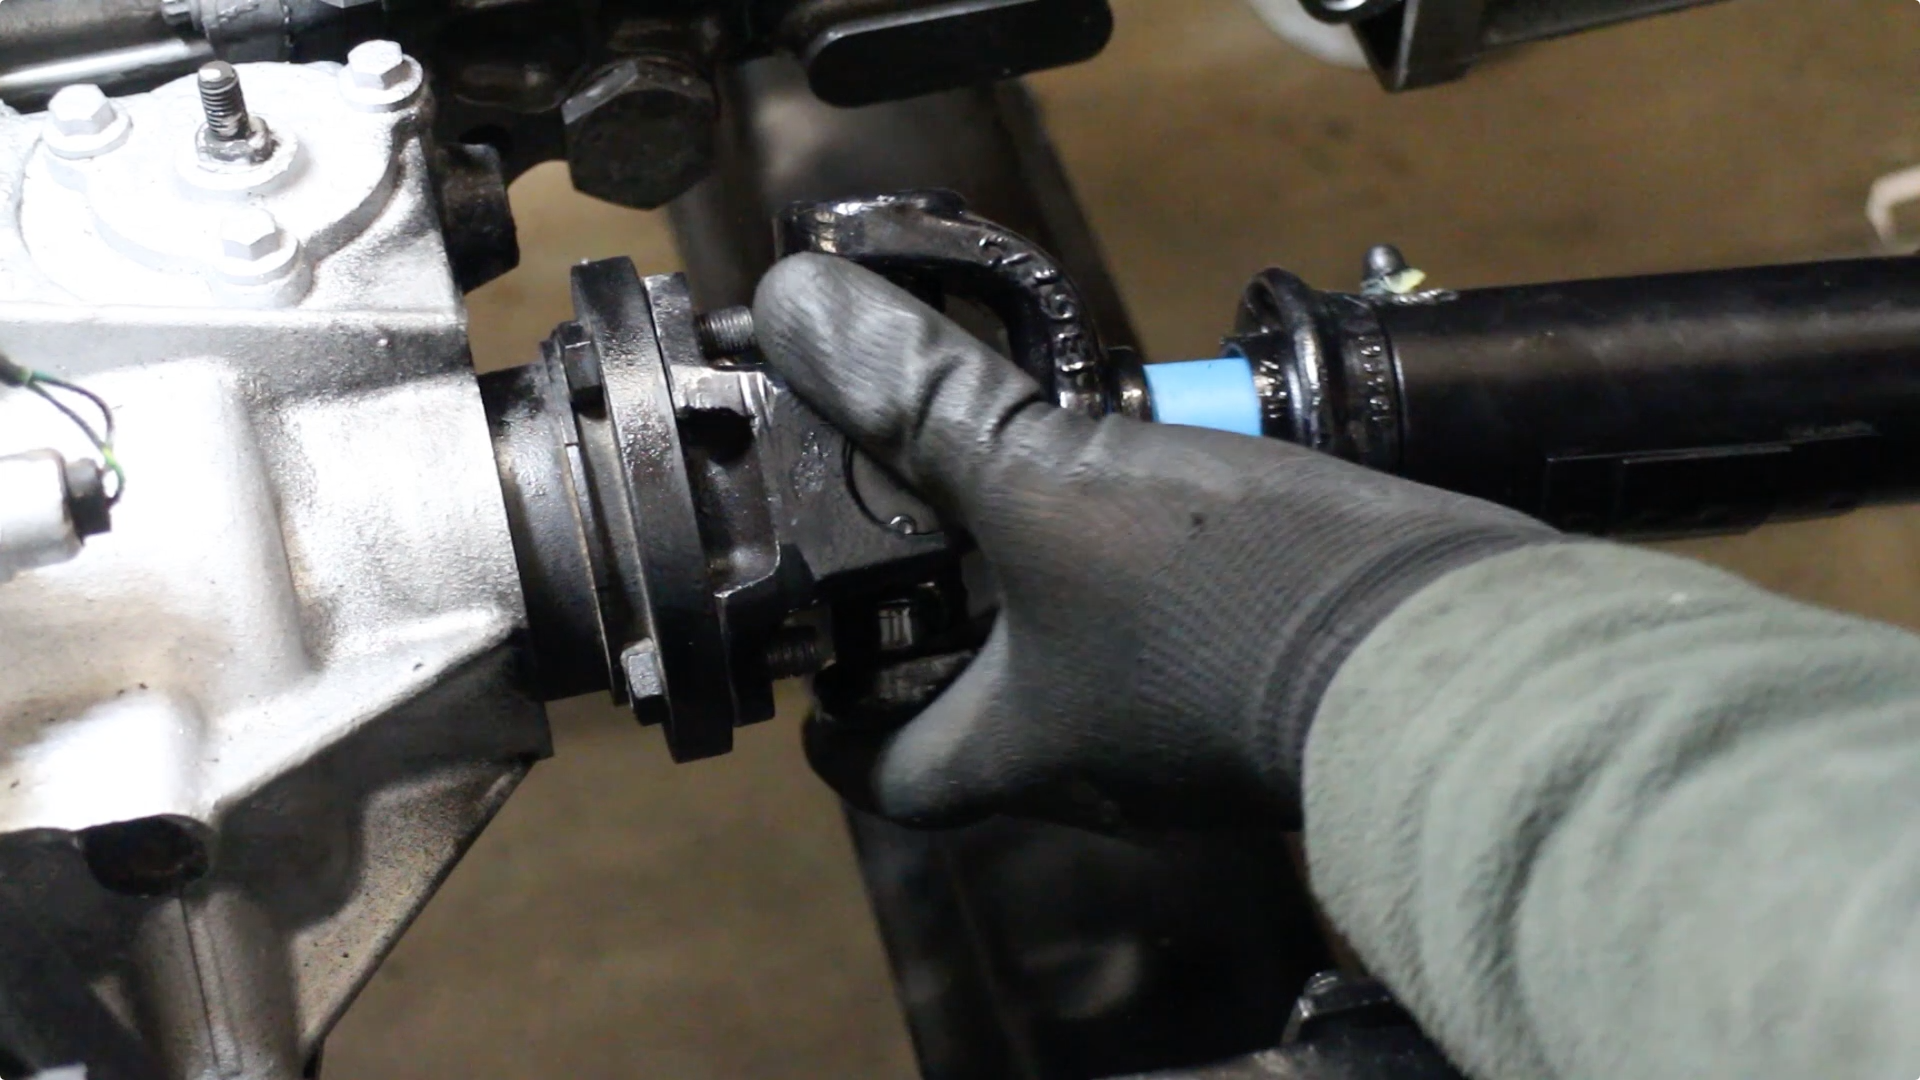
I'll grease those UJs and props again before running the vehicle, once offered up, fixings were lightly greased to prevent seizing up, and torqued down to 48nm. A propshaft socket is very handy here, you'll also need a 9/16 spanner (some owners make a 14mm combination work, though this isn't quite the right size and can cause nut rounding)

Props in place
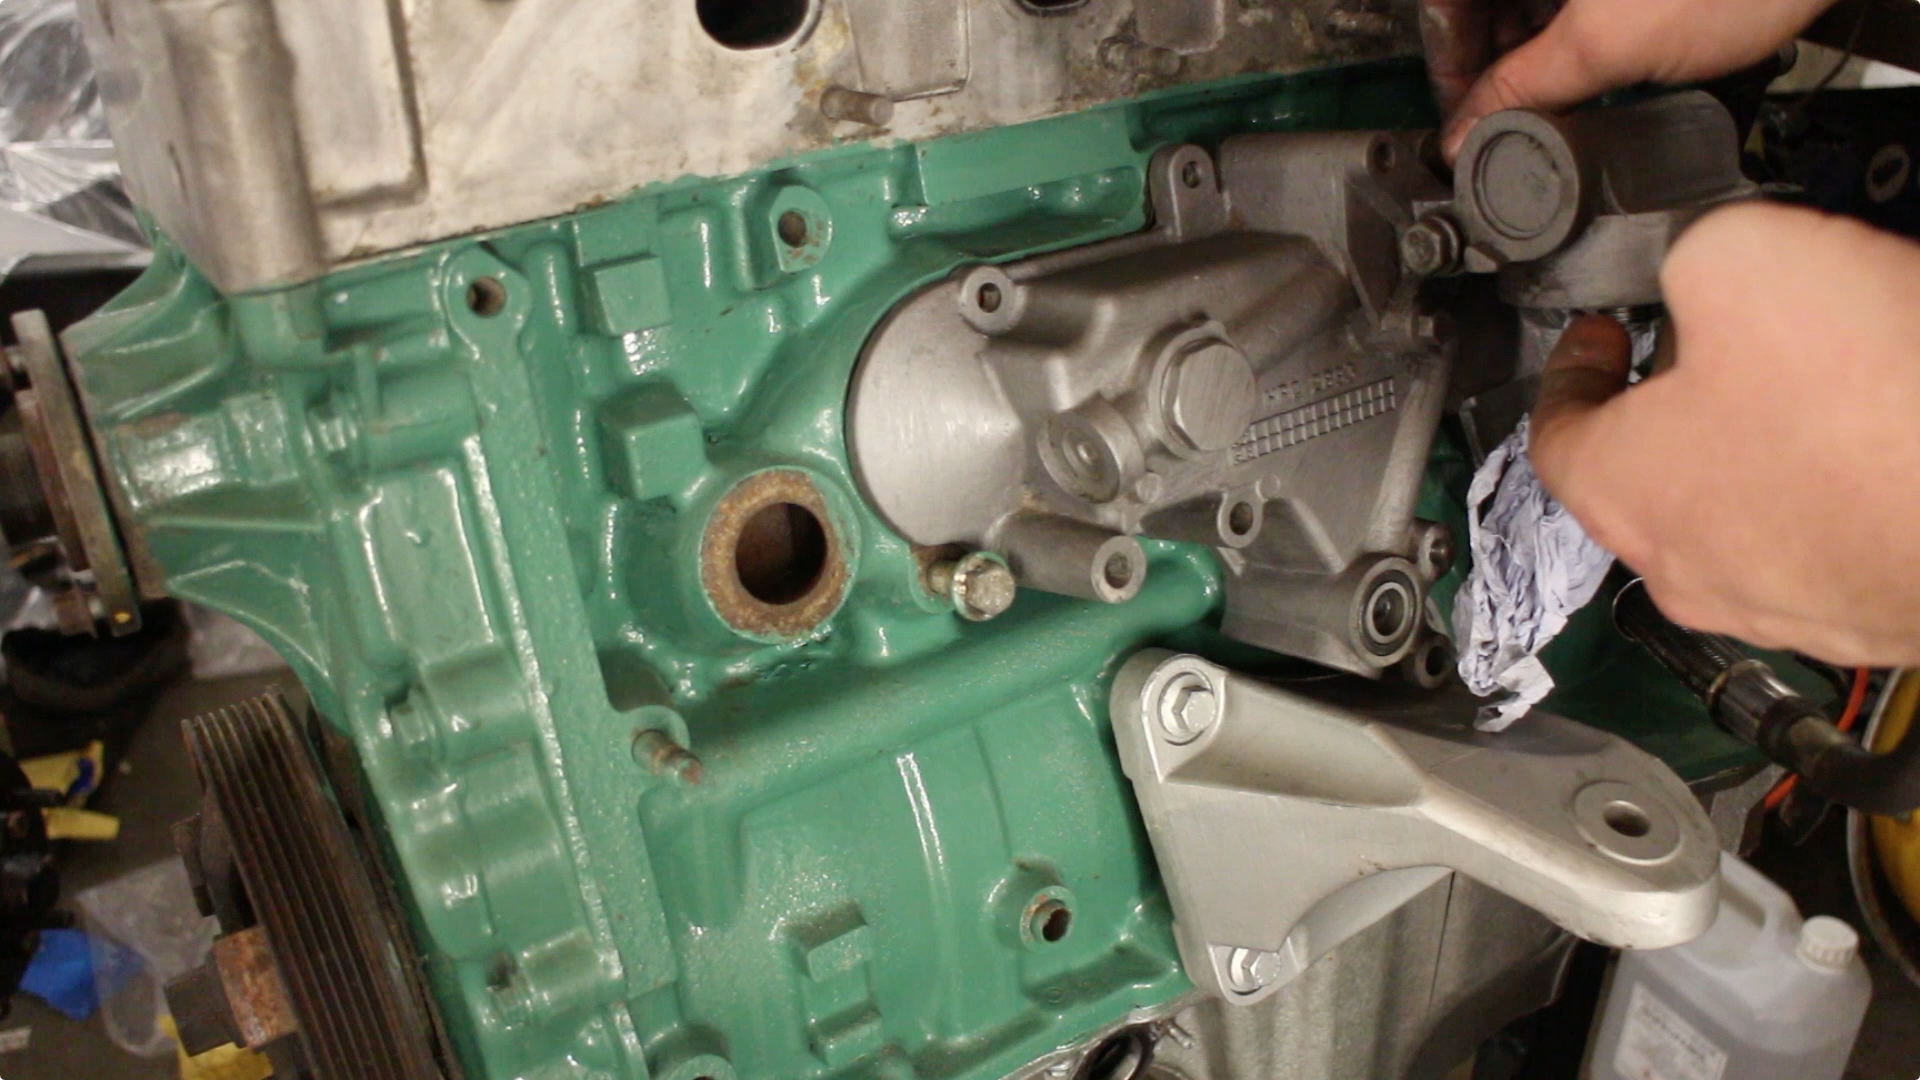
I've fitted the oil cooler, however some owners have contacted me suggesting an upgrade to this area - will feature that in a coming episode.
I managed to accidentally format my SD card the other week, losing a lot of engine re-assmebly clips! And a rather humorous one of me putting the inlet manifold into a dishwasher, before the dishwasher began to spew diesel and oil bubbles all over the kitchen. The wife, needless to say, wasn't impressed.
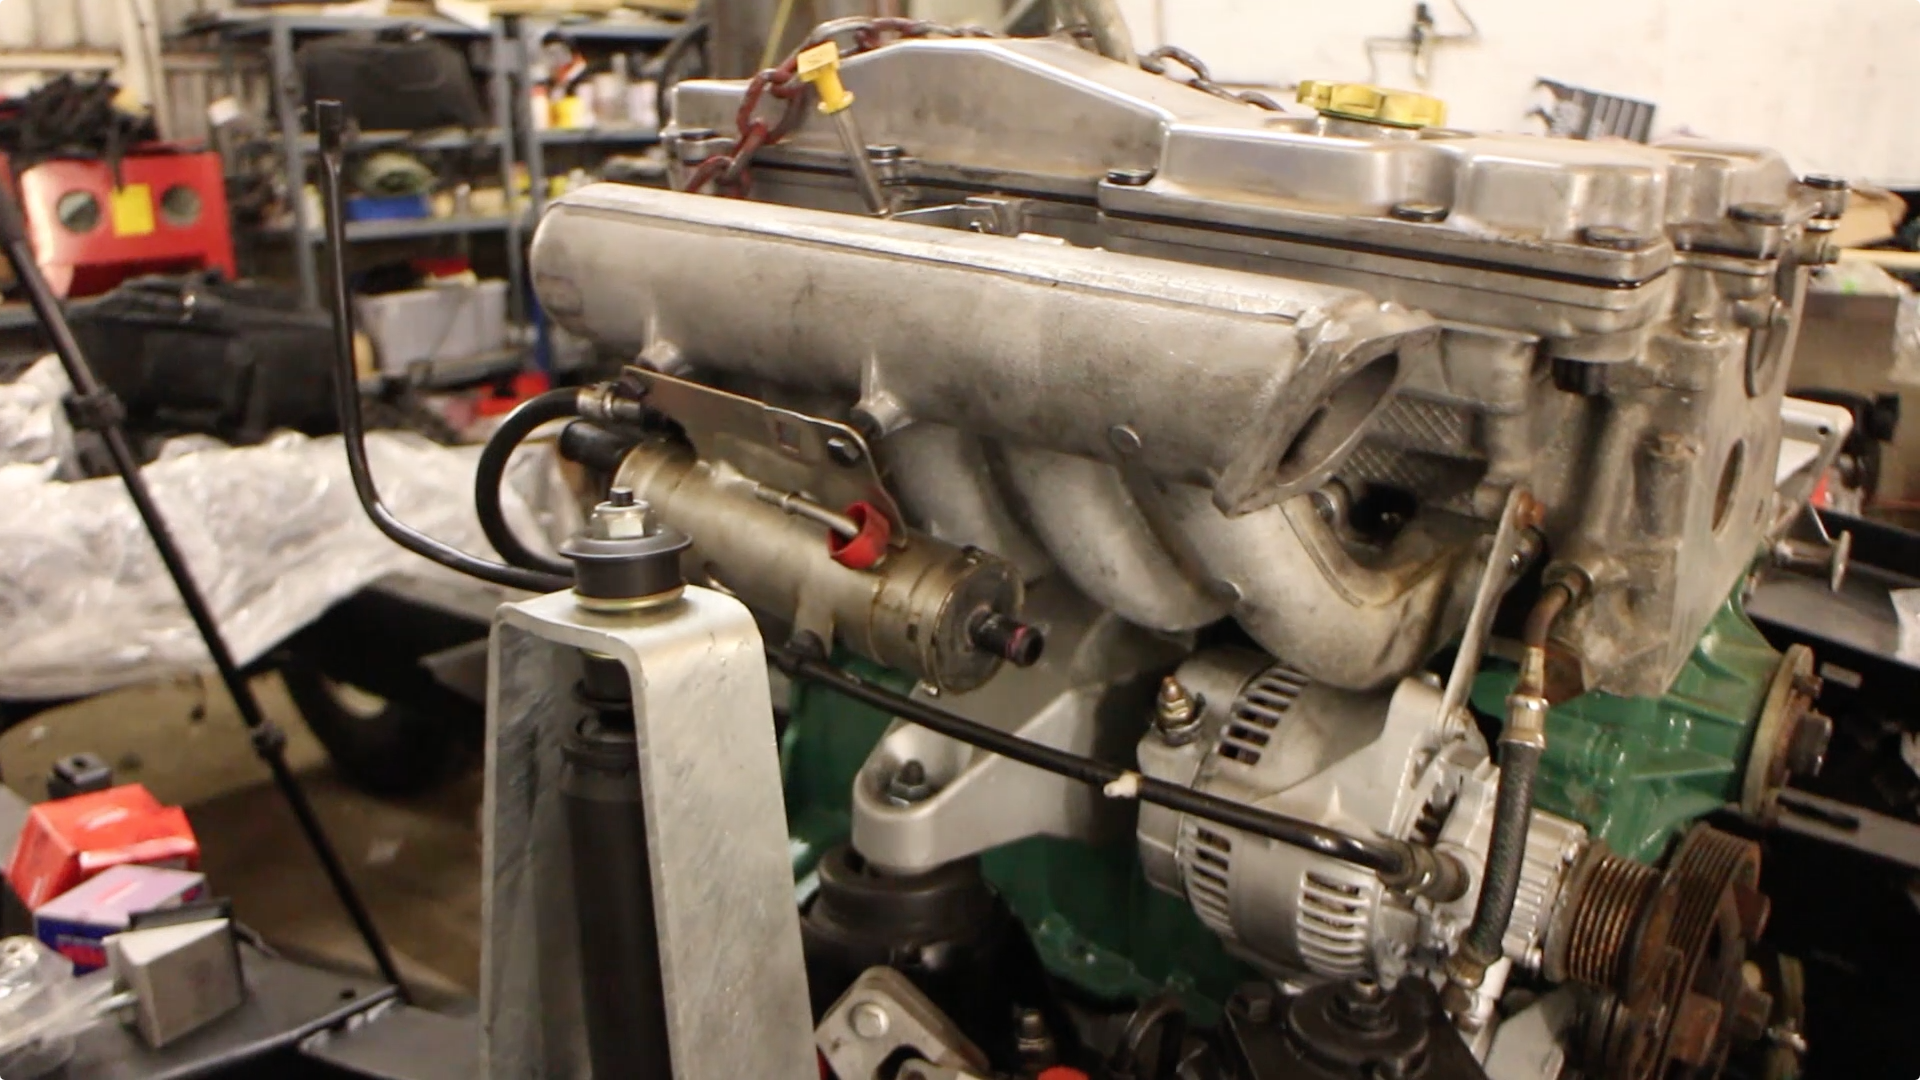
Inlet manifold and fuel cooler in position.
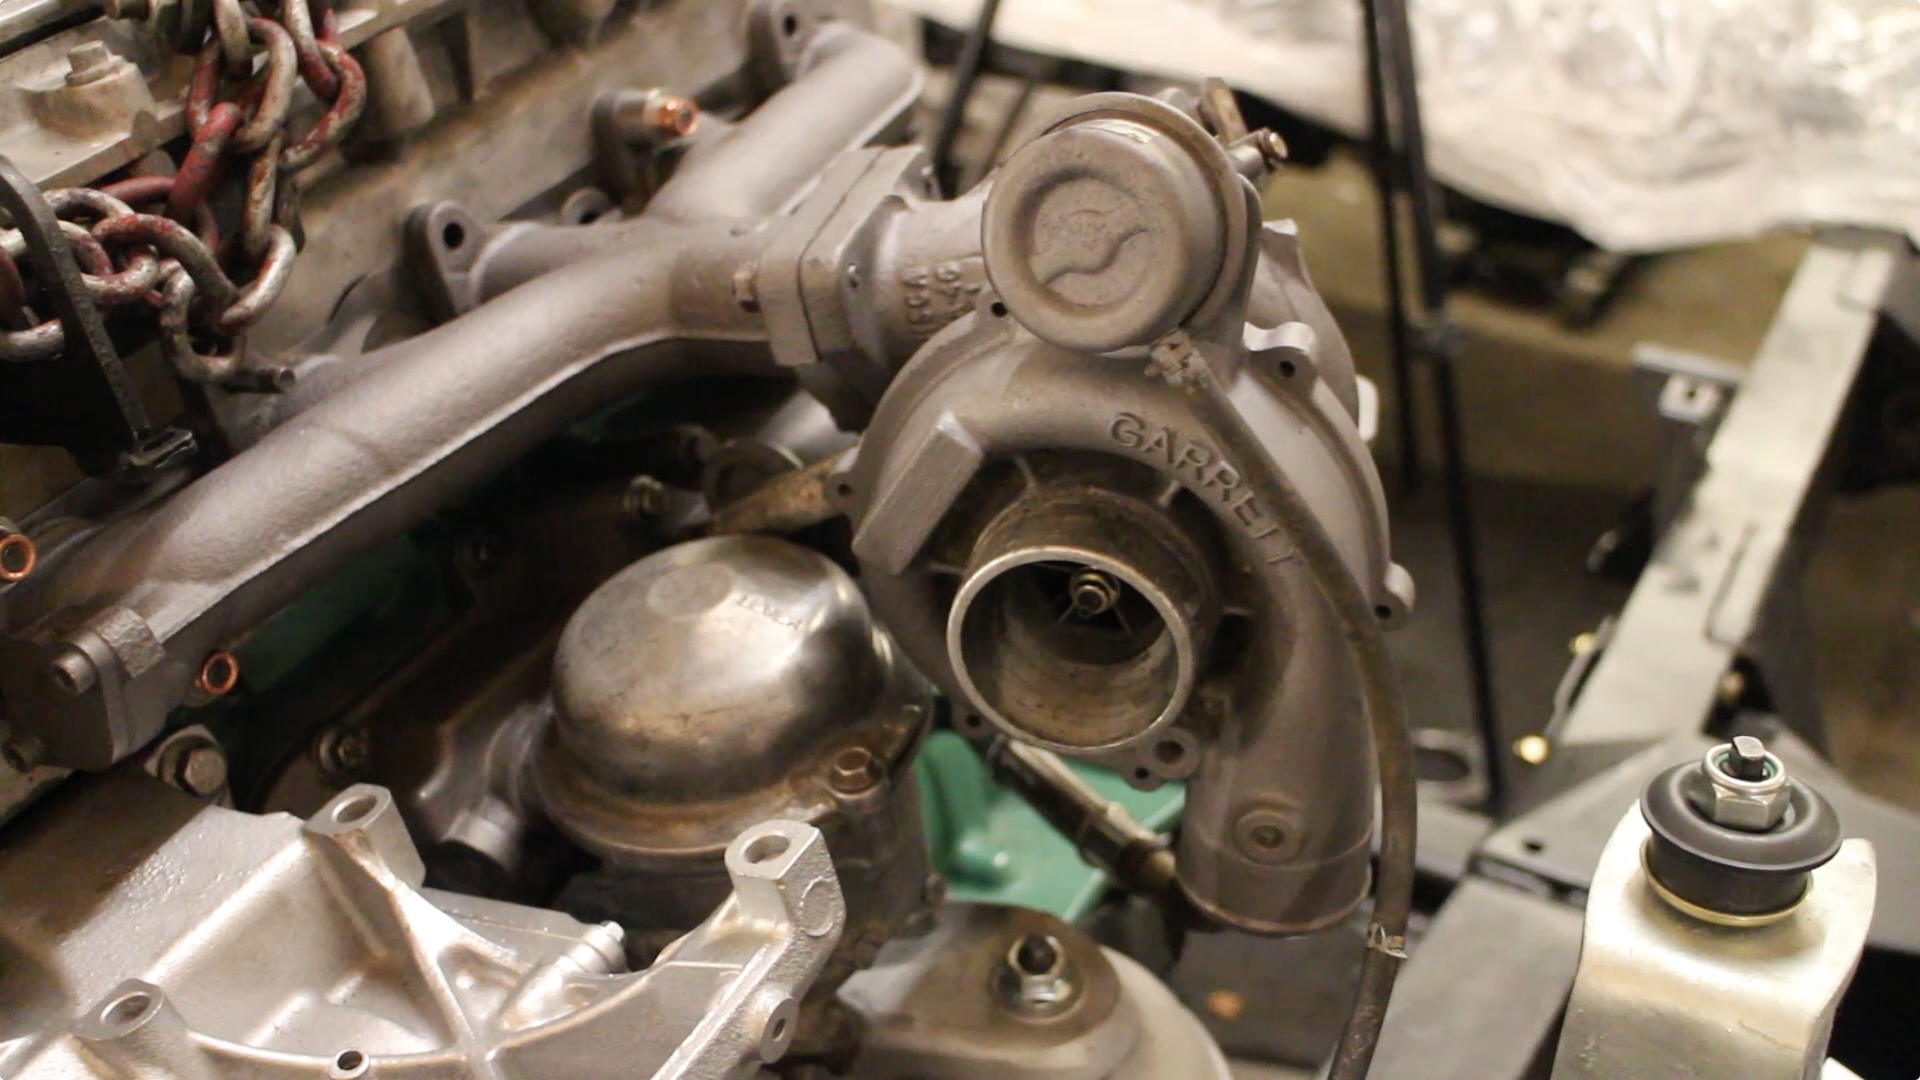
The painted turbo and exhaust manifold, we used grey POR 15 high temperature manifold paint from Frost.co.uk.
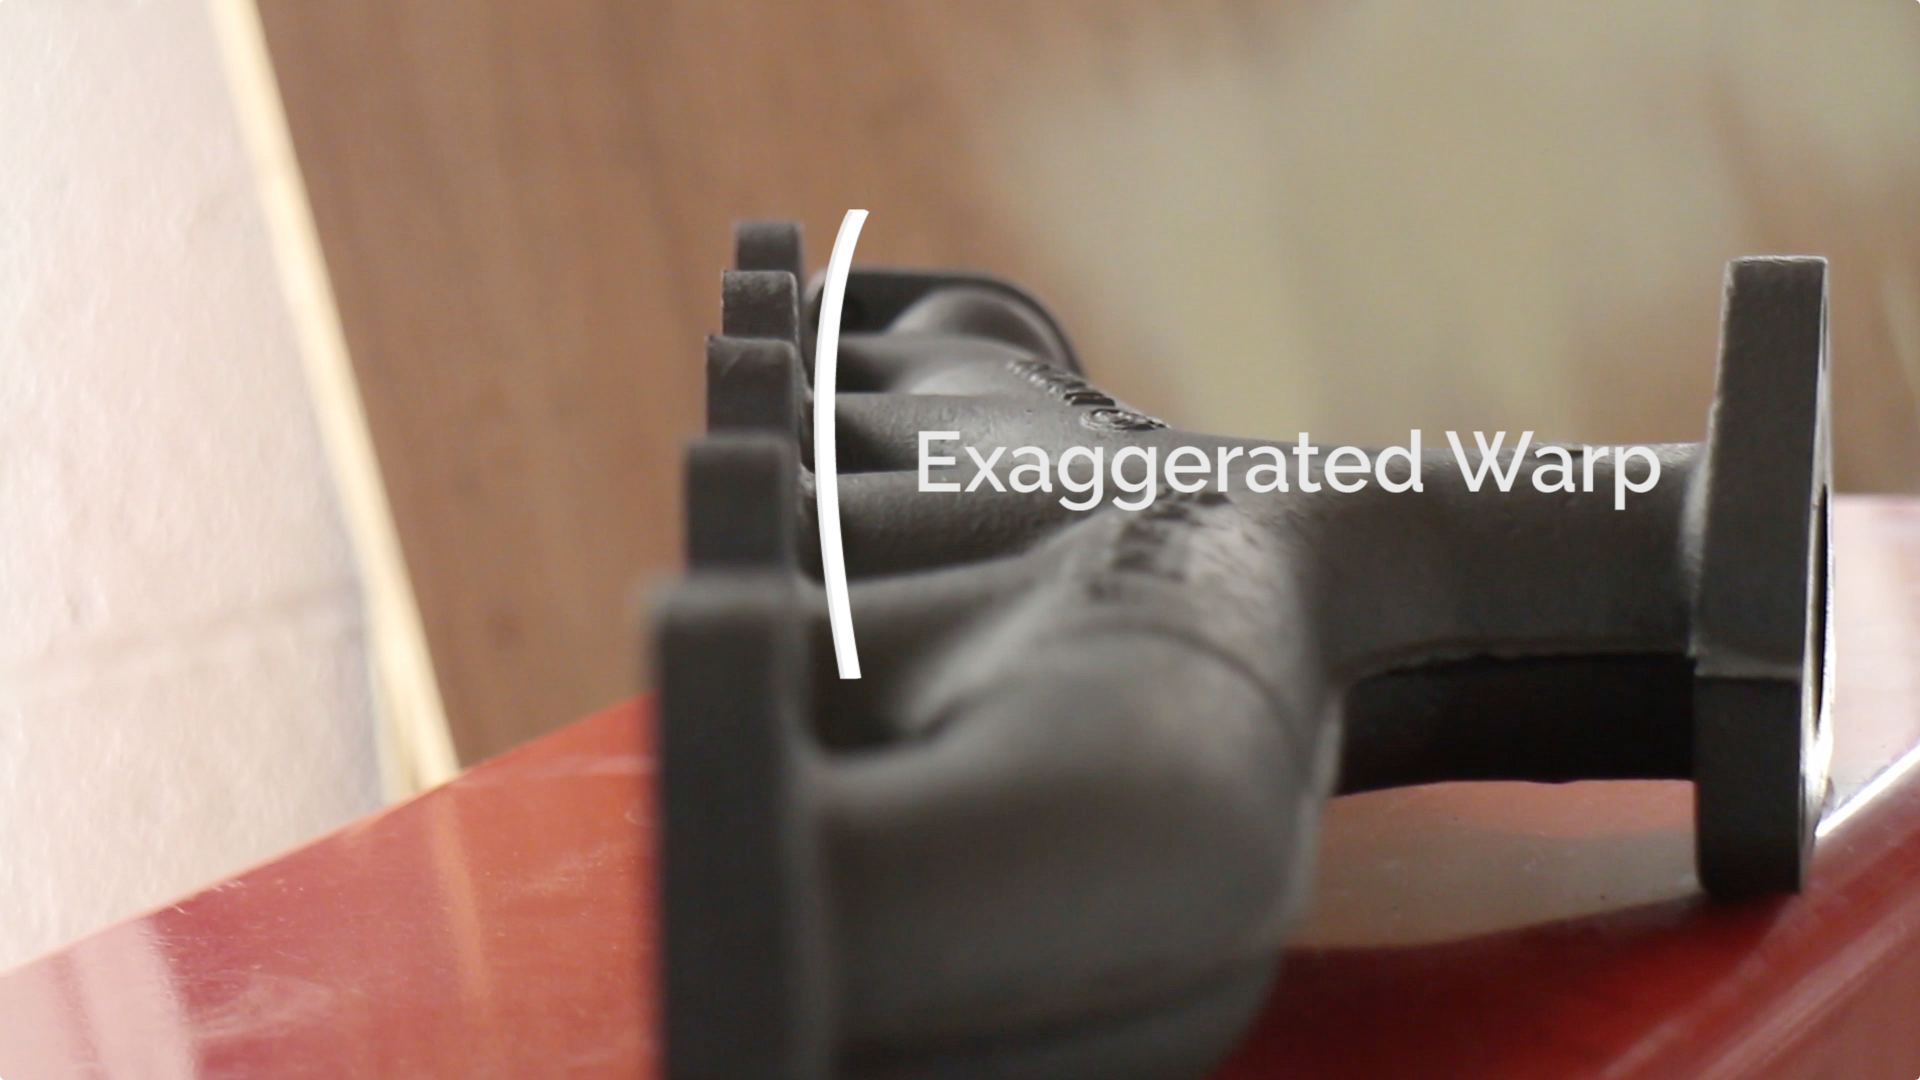
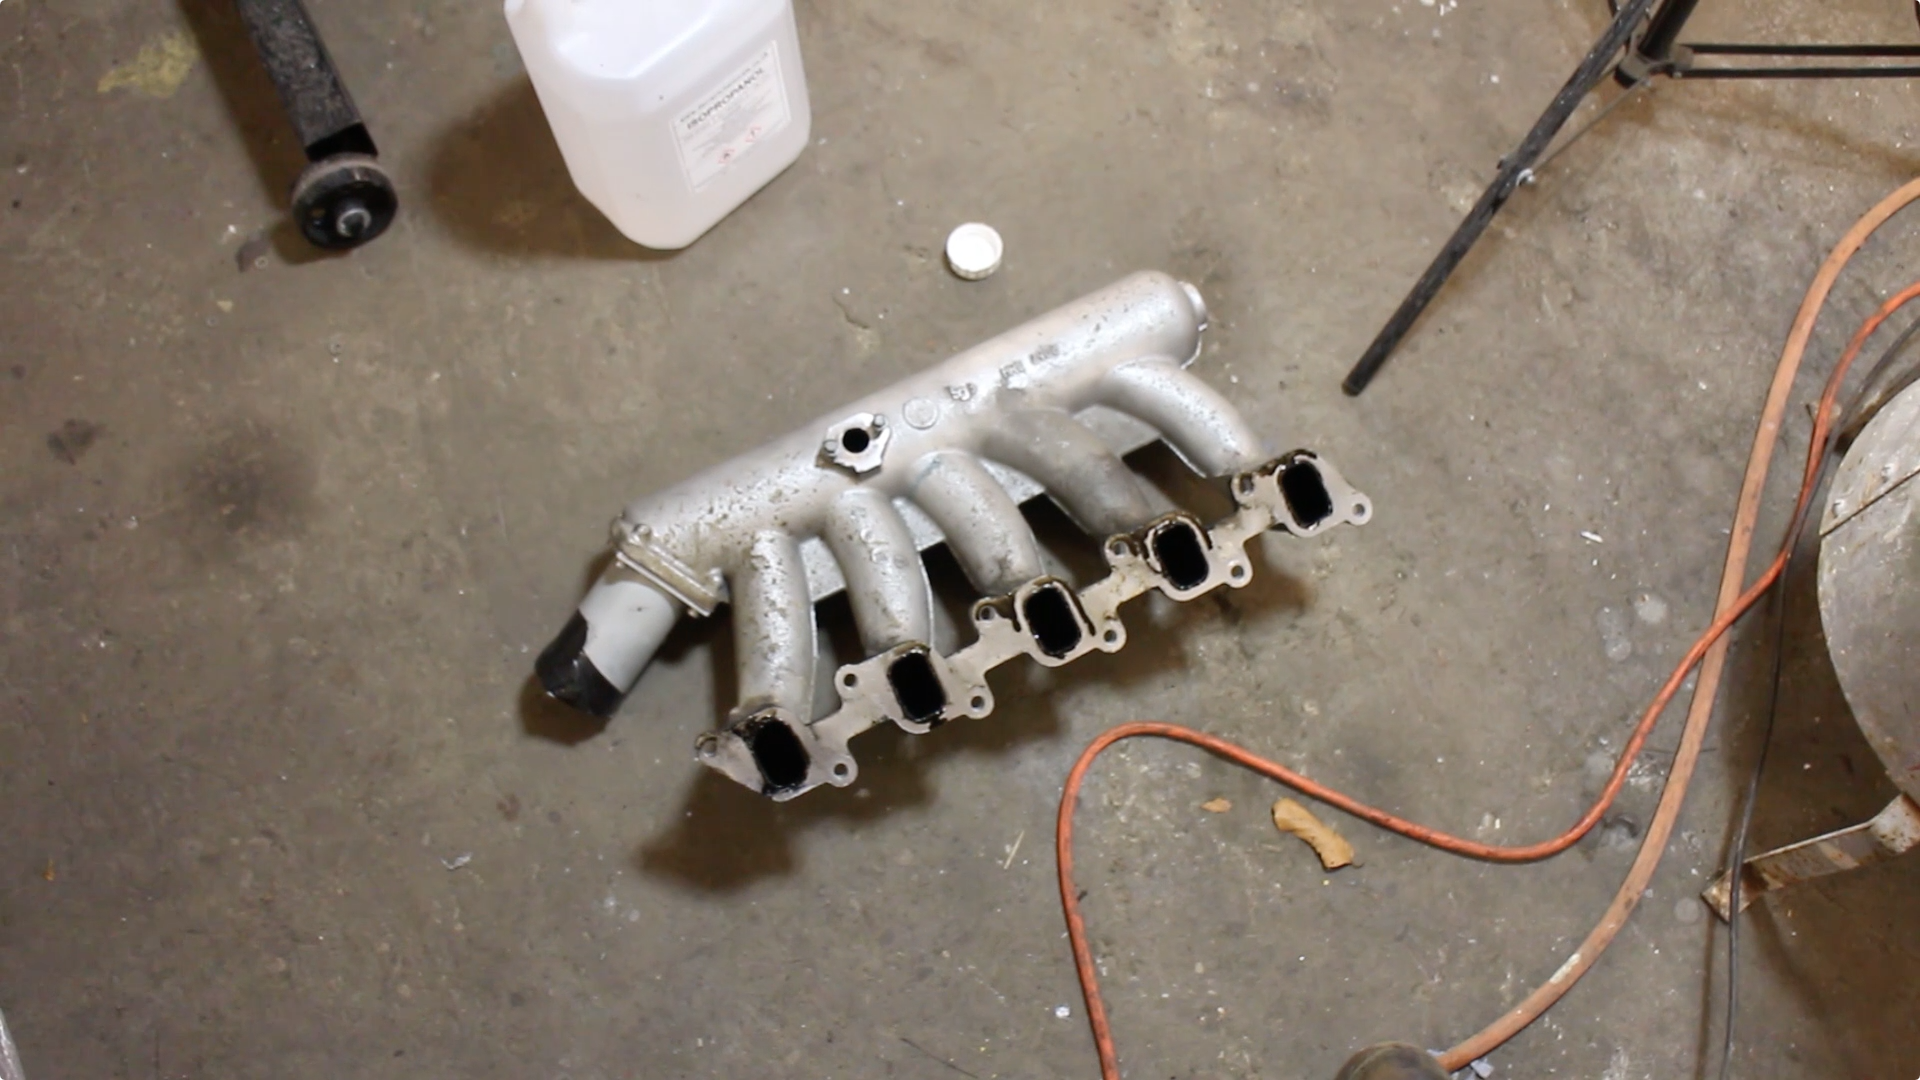
You might remember that our manifold had warped and snapped studs. This is a common issue on Td5's. The easiest fix (and most cost effective) is to remove the manifold and have it skimmed true and dewebbed. The theory is that the casting has warped and shouldn't warp again. Once it's been engineered back to acceptable tolerances, you can fit longer studs from AliveTuning or similar with spacers to help prevent the studs from snapping again. We purchased a set of 16mm stainless steel spacers from eBay, along with an extended stud kit and then painted the whole lot to match the turbo. It shouldn't ever shift again and the cost was preferential to that of a custom stainless or ceramic coated manifold.
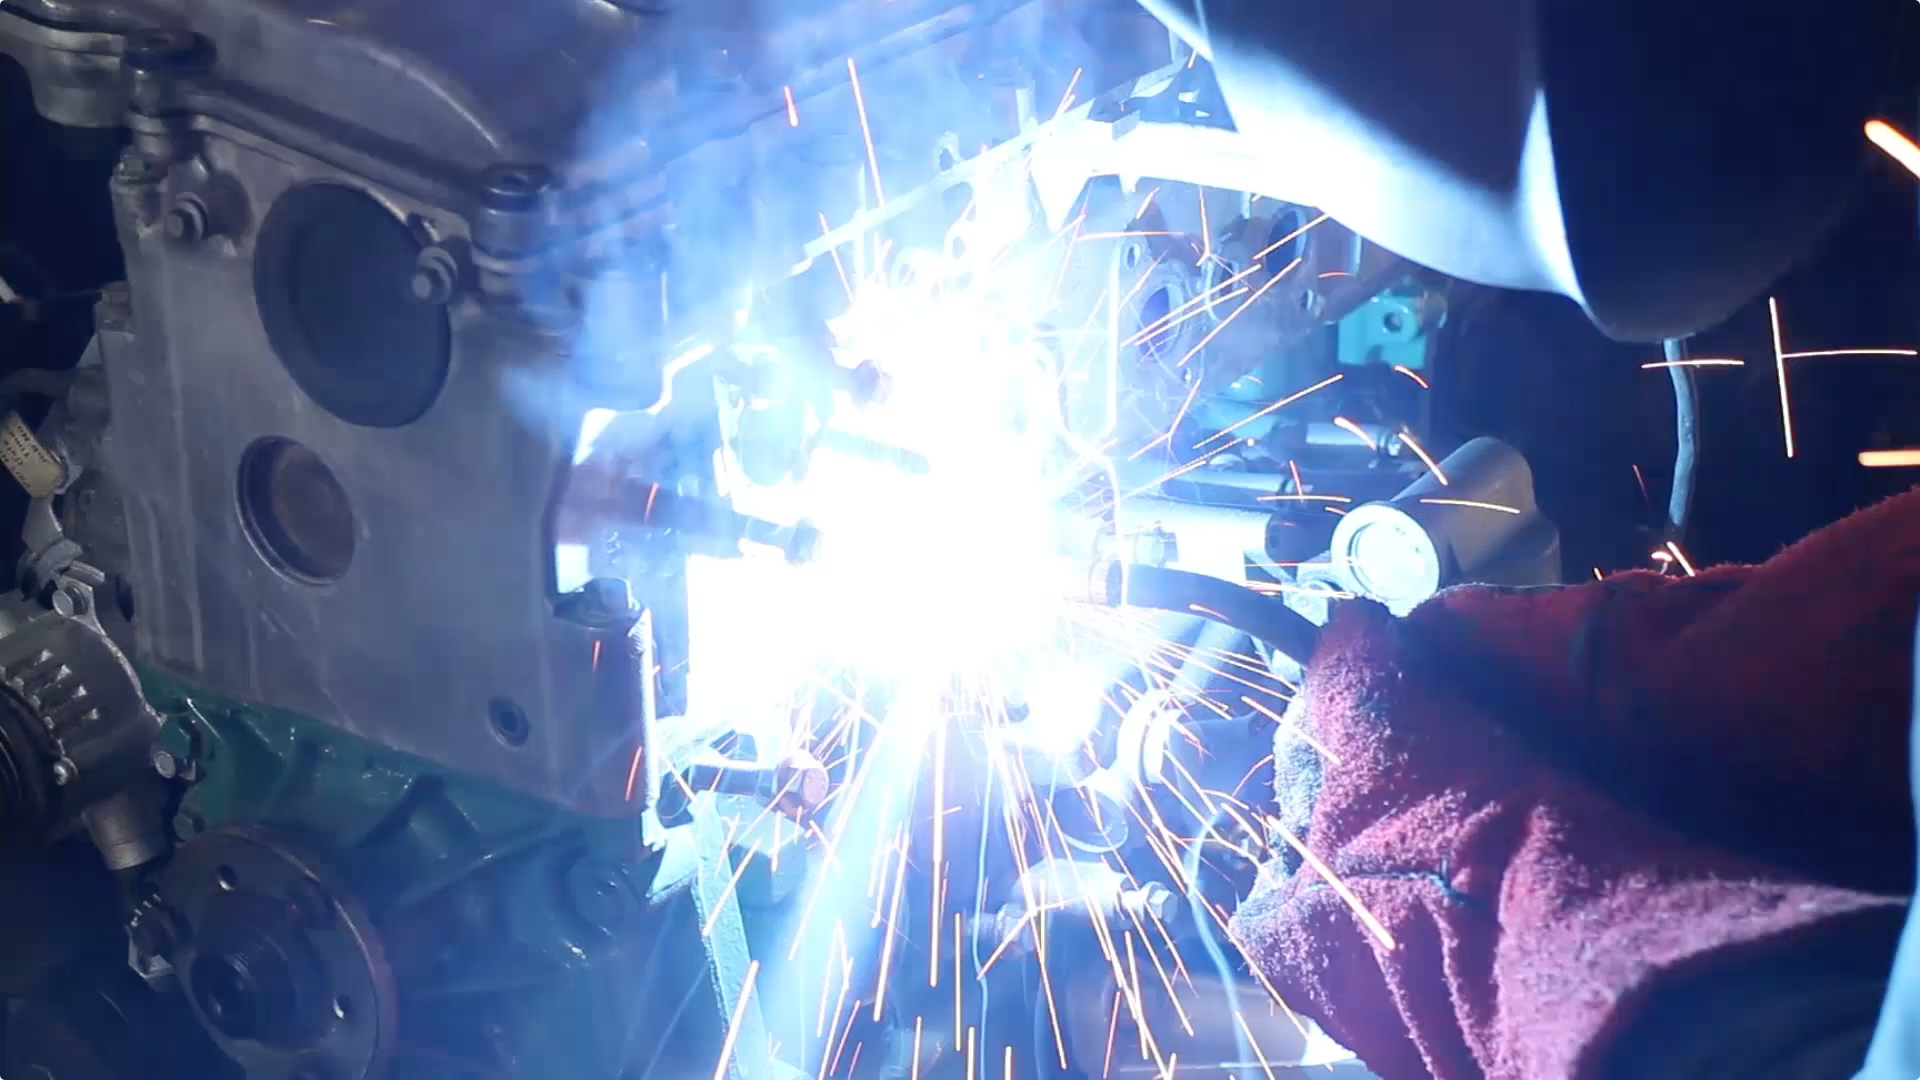
Removing broken studs: you can try stud extractors (didn't work for me), drilling and retapping, drilling and helicoiling or welding a nut onto the end of the stud and removing that way.

This works well as the heat from welding helps free up the threads and the whole stud should simply wind out.
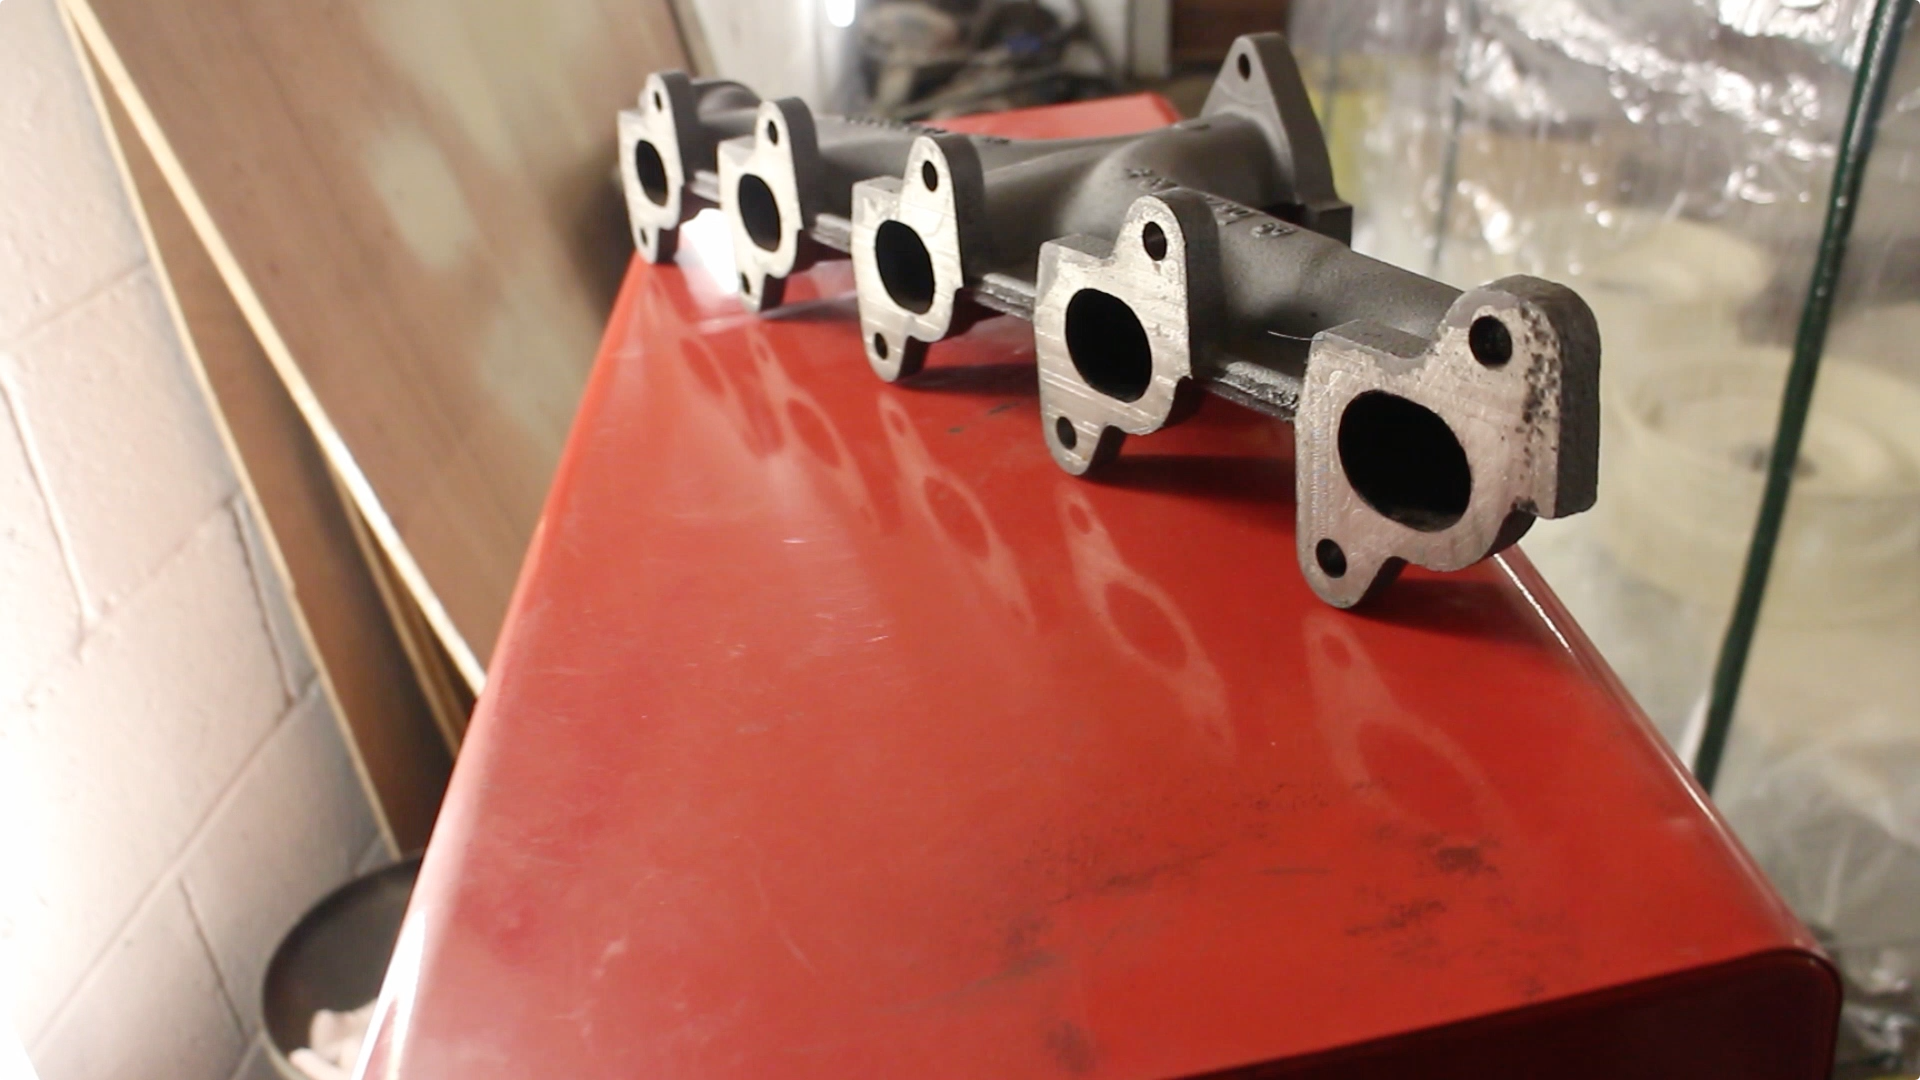
The manifold skimming cost £90 in the end from a local machine shop. This was considerably cheaper than £500+ for a stainless part.
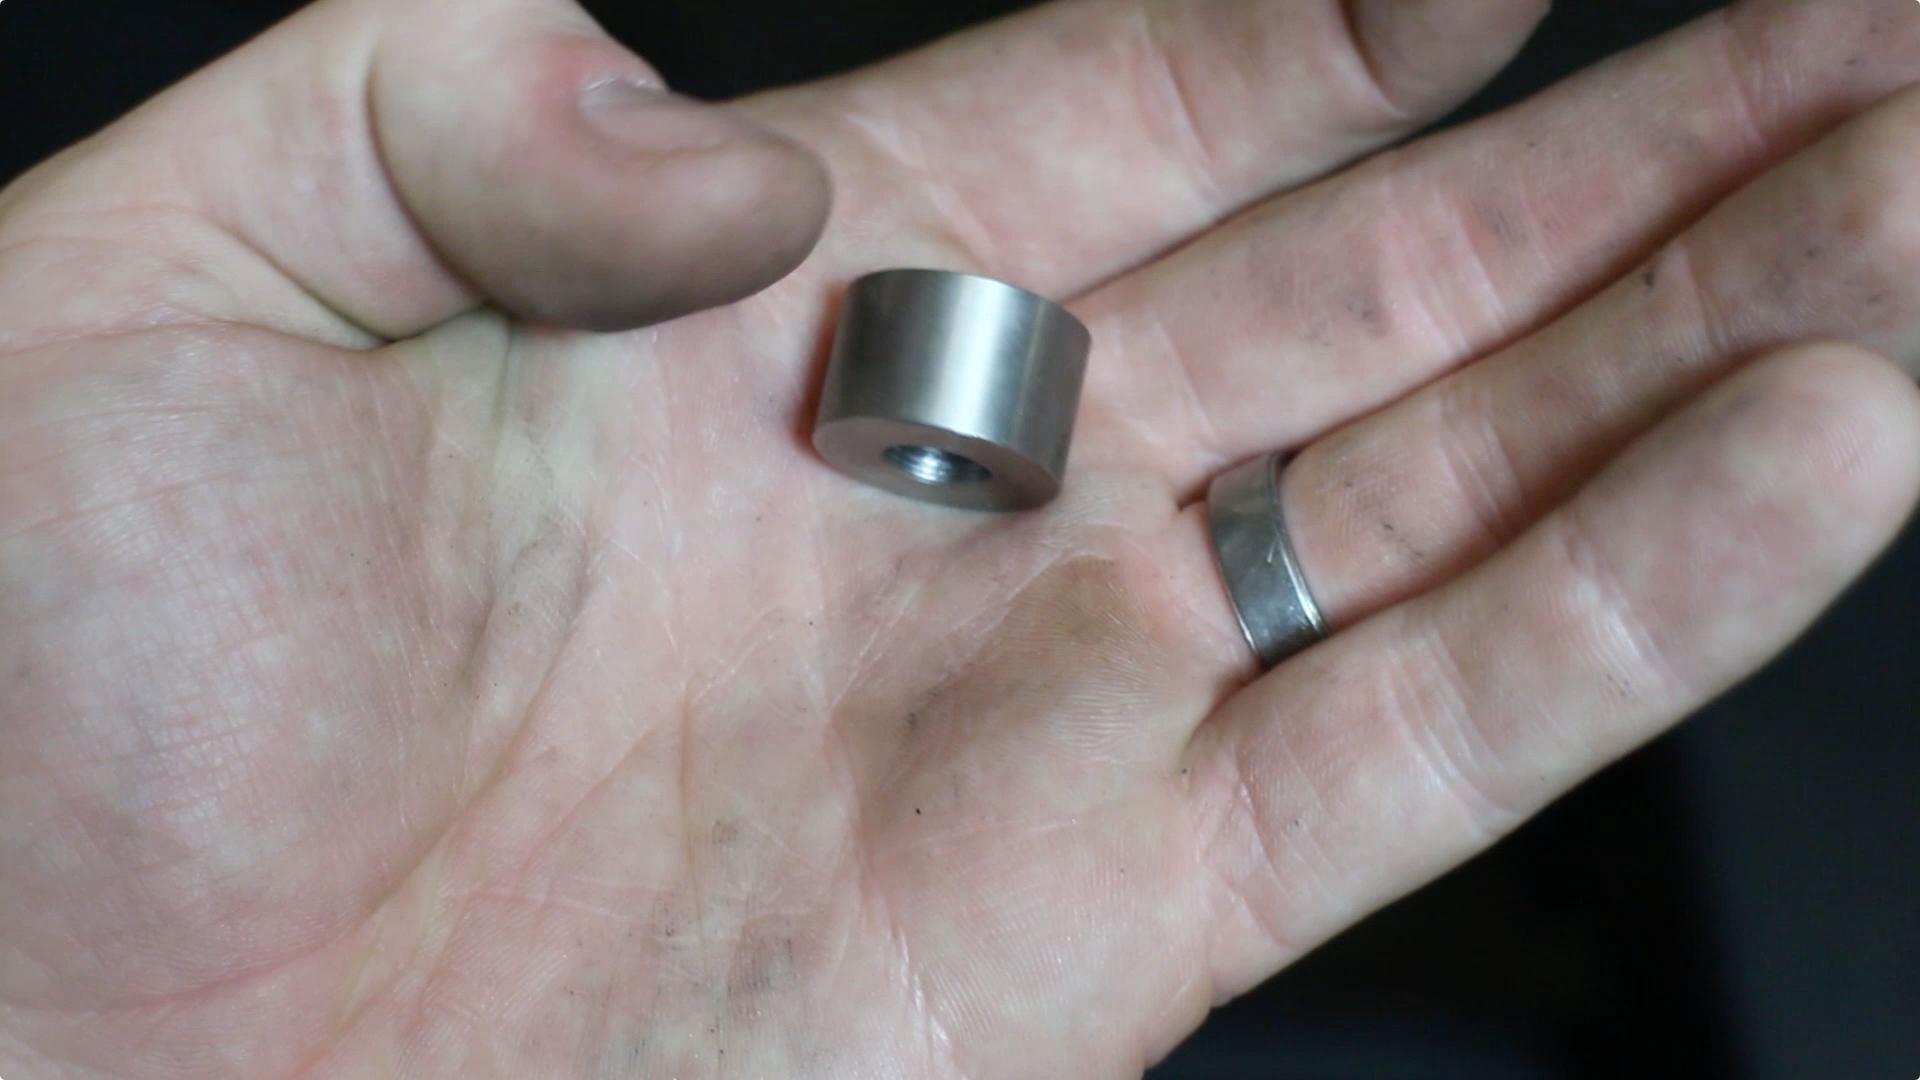
These M8 16mm spacers were purchased from eBay and match our Wurth extended studs nicely.
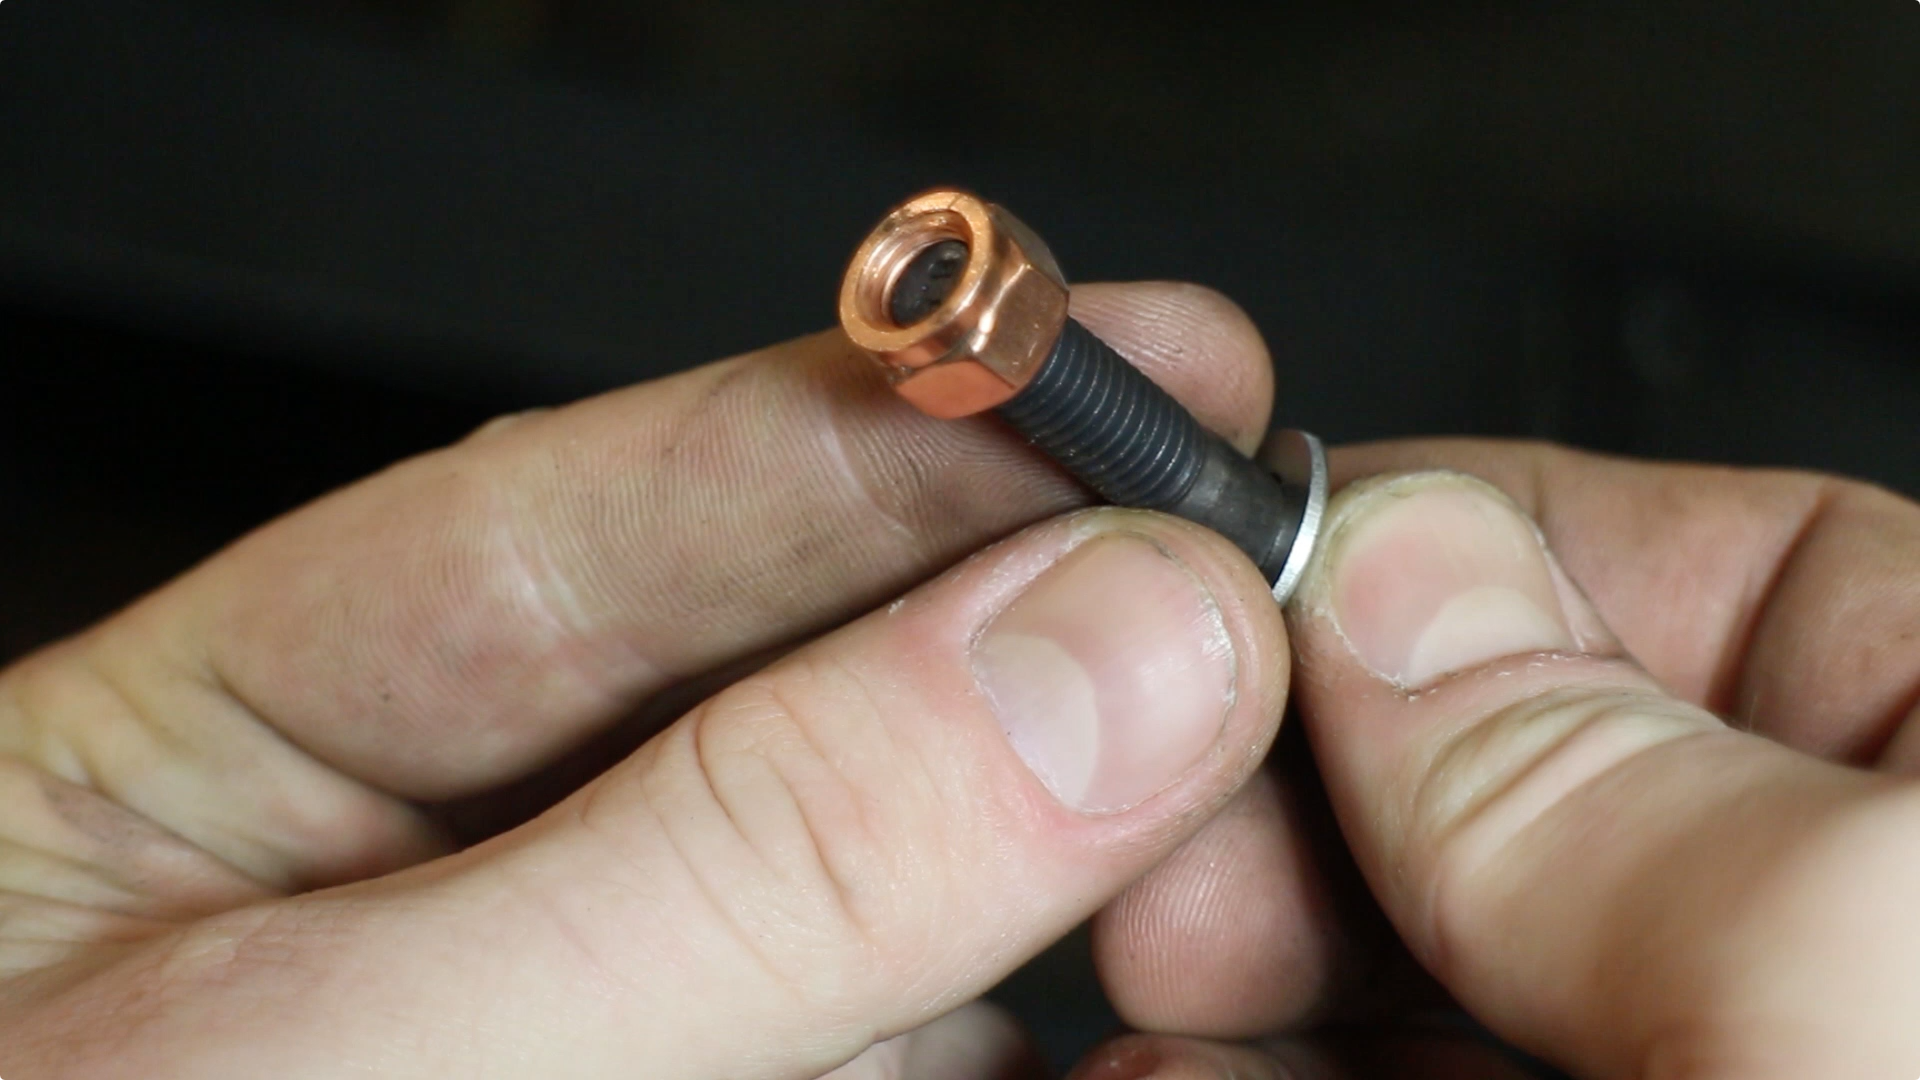
The kit also includes a washer and copper flashed nut, helping avoid corrosion issues.
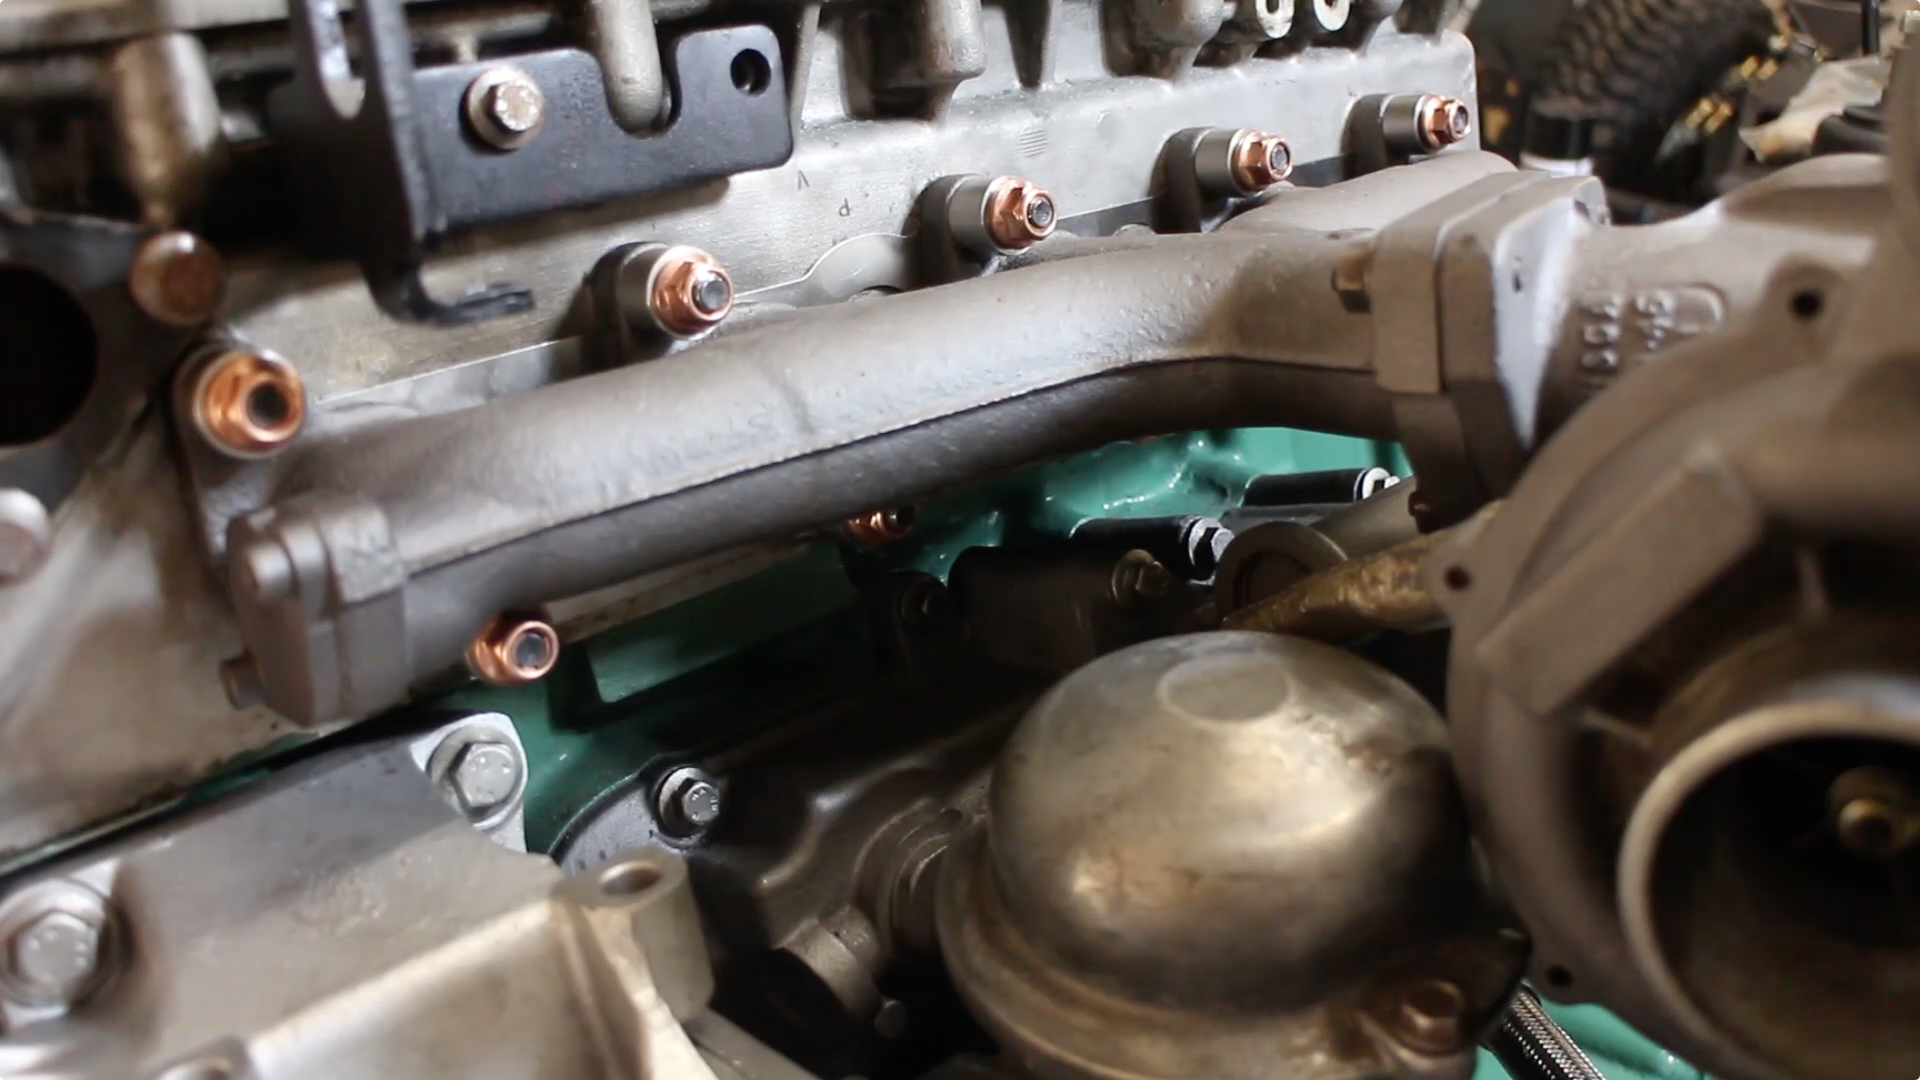
Here's the manifold in place, complete with it's spacers. It certainly looks the part and shouldn't warp again. I also fitted 2 gaskets because when I removed it, there were 2 gaskets - probably a service bulletin fix from a dealer!
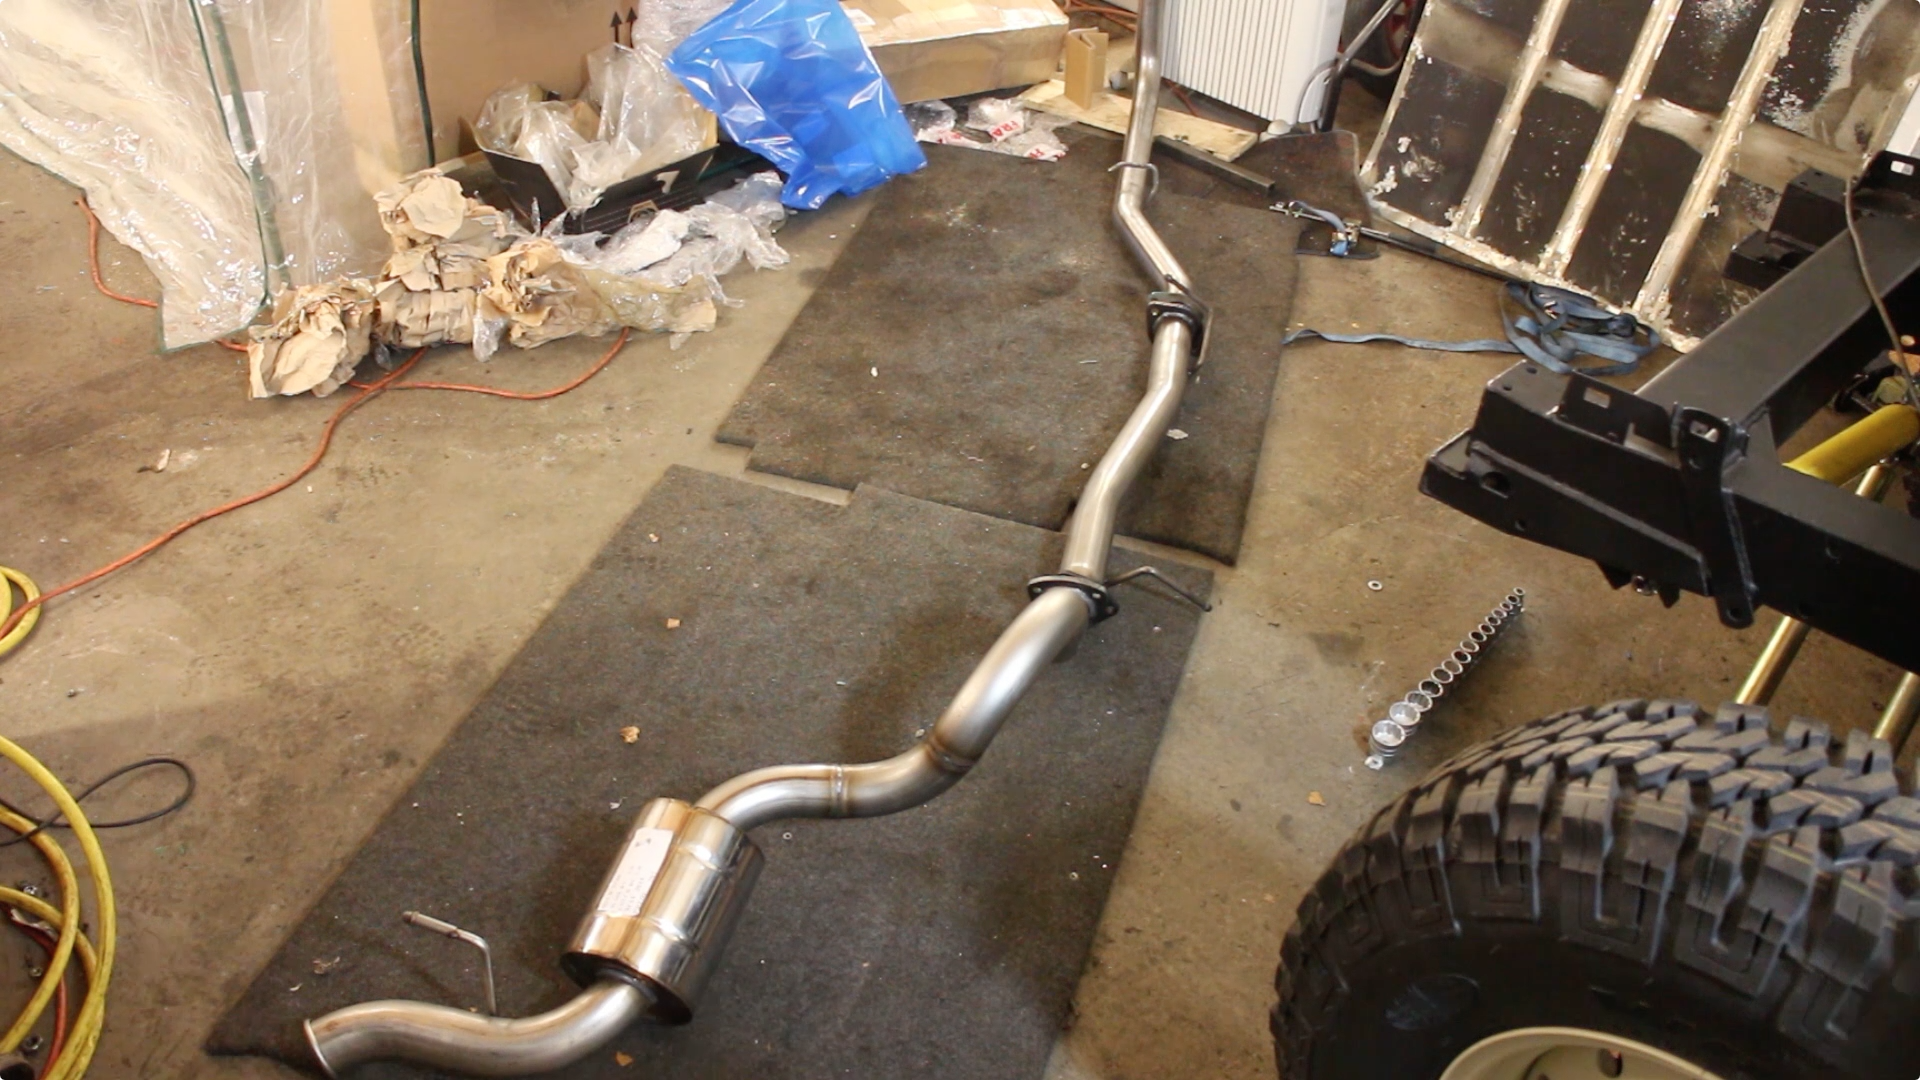
Next time, we can fit up our stainless exhaust system, weld the bulkhead and sort out the brake pipes.
Related items for sale on eBay
| Ebay has returned a malformed xml response. This could be due to testing or a bug in the RSS2 Generator. Please check the support forums to see if there are any posts regarding recent RSS2 Generator bugs. CURL error code = 6. (Could not resolve host: rest.ebay.com) |
2 Comments
Leave a Reply
About Us
FunRover is a place for Land Rover enthusiasts to gather as a community and discuss the best 4x4 vehicles ever produced. We're building a library of high quality resources & articles to help owners along in their Land Rover ownership.
Popular Posts
8 Almost Useless Land Rover Mods
11th June 2014
Updated: What Makes a Defender Iconic?
29th November 2011
How to Plastidip your Land Rover Defender
19th August 2014
When I did the manifold on our Td5, I also thought that two gaskets were fitted, but apparently it is just because a gasket consists of two layers. So they’re just two halves mistakenly perceived as two gaskets.
I find your information very helpful I have the same problem with my discovery td5